Redis is an efficient object caching application. If you have a Wordpress site based on Litespeed (OpenLitespeed) server and you have LSCache installed, you can further speed up your site with an object cache.
However, you can only choose to install one of the object cache programs, Redis and Memcached. For Litespeed/Wordpress systems, there is not much difference in performance between the two as object cache programs. Today we will cover how to install a Redis server.
1. System environment
The operating system for this article is Ubuntu 20.04 LTS 64 bit, and the server operating environment is OpenLitespeed server with LSPHP 7.4.
The installation steps for other versions are similar.
2. Installing the Redis server
We can install the Redis server directly from the package manager. Execute the following command.
If you are using the CentOS series, the command to install the Redis server is as follows.
3. compile and install php-redis extension
Redis is much easier to install than Memcached, mainly because its PHP extensions are easier to install.
First, install the necessary compilation environment.
|
|
Then get the php-redis source code from pecl:
Before you start compiling, you first need to pre-process the source code with phpize. Normally, OpenLitespeed does not pre-install phpize and we need to install the lsphp74-dev package additionally.
Now you can start compiling.
When you make install, you will be prompted for the installation path of the php-redis extension, as shown below.
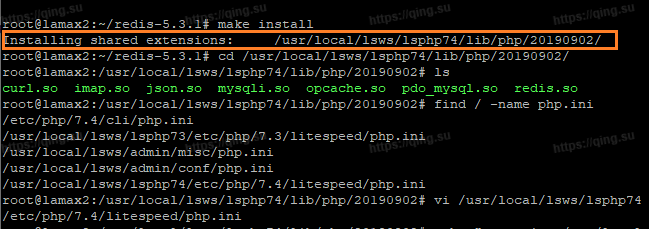
For example, here I have /usr/local/lsws/lsphp74/lib/php/20190902/redis.so
So, edit the php.ini file and write the redis expansion location to
|
|
Finally, restart OpenLitespeed:
|
|
4. check php-redis installation
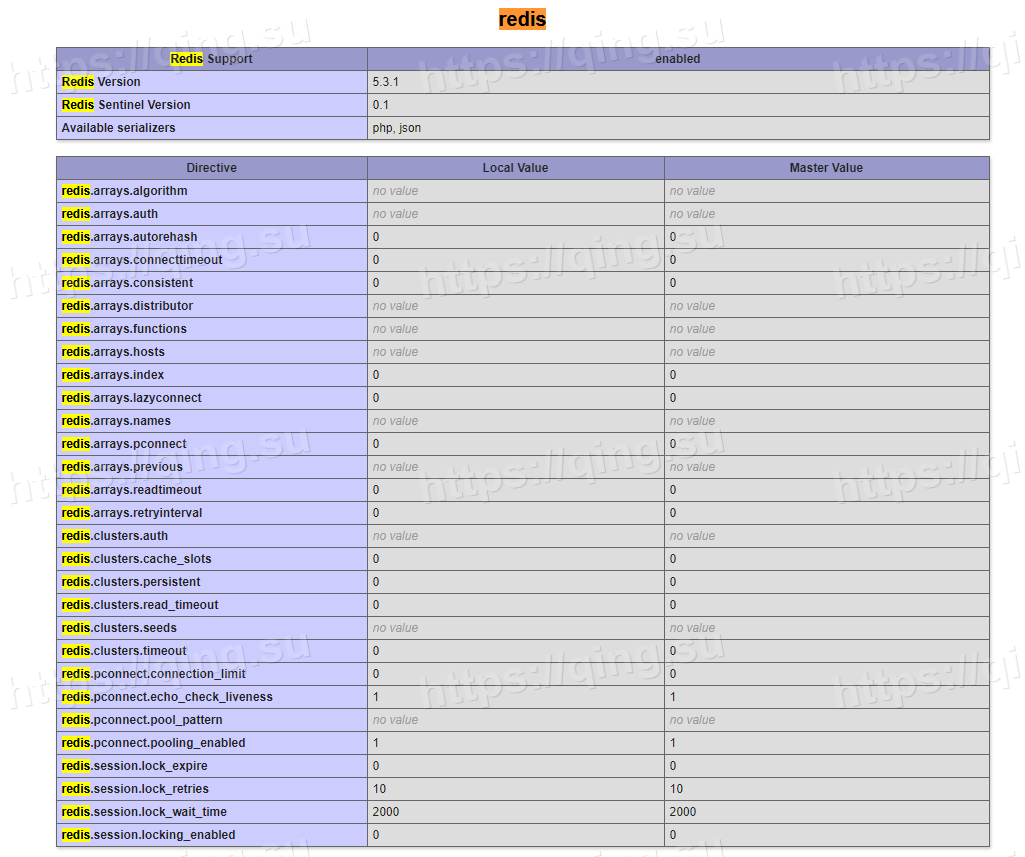
After installing the Redis server with the php-redis extension, we should be able to see the corresponding Redis block in phpinfo(), as follows.
In SSH, we can also test if the Redis server is running properly. Execute.
|
|
If Redis is running properly, you can see the following response.
|
|
5. Enable Redis object caching for WordPress
After installation, we can use the object cache by enabling the redis function in LSCache.
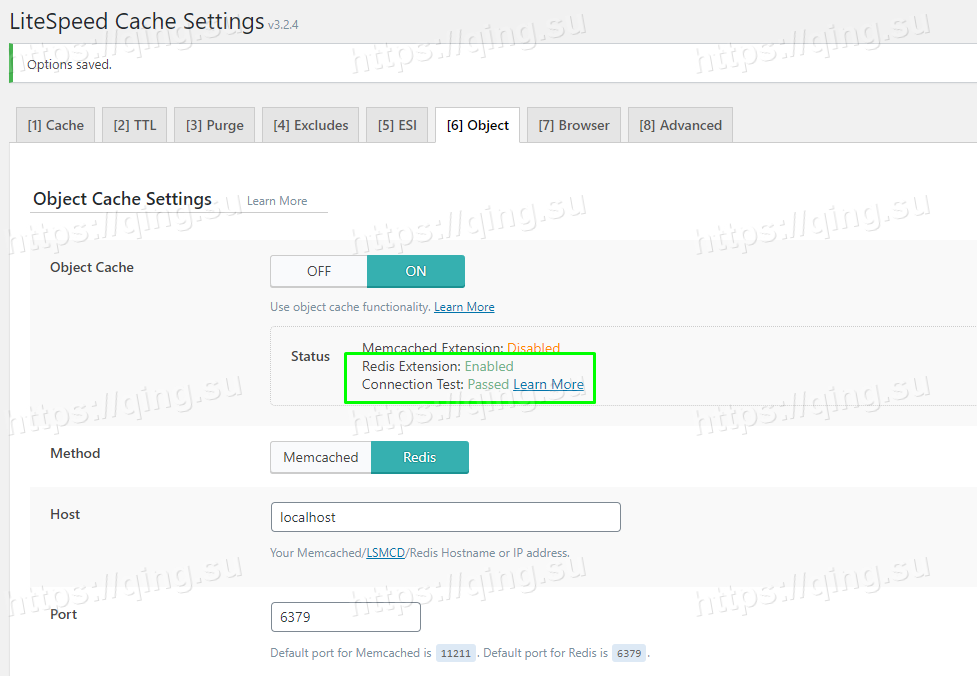
As shown above. If Redis is installed correctly, the Redis Extension and Connection Test values should both be green.
To sum up, we installed Redis server and lsphp-redis extension on Ubuntu 20.04 LTS operating system, and used Redis object cache and LSCache to speed up WordPress.
Reference https://qing.su/article/install-redis-for-litespeed.html