Because Java code is very easy to decompile, Java code obfuscation is needed to protect Java source code well. This article describes how to use ProGuard’s plugin proguard-maven-plugin to obfuscate Java programs.
How ProGuard works
ProGuard can rename classes, fields and methods by removing useless code and using short, meaningless names. This allows you to compress, optimize and obfuscate your code. The result is a smaller compiled file that is much harder to reverse engineer with ProGuard.
- Shrink: This step in the compression process is used to detect and remove unused classes, fields, methods, and properties.
- Optimize: In the Optimize step, the bytecode is optimized and useless instructions are removed.
- Obfuscate: In the Obfuscate step, rename classes, fields and methods with meaningless names such as a, b, c, etc.
- Preveirfy: In the Preveirfy step, the processed code is mainly prefixed on the Java platform.
For ProGuard execution flowchart is shown in the figure below.
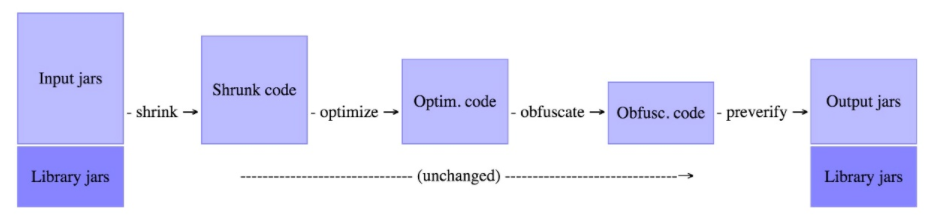
Therefore, using ProGuard not only enables code obfuscation, but also provides additional benefits in terms of code compression, optimization, etc.
How to use ProGuard
ProGuard offers several ways to use it.
- Using the ProGuard command line
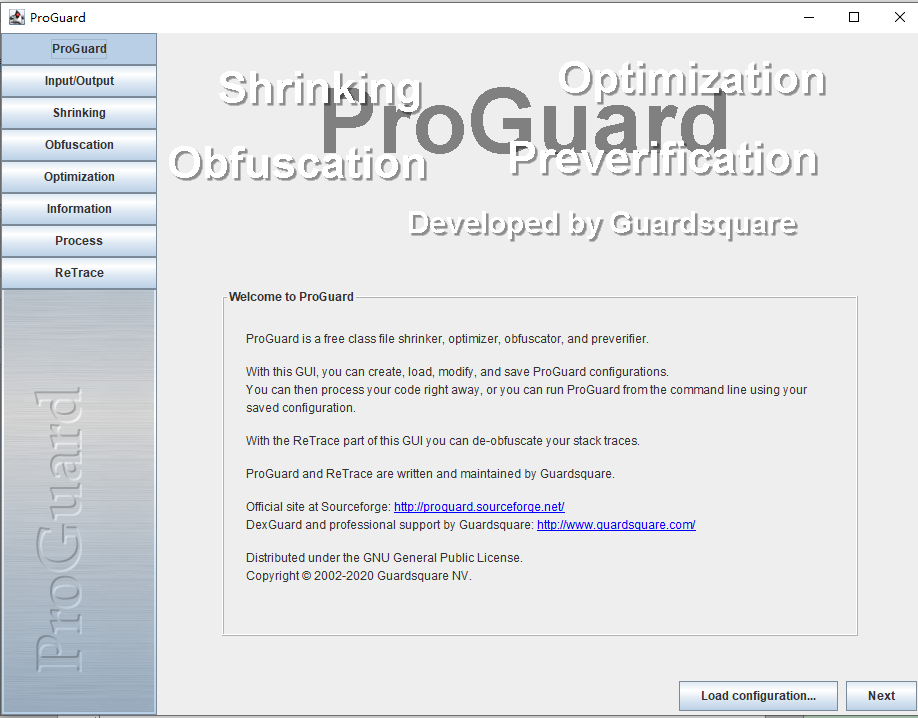
- Using the ProGuard GUI program
- Using the ProGuard Plugin
Download the installation package, take proguard-7.1.1.zip for example, and unzip it to any directory. Double click the bin/proguardgui.bat file to start the ProGuard tool interface. Look at the style is pure Java client program.
If the command line approach is used, the proguard.bat file is used.
All of the above ways are relatively simple and will not be described in detail here. After all, it is the way the ProGuard plugin is used that is the main focus of this section.
Using the ProGuard Plugin
Technically speaking, the ProGuard plugin is not an official product. He is provided by a third party, but is also recognized by ProGuard. The ProGuard plugin is available at: https://github.com/wvengen/proguard-maven-plugin
Creating a Spring Boot application
With Spring Initializr, we start by creating a simple Spring Boot application.
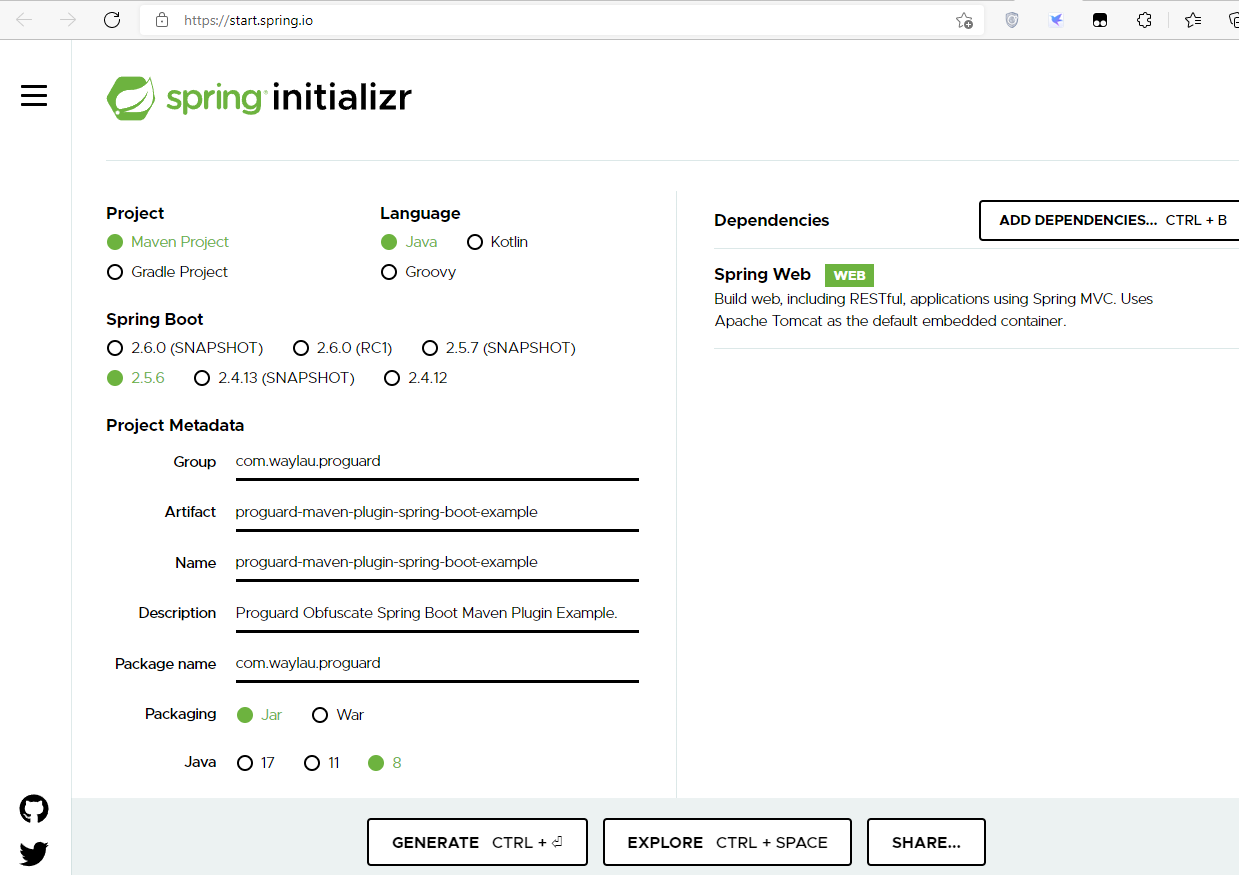
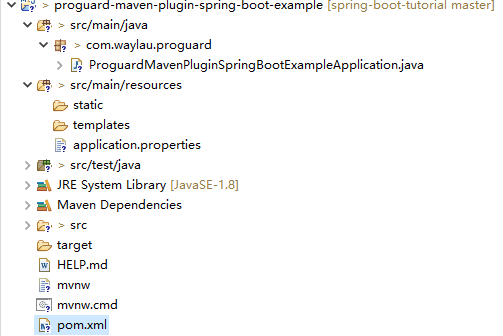
The code structure is as follows.
Create a new HelloController code
Create the package “com.waylau.proguard.controller” and create the HelloController class under this package with the following code.
 1
 2
 3
 4
 5
 6
 7
 8
 9
10
11
12
13
14
15
16
17
18
19
20
21
22
23
24
25
26
27
|
/**
 * Welcome to https://waylau.com
 */
package com.waylau.proguard.controller;

import org.springframework.web.bind.annotation.GetMapping;
import org.springframework.web.bind.annotation.RestController;

/**
 * Hello Controller.
 *
 * @since 1.0.0 2021年11月11日
 * @author <a href="https://waylau.com">Way Lau</a>
 */
@RestController
public class HelloController {

	@GetMapping("/hello")
	public String hello() {
		return getMsg();
	}

	private String getMsg() {
		return "Hello World!";
	}

}
|
The HelloController class is the implementation of a simple REST interface.
Modify the pom.xml configuration
The original pom.xml configuration is as follows.
 1
 2
 3
 4
 5
 6
 7
 8
 9
10
11
12
13
14
15
16
17
18
19
20
21
22
23
24
25
26
27
28
29
30
31
32
33
34
35
36
37
38
39
40
41
|
<?xml version="1.0" encoding="UTF-8"?>
<project xmlns="http://maven.apache.org/POM/4.0.0" xmlns:xsi="http://www.w3.org/2001/XMLSchema-instance"
	xsi:schemaLocation="http://maven.apache.org/POM/4.0.0 https://maven.apache.org/xsd/maven-4.0.0.xsd">
	<modelVersion>4.0.0</modelVersion>
	<parent>
		<groupId>org.springframework.boot</groupId>
		<artifactId>spring-boot-starter-parent</artifactId>
		<version>2.5.6</version>
		<relativePath/>
	</parent>
	<groupId>com.waylau.proguard</groupId>
	<artifactId>proguard-maven-plugin-spring-boot-example</artifactId>
	<version>0.0.1-SNAPSHOT</version>
	<name>proguard-maven-plugin-spring-boot-example</name>
	<description>Proguard Obfuscate Spring Boot Maven Plugin Example.</description>
	<properties>
		<java.version>1.8</java.version>
	</properties>
	<dependencies>
		<dependency>
			<groupId>org.springframework.boot</groupId>
			<artifactId>spring-boot-starter-web</artifactId>
		</dependency>

		<dependency>
			<groupId>org.springframework.boot</groupId>
			<artifactId>spring-boot-starter-test</artifactId>
			<scope>test</scope>
		</dependency>
	</dependencies>

	<build>
		<plugins>
			<plugin>
				<groupId>org.springframework.boot</groupId>
				<artifactId>spring-boot-maven-plugin</artifactId>
			</plugin>
		</plugins>
	</build>

</project>
|
In the above configuration, add the configuration of the proguard-maven-plugin plugin with the following configuration.
 1
 2
 3
 4
 5
 6
 7
 8
 9
10
11
12
13
14
15
16
17
18
19
20
21
22
23
24
25
26
27
28
29
30
31
32
33
34
35
36
37
38
39
40
41
42
43
44
45
46
47
48
49
50
51
52
53
54
55
56
57
58
59
60
61
62
63
64
65
66
67
68
69
70
71
72
73
74
75
76
77
78
79
80
81
82
83
84
85
86
87
88
89
90
91
|
<plugin>
    <groupId>com.github.wvengen</groupId>
    <artifactId>proguard-maven-plugin</artifactId>
    <version>${proguard.maven.plugin.version}</version>
    <executions>
        <execution>
            <phase>package</phase>
            <goals>
                <goal>proguard</goal>
            </goals>
        </execution>
    </executions>

    <configuration>
        <proguardVersion>${proguard.version}</proguardVersion>
        <injar>${project.build.finalName}.jar</injar>
        <outjar>${project.build.finalName}.jar</outjar>
        <obfuscate>true</obfuscate>
        <options>
            <option>-dontshrink</option>
            <option>-dontoptimize</option>

            <!-- 此选项将用新的类名替换反射方法调用中的所有字符串。例如,调用Class.forName('className') -->
            <option>-adaptclassstrings</option>

            <!-- 此选项将保存所有原始注解等。否则,将从文件中删除所有注解。 -->
            <option>-keepattributes
                Exceptions,
                InnerClasses,
                Signature,
                Deprecated,
                SourceFile,
                LineNumberTable,
                *Annotation*,
                EnclosingMethod
            </option>

            <!-- 此选项将保存接口中的所有原始名称(不混淆) -->
            <option>-keepnames interface **</option>

            <!-- 此选项将将所有原始方法参数 -->
            <option>-keepparameternames</option>

            <!-- 此选项将保存所有原始类文件(不混淆),一般是混淆领域或者服务包中的文件。 -->
            <option>-keep
                class com.waylau.proguard.ProguardMavenPluginSpringBootExampleApplication {
                    public static
                    void main(java.lang.String[]);
                }
            </option>

            <!-- 此选项忽略警告,例如重复的类定义和命名不正确的文件中的类 -->
            <option>-ignorewarnings</option>

            <!-- 此选项将保存服务包中的所有原始类文件(不进行混淆) -->
            <!-- <option>-keep class com.waylau.proguard.service { *; }</option> -->

            <!-- 此选项将保存所有软件包中的所有原始接口文件(不进行混淆) -->
            <option>-keep interface * extends * { *; }</option>

            <!-- 此选项将保存所有包中所有类中的所有原始定义的注解 -->
            <option>-keep class com.fasterxml.jackson.** { *; }</option>
            <option>-keep class org.json.JSONObject.** {**
                put(java.lang.String,java.util.Map);}</option>
            <option>-keepclassmembers class * {
                @org.springframework.context.annotation.Bean *;
                @org.springframework.beans.factory.annotation.Autowired *;
                @org.springframework.beans.factory.annotation.Value *;
                }

            </option>

            <option>-dontwarn com.fasterxml.jackson.databind.**</option>
            <option>-dontwarn com.fasterxml.jackson.**</option>

        </options>
        <injarNotExistsSkip>true</injarNotExistsSkip>
        <libs>
            <!--在此添加需要的类库 -->
            <!--<lib>${java.home}/lib/rt.jar</lib> -->
        </libs>

    </configuration>
    <dependencies>
        <dependency>
            <groupId>com.guardsquare</groupId>
            <artifactId>proguard-base</artifactId>
            <version>${proguard.version}</version>
        </dependency>
    </dependencies>
</plugin>
|
The above configuration requires several points to be noted.
- Add proguard-maven-plugin plugin and ProGuard configuration
- proguard will be run automatically during the package phase
- spring-boot-maven-plugin must be run after proguard is obfuscated so that it will fetch files that have already been obfuscated. This means that the obfuscated proguard-maven-plugin-spring-boot-example-0.0.1-SNAPSHOT.jar will overwrite the pre-obfuscated proguard-maven-plugin-spring-boot-example-0.0.1- SNAPSHOT.jar.
Verify that the ProGuard plugin is working properly
The verification is divided into two pieces, namely
- Whether the obfuscation has been completed.
- Whether the program works properly after obfuscation.
Verify that the program is working properly
This is relatively simple, just run the program down. Start the application and execute.
1
|
java -jar target/proguard-maven-plugin-spring-boot-example-0.0.1-SNAPSHOT.jar
|
Once started, the REST interface can be accessed through a browser.
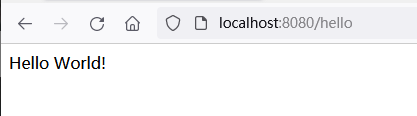
Verify that the obfuscation has been completed
Here you can use a decompiler tool to see if the obfuscation is complete.
Download and install the decompiler tool JD-GUI. jd-gui-windows-1.6.6.zip for example, and extract it to any directory. Double click the jd-gui.exe file to start the JD-GUI tool.
Open our proguard-maven-plugin-spring-boot-example-0.0.1-SNAPSHOT.jar, click on the left class file, you can see the decompiled source code on the right.
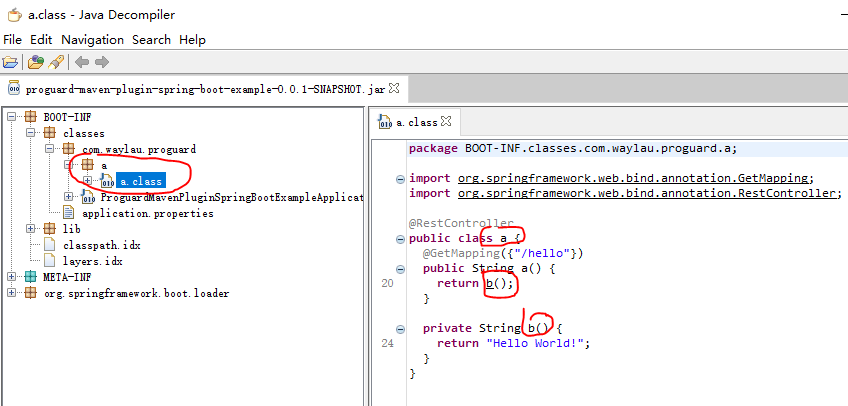
From the result of decompiling, package name, class name and method name have been successfully obfuscated.