Introduction to Maven
Before we get into Maven, let’s take a look at what you need for a Java project. First, we need to determine which dependency packages to introduce. For example, if we need to use commons logging, we must put the commons logging jar packages into the classpath. if we also need log4j, we need to put all the log4j related jar packages into the classpath. These are the dependency packages management. Next, we need to determine the directory structure of the project. For example, the src directory holds the Java source code , resources directory holds the configuration files , bin directory holds the compiled .class files . In addition, we also need to configure the environment, such as the version of the JDK, the compilation and packaging process, the current code version number. Finally, in addition to using an IDE like Eclipse for compilation, we must also be able to compile via command line tools to be able to compile, test, and deploy the project on a standalone server. These tasks are not too difficult, but very trivial and time-consuming. If every project had its own set of configurations, it would be a mess. What we need is a standardized Java project management and build tool.

Maven is the management and build tool built specifically for Java projects, and its main features are.
- provides a standardized set of project structure.
- provides a standardized set of build process (compile, test, package, release ……).
- Provides a set of dependency management mechanisms.
An ordinary Java project managed with Maven has the following directory structure by default.
The root directory of the project a-maven-project is the project name, it has a project description file pom.xml, the directory where Java source code is stored is src/main/java, the directory where resource files are stored is src/main/resources, the directory where test source code is stored is src/test/java, the directory is src/test/resources, and finally, all the compiled and packaged files are placed in the target directory. This is the standard directory structure of a Maven project.
All the directory structures are agreed upon as standard and should not be modified at will. There is no need to do any configuration to use the standard structure, and Maven will work fine.
Let’s look at the most critical project description file, pom.xml, which looks like the following.
|
|
The groupId is similar to the Java package name, usually the company or organization name, the artifactId is similar to the Java class name, usually the project name, plus version, a Maven project is uniquely identified by the groupId, artifactId and version. When we reference other third-party libraries, it is also determined by these three variables. For example, the dependency commons-logging.
After declaring a dependency with <dependency>, Maven will automatically download the dependency package and put it in the classpath.
Maven installation and configuration
The first step is to download the Meven files from the official website.
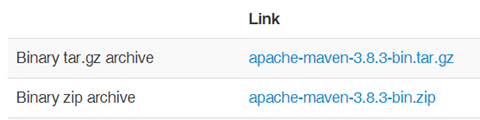
After the download is complete, extract the installation file to the specified directory.
Set up environment variables
Configure the Maven installation into the operating system environment. Open the System Properties panel (right-click My Computer → Properties on the desktop) and click Advanced System Settings. Set the Maven_Home environment variable. Create a new system variable.
Modify the value of the Path variable by adding after the Path variable value.
|
|
Set the MAVEN_OPTS environment variable.
Setting the MAVEN_OPTS environment variable is not required, but recommended. Because Java’s default maximum available memory is often not sufficient for Maven to run, for example, when the project is large, using Maven to generate the project site requires a lot of memory, without this configuration, it is easy to get java.lang.OutOfMemeoryError. therefore, configuring this variable at the beginning is the recommended practice.
Check Maven installation
After you have configured the environment variables, add a new cmd window and run the following command to check the Maven installation.
|
|
Configuration of Maven
Generate the .m2 folder and execute the following command in a cmd window: mvn help:system. This command will print out all Java system properties and environment variables, which are useful to turn into our daily work. The purpose of this command is to get Maven to perform a task that is in progress. We can see from the command line output that Maven will download \maven-help-plugin, including the pom file and jar file. These files are downloaded to the Maven local repository.
The .m2 folder is now created and can be found in the user directory, e.g. C:\Users\qw.TCENT.m2\repository. By default, the Maven local repository is placed in this folder and all Maven artifacts are stored in this repository for easy reuse. You can go to C:\Users\qw.TCENT.m2\repository\org\apache\maven\plugins\maven-help-plugin\ directory to find the pom file and jar file of maven-help-plugin that you just downloaded.
Configure the user-scoped settings.xml file. By default, there are no other directories or files in the .m2 folder except for the repository repository, but most Maven users need to copy the D:\ProgramData\apache-maven-3.8.3\conf\settings.xml file from the installation directory to the .m2 folder under C:\ Users\qw.TCENT.m2\settings.xml. This is a best practice. Maven users can choose to configure either the \conf\settings.xml file in the installation directory or the settings.xml file in the .m2 folder. The former is global in scope and all users on the entire machine will be directly affected by the configuration, while the latter is user-wide and only the current user will be affected by the configuration (recommended).
Configure Maven local repository
Open the settings.xml file in the .m2 folder and add the following configuration.
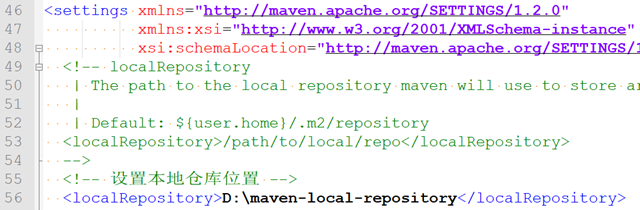
This way the Maven local repository doesn’t have to be under the C drive.
Configure the central repository mirror (instead: Aliyun central repository mirror)
Sometimes when we go through Maven to download the relevant dependency packages, we will find that the download speed is very slow, and sometimes it does not download, no response. Why is it so slow? The reason is that Maven’s default connection to the remote repository is foreign (http://repo1.maven.org/maven2/). In order to improve the download speed, just change the default Maven mirror to the domestic on the line, such as Aliyun’s central repository mirror. In the <mirrors> node under the settings.xml file, add the following configuration.
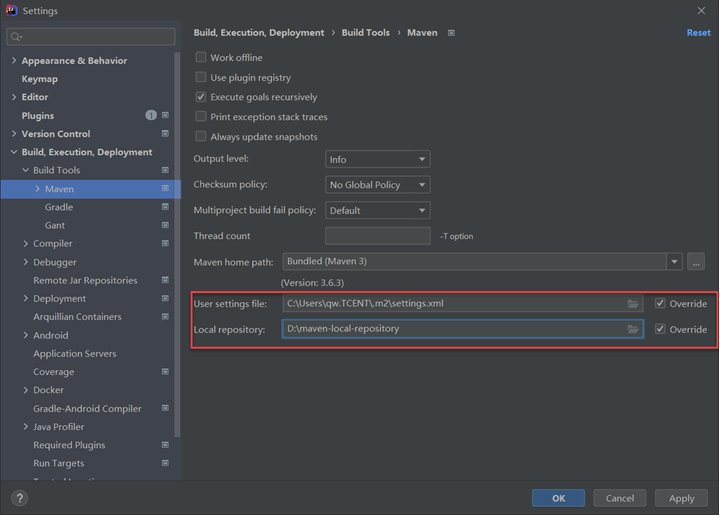
IntelliJ IDEA using Maven
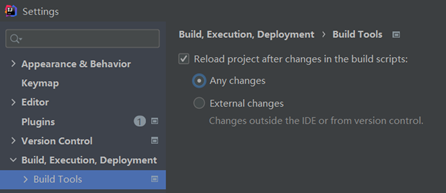
Set IDEA properties in [File] -> [Setting] -> [Build,Execution,Deployment] -> [Build Tools] -> [Maven], as follows.
Creating a project with Maven
Create a project
Select project type.

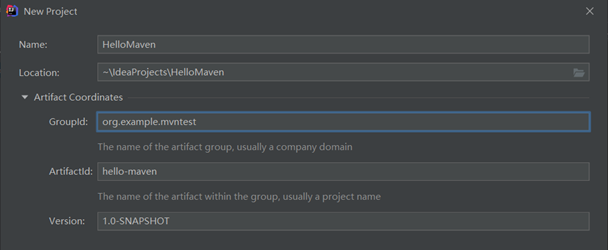
Set up project information.
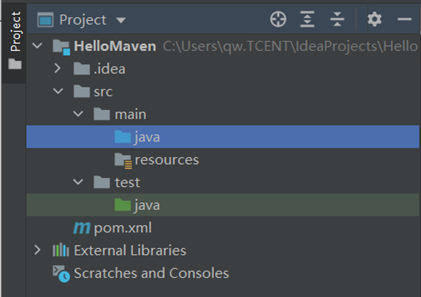
The final project structure is as follows.
Write the POM.xml configuration file and introduce the JUnit5 jar package as an example, with the following configuration information.
|
|
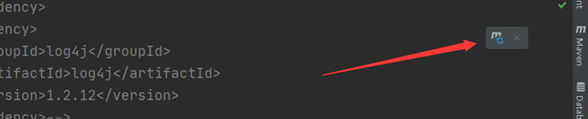
pom.xml is not automatically updated by default after modification. You need to click the icon on the right side for it to take effect.
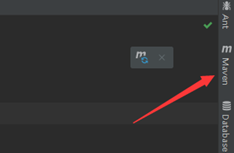
To modify the method to automatically refresh, click on the sidebar: Maven
Click on Auto-Reload Settings…

Check Any changes, then apply, then click ok.
Write the code
Create the HelloMaven.java class.
Create the HelloMavenTest.java test class.
|
|
If you run the task after completion, the following error may be reported: java: Error: Release version 5 is not supported

The reason is that the new project Java compiler Target bytecode version, the default setting of 1.5, if the same as I use jdk1.8, then 1.5 to 1.8 can be changed.

This solution also has a problem: every time a new module is added, all settings become the default 1.5. solution: add the following to the project’s pom.xml
Run the program after completion to get the desired result.