Okteto is an application development tool for developing and testing code in Kubernetes. It is very easy to launch a development environment in Kubernetes with one click through Okteto. We have also introduced the Skaffold tool from Google, and today we will demonstrate how to use Okteto to build Python application development environment.
Installation
We just need to install the Okteto CLI tool on our local development machine. To use Okteto to configure the environment we need to have access to a Kubernetes cluster on our local machine, so The prerequisite is to configure a kubeconfig file for an accessible Kubernetes cluster. If you don’t have a Kubernetes cluster, you can use the environment provided by OKteto Cloud, which is basically enough for individual users for a free amount. The Okteto CLI is a binary file, so installation is very simple.
For MacOS or Linux systems just execute the following command.
|
|
For Windows users just download https://downloads.okteto.com/cli/okteto.exe and add it to your $PATH path.
Once the configuration is complete, execute the following command in the terminal and the installation will be completed normally.
Project Configuration
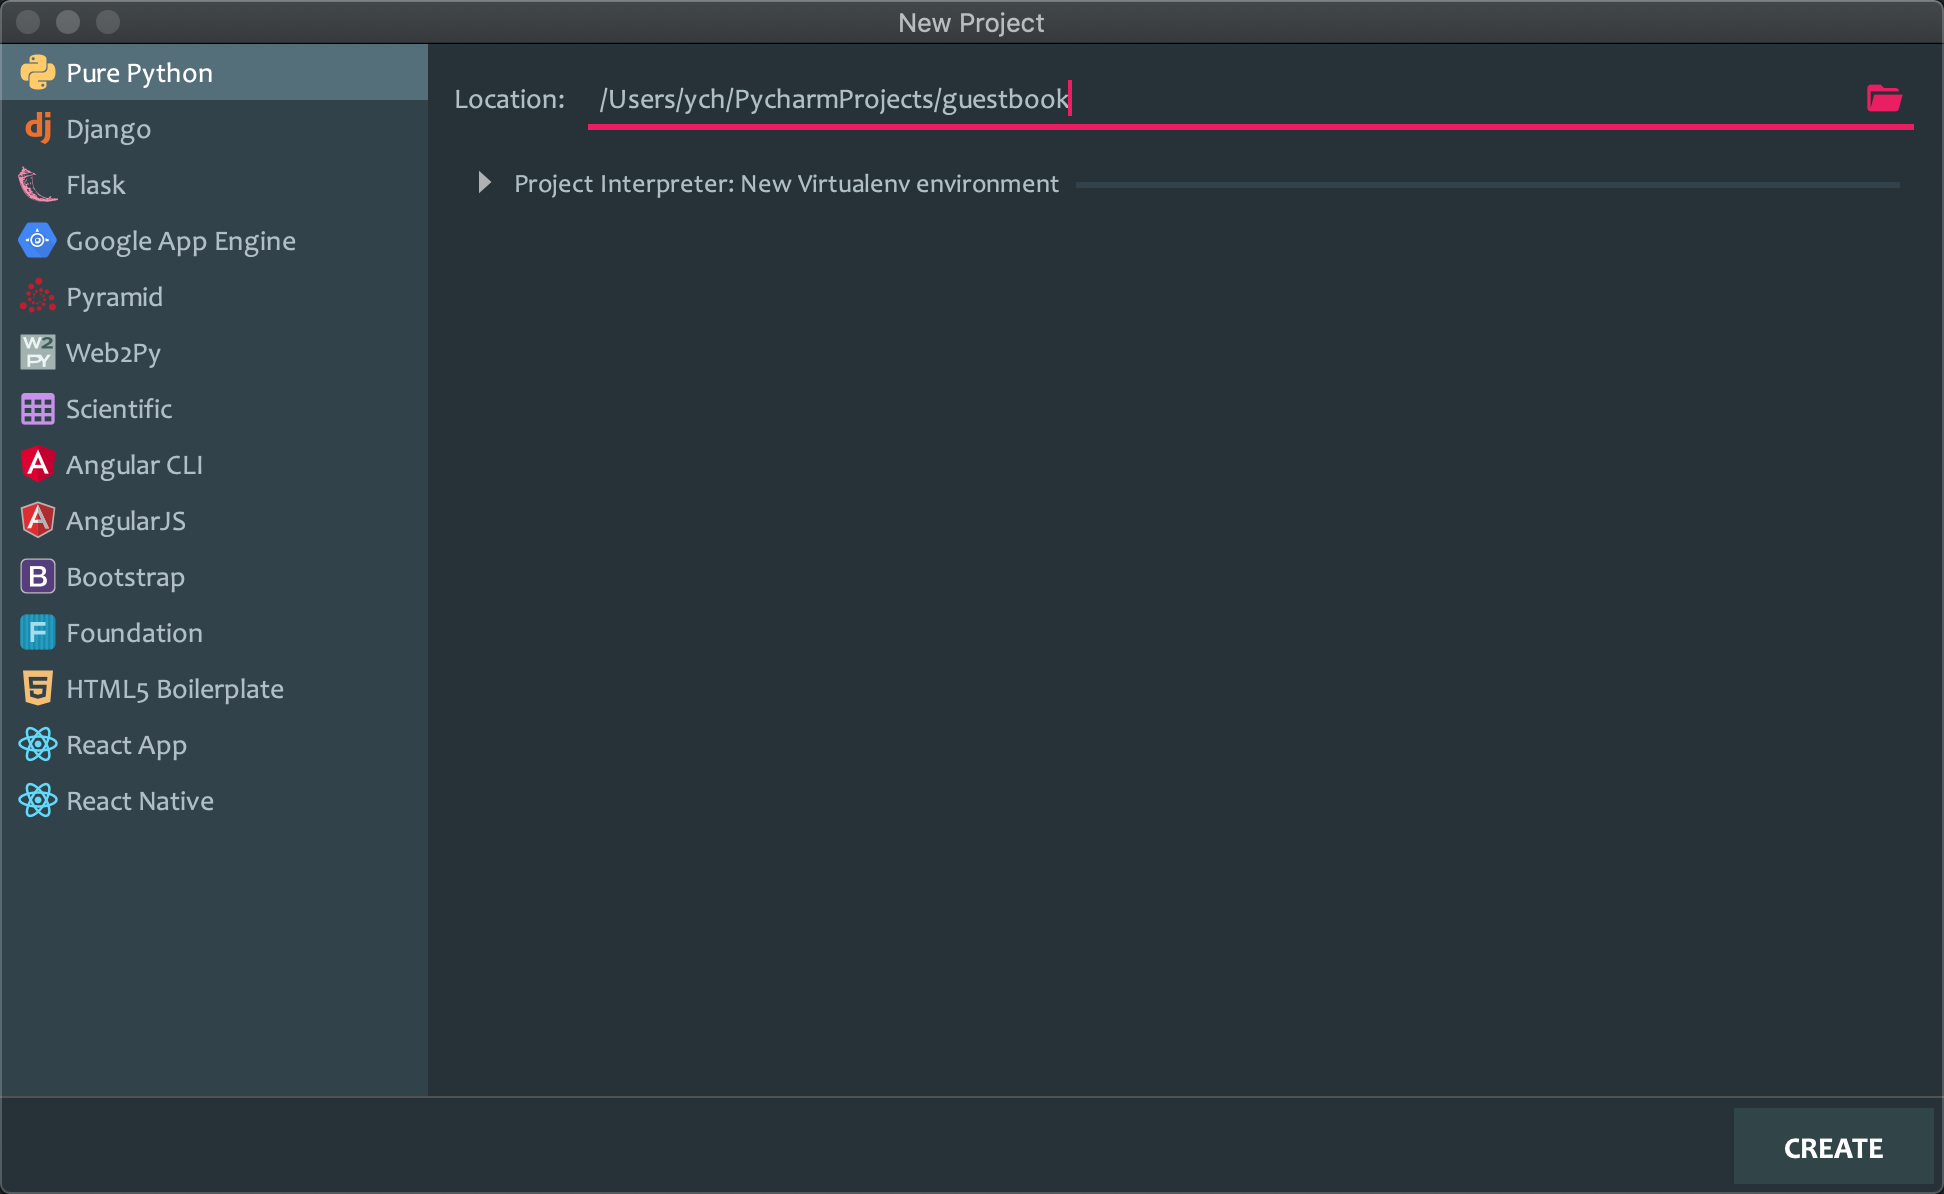
Open the PyCharm IDE and make a new project for our application environment, select the Pure Python template and name it guestbook.
The remote development environment is actually a Docker container that runs remotely and contains some environment dependencies for building and developing the application. Okteto will read the okteto.yml file in the project to define the development environment for the application.
For example, here we create a file called okteto.yml in the root of the guestbook project, with the following contents.
This file defines the operation of Okteto.
- Create a development environment named
guestbook - Use the image
okteto/python:3 - Start a remote SSH server on port 2222
- Forwarding port 8080 to the remote environment
- The
bashcommand is run at boot time, so we can get a remote terminal
For more use of the
okteto.ymlconfiguration list check out the documentation at https://okteto.com/docs/reference/manifest for more.
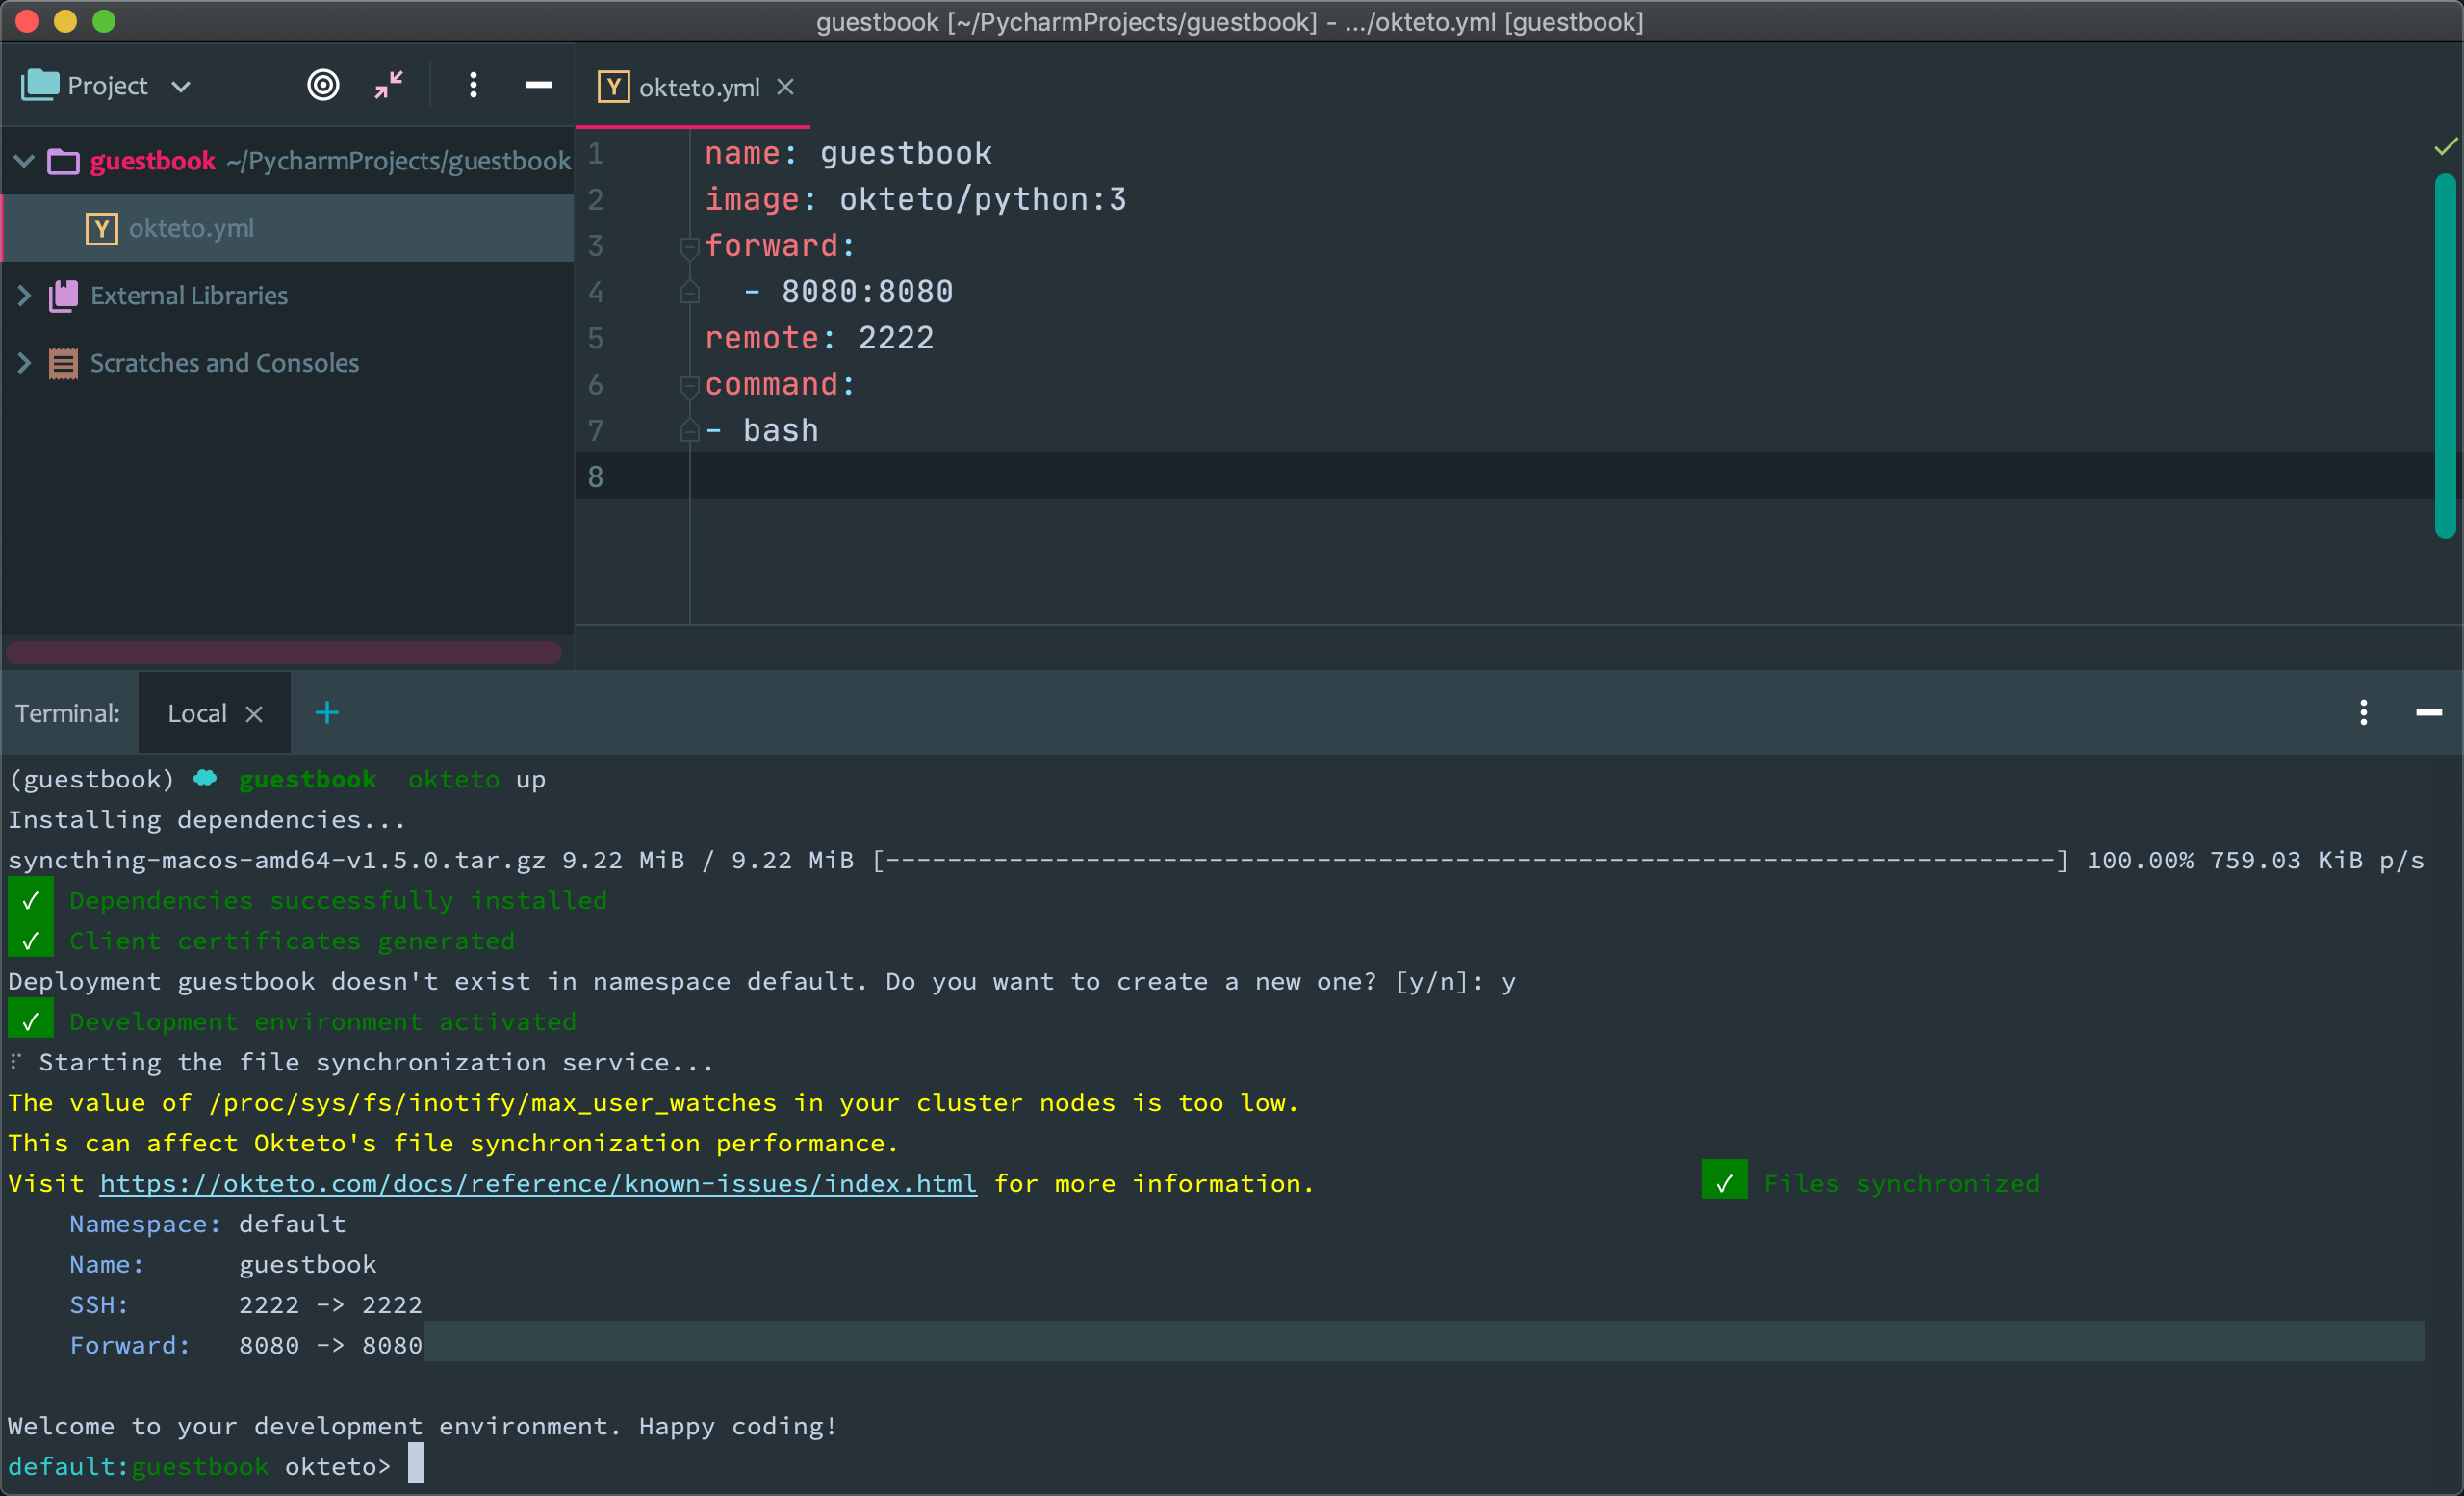
Now let’s deploy the development environment, open the local terminal directly in PyCharm and execute the okteto up command directly, the first time we start it we will be asked to confirm whether to create it or not, just type y to confirm. This command will automatically perform the environment configuration task.
- Deploy the development environment described in
okteto.ymlto the Kubernetes cluster - Forwarding port 8080 to a remote environment
- Start the SSH server on port 2222
- Start File Sync Service, which will keep our local filesystem and the development environment’s Pod up to date
- Start a remote shell in the remote development environment and now we can build, test and run the application as if we were on the local computer.
The process of configuring the environment is actually starting a Pod in the Kubernetes cluster to provide the development environment, and we can view this newly started Pod in Kubernetes at
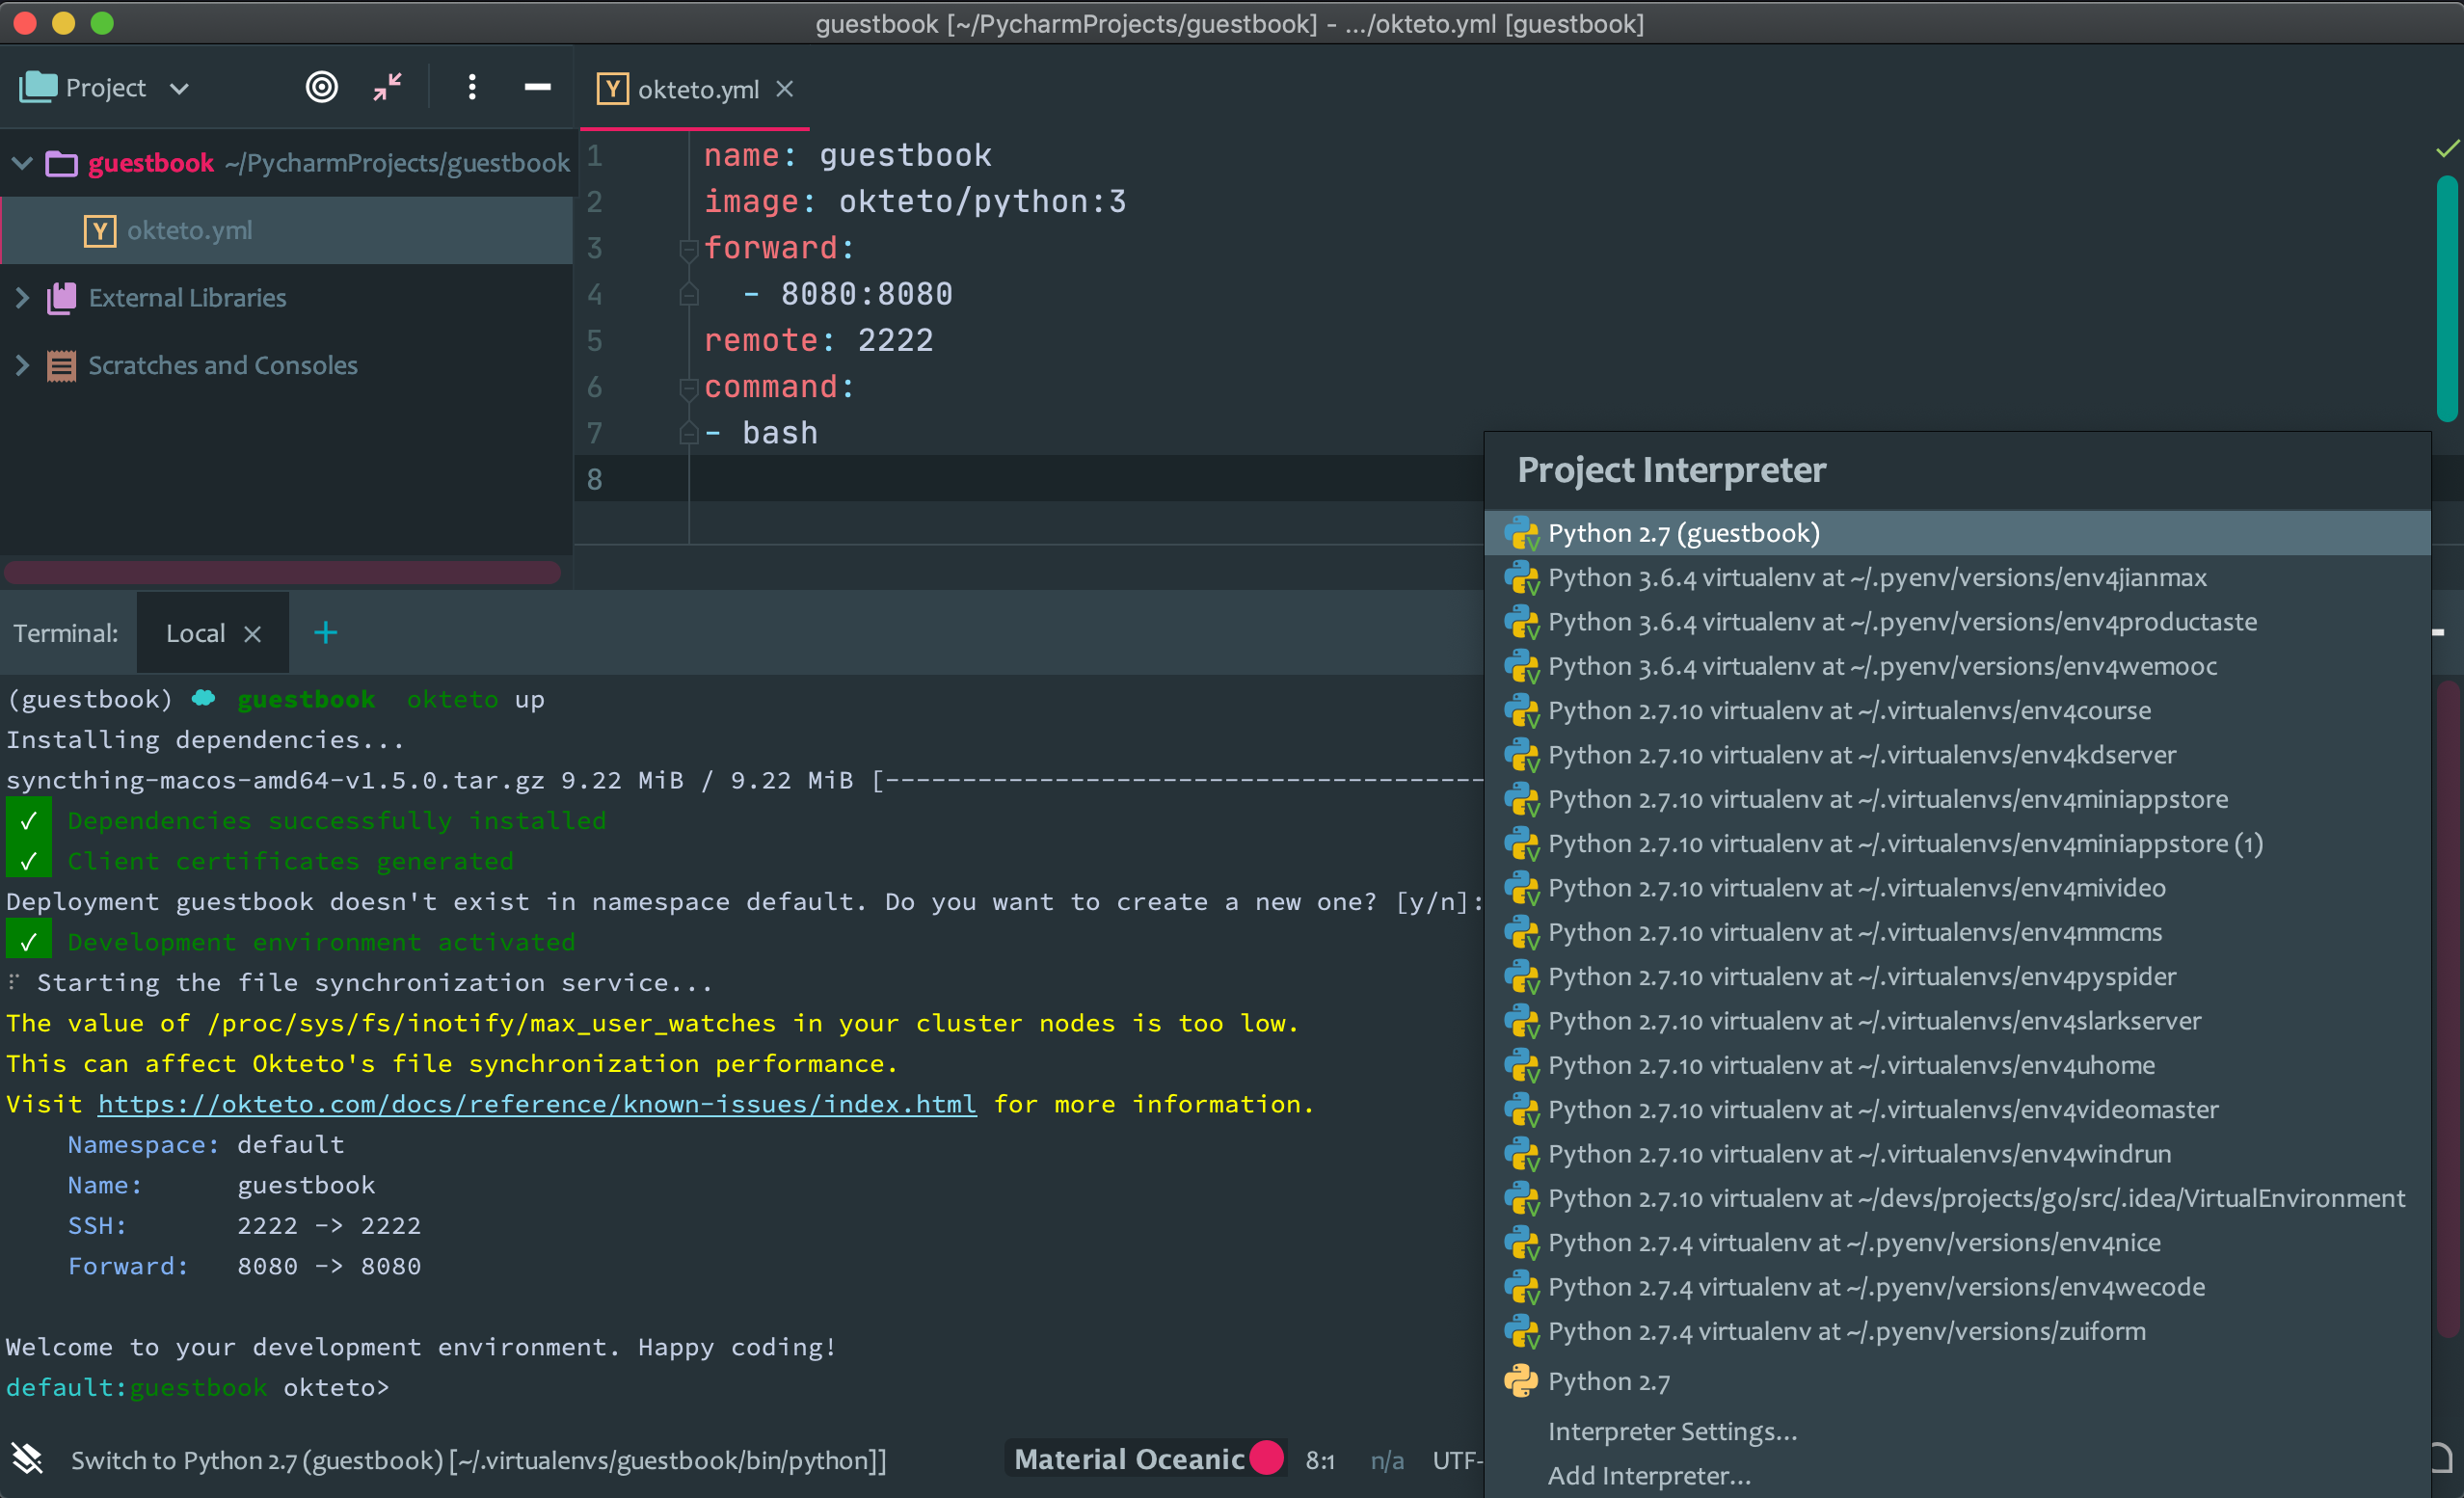
By default, PyCharm uses the local Python interpreter. Our environment here is remote, so we need to configure it to use the remote development environment as the interpreter, which will ensure that our development environment is not associated with anything local.
Select Python Interpreters at the bottom right of the status bar at the bottom of PyCharm, and then click the Add Interpreter... menu to add a new interpreter. ` menu to add a new interpreter: the
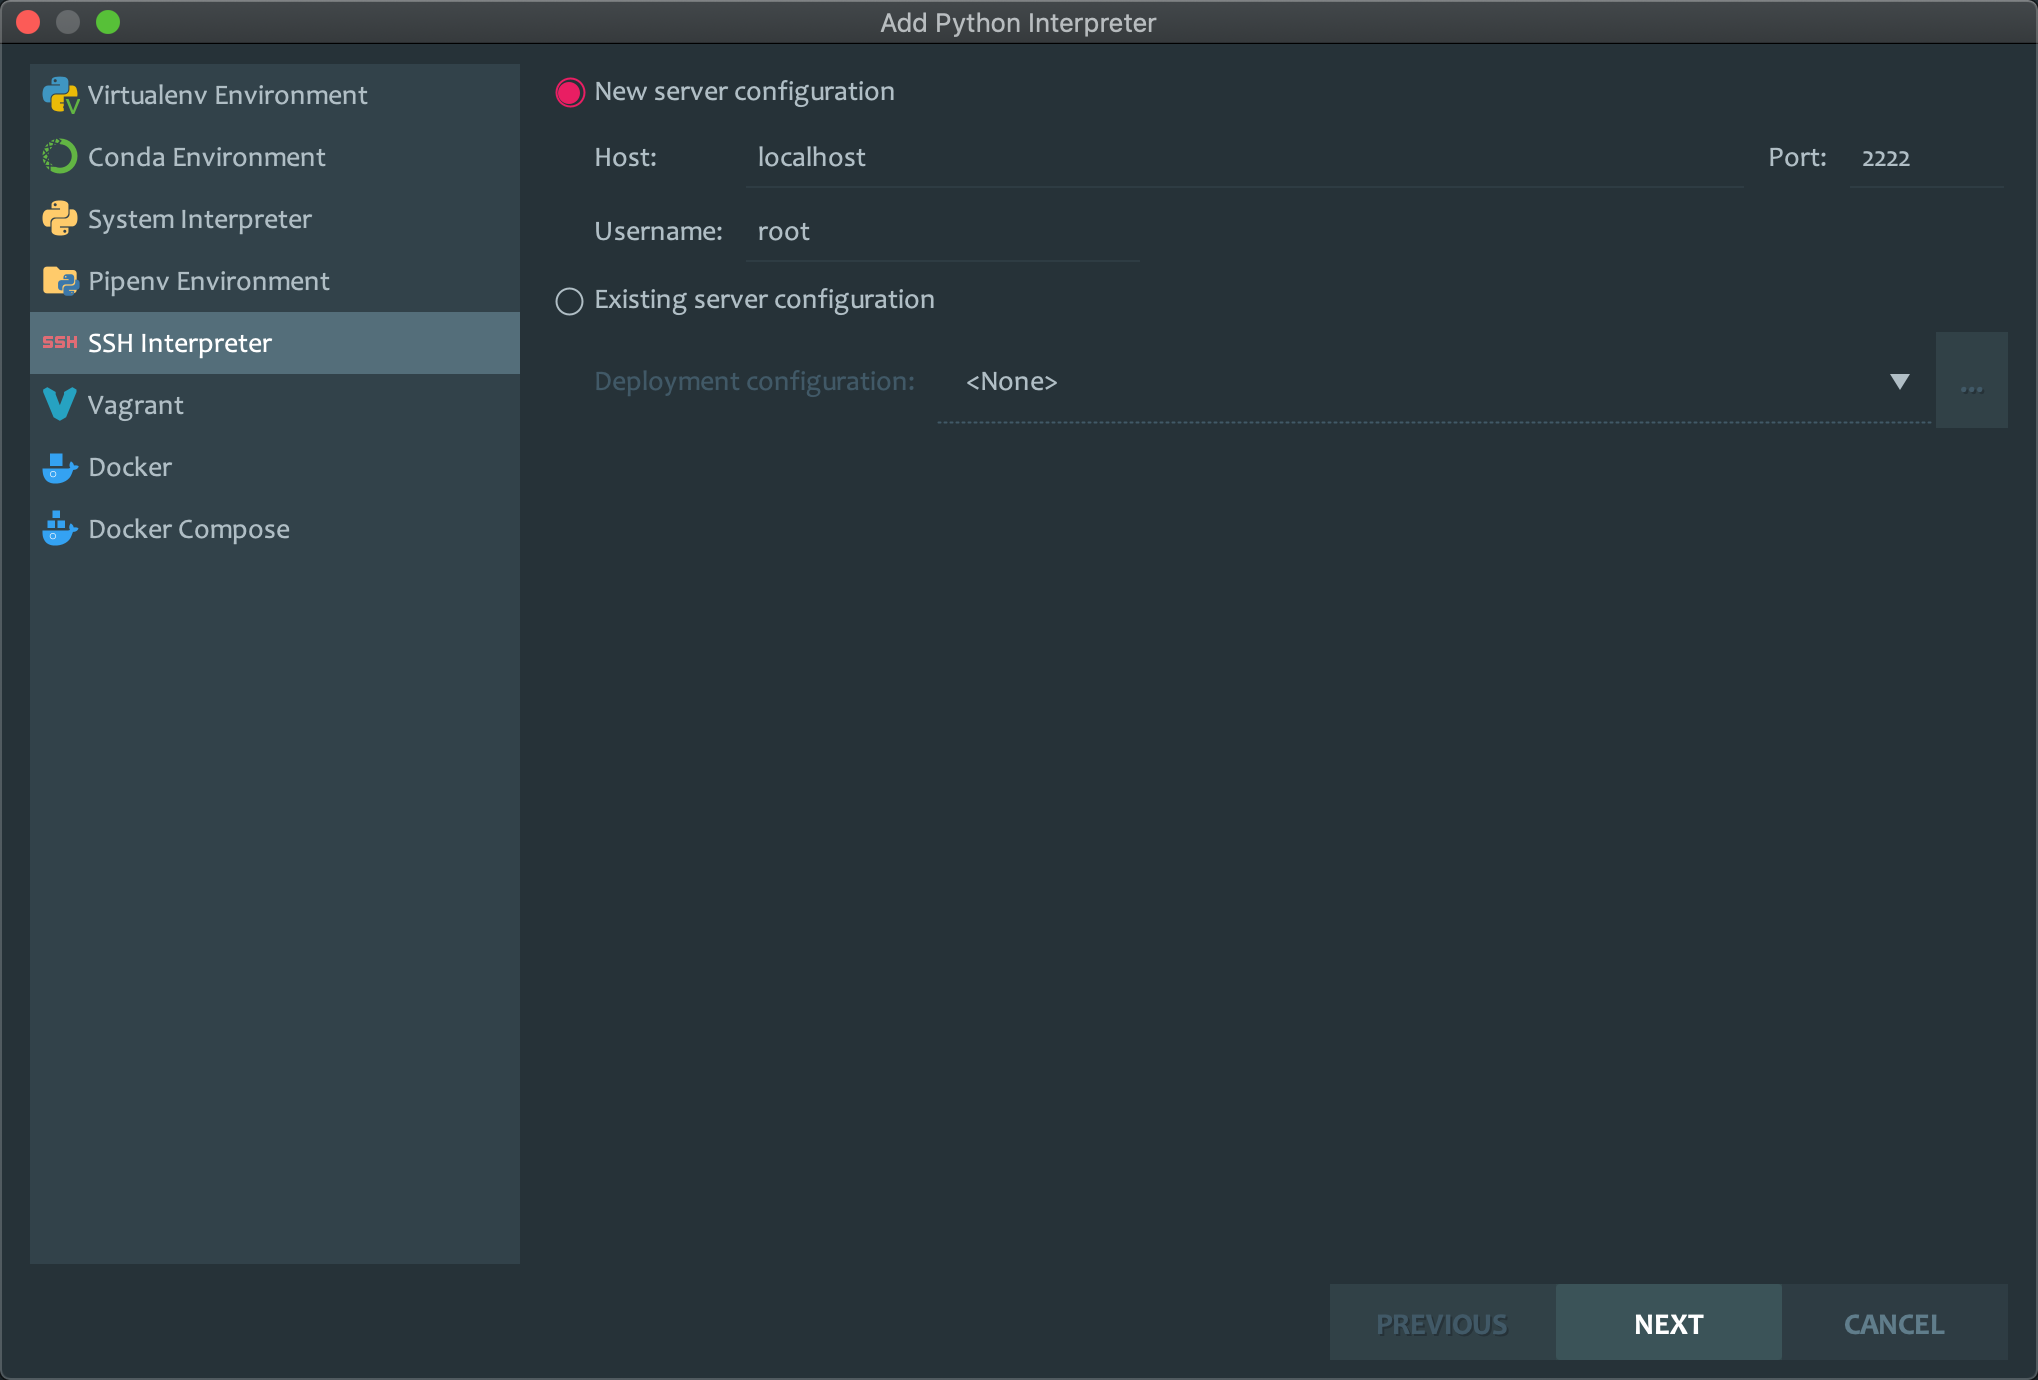
Then select SSH Interpreter on the left.
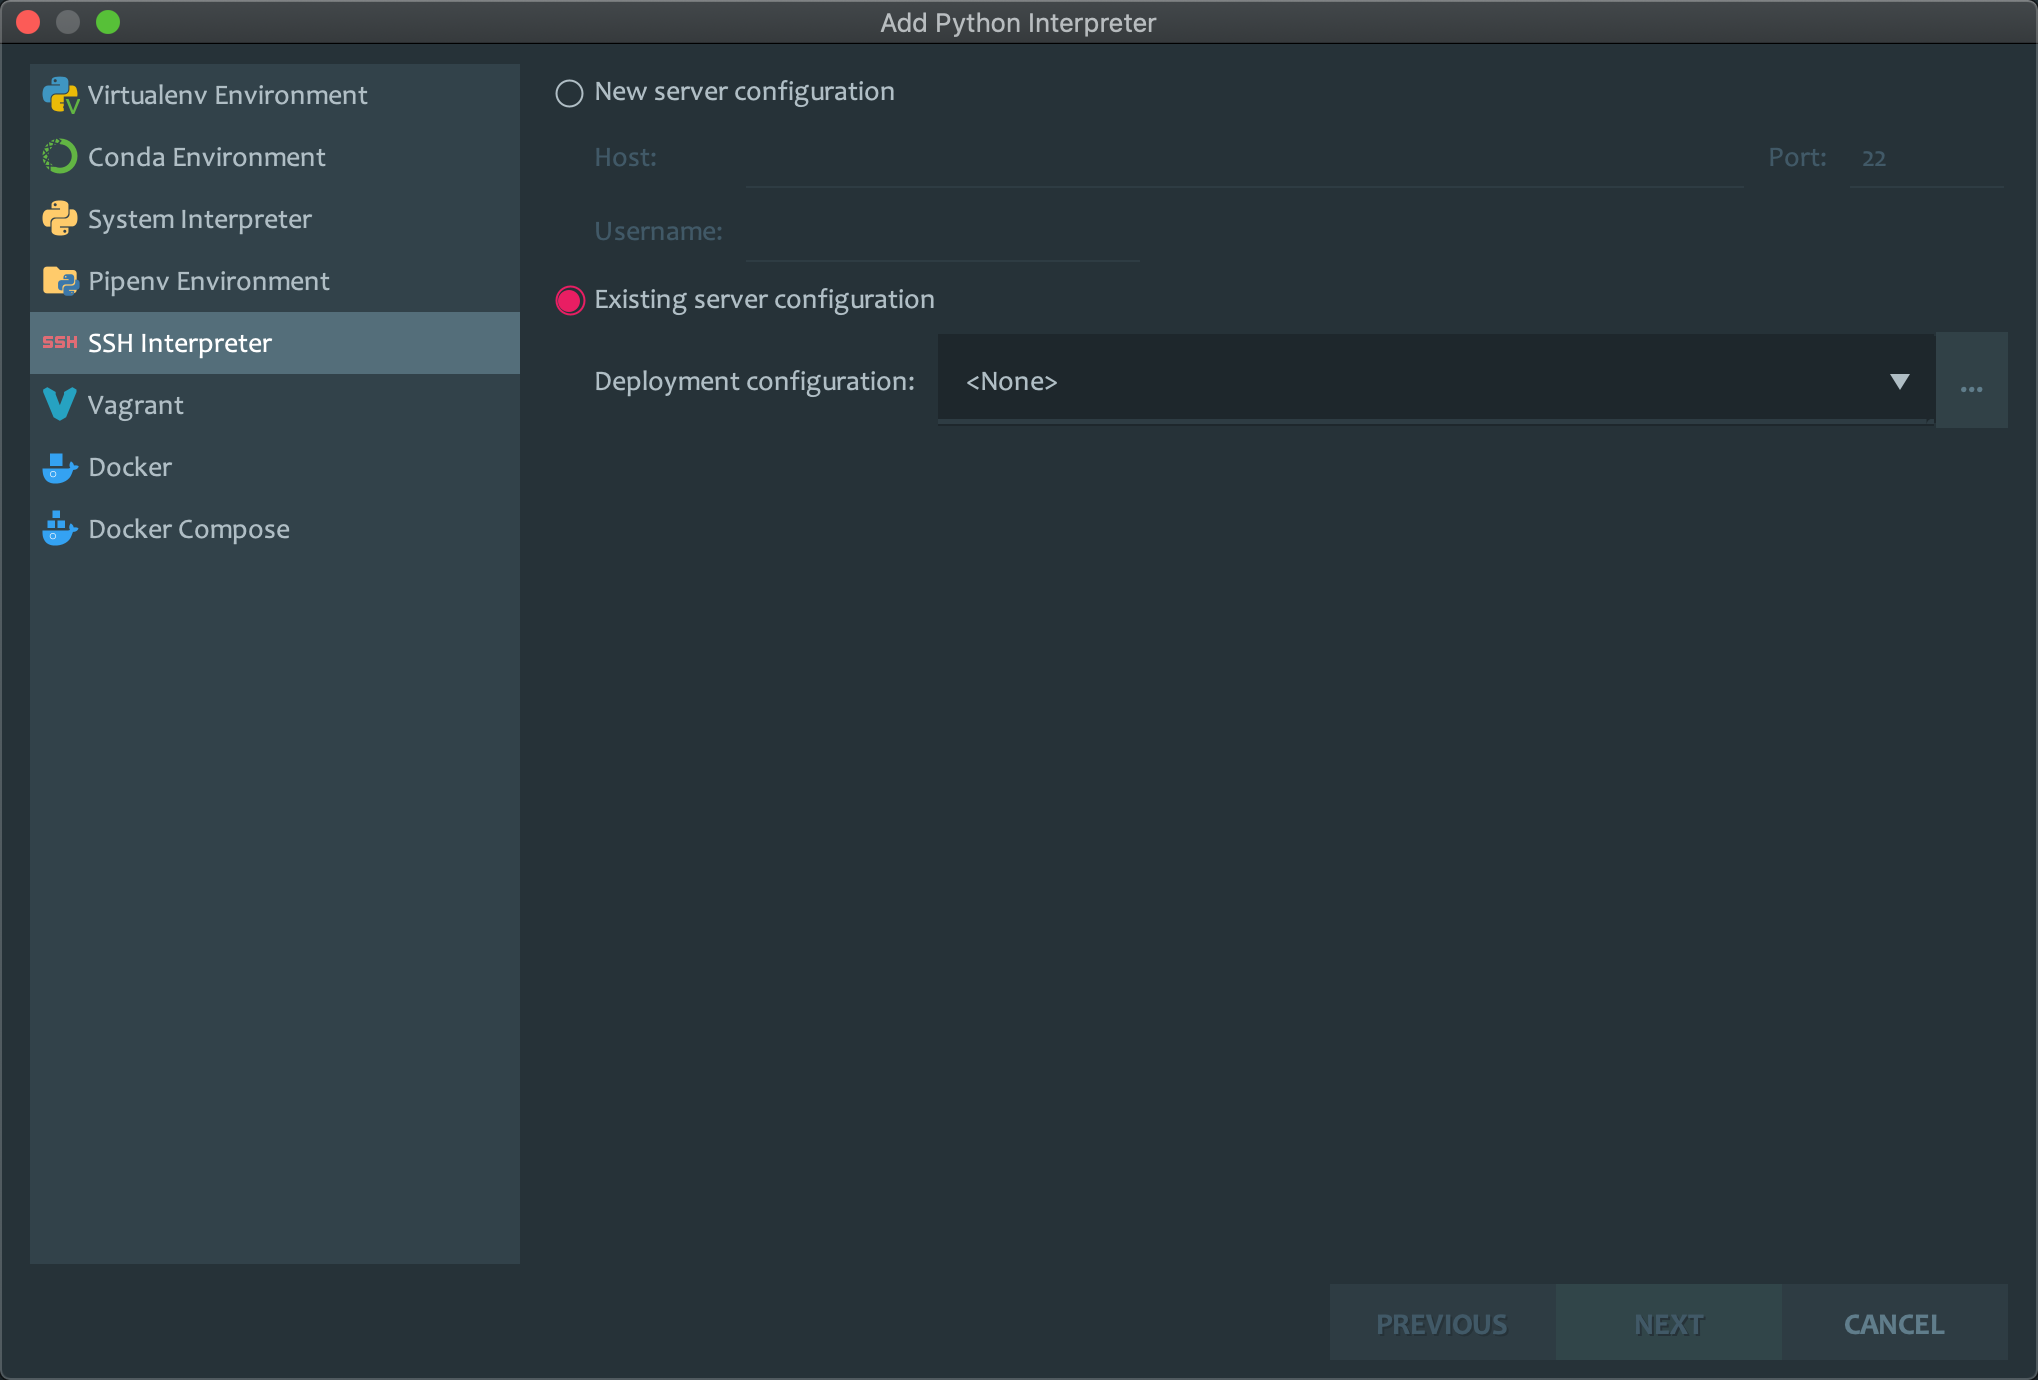
Select New server configuration to create a new configuration as shown in the following figure.
Click NEXT to enter the authentication configuration page, select Key pair, enter the path of Private key file file /Users/ych/.okteto/id_rsa_okteto, here replace /Users/ych with your own $HOME directory path to.
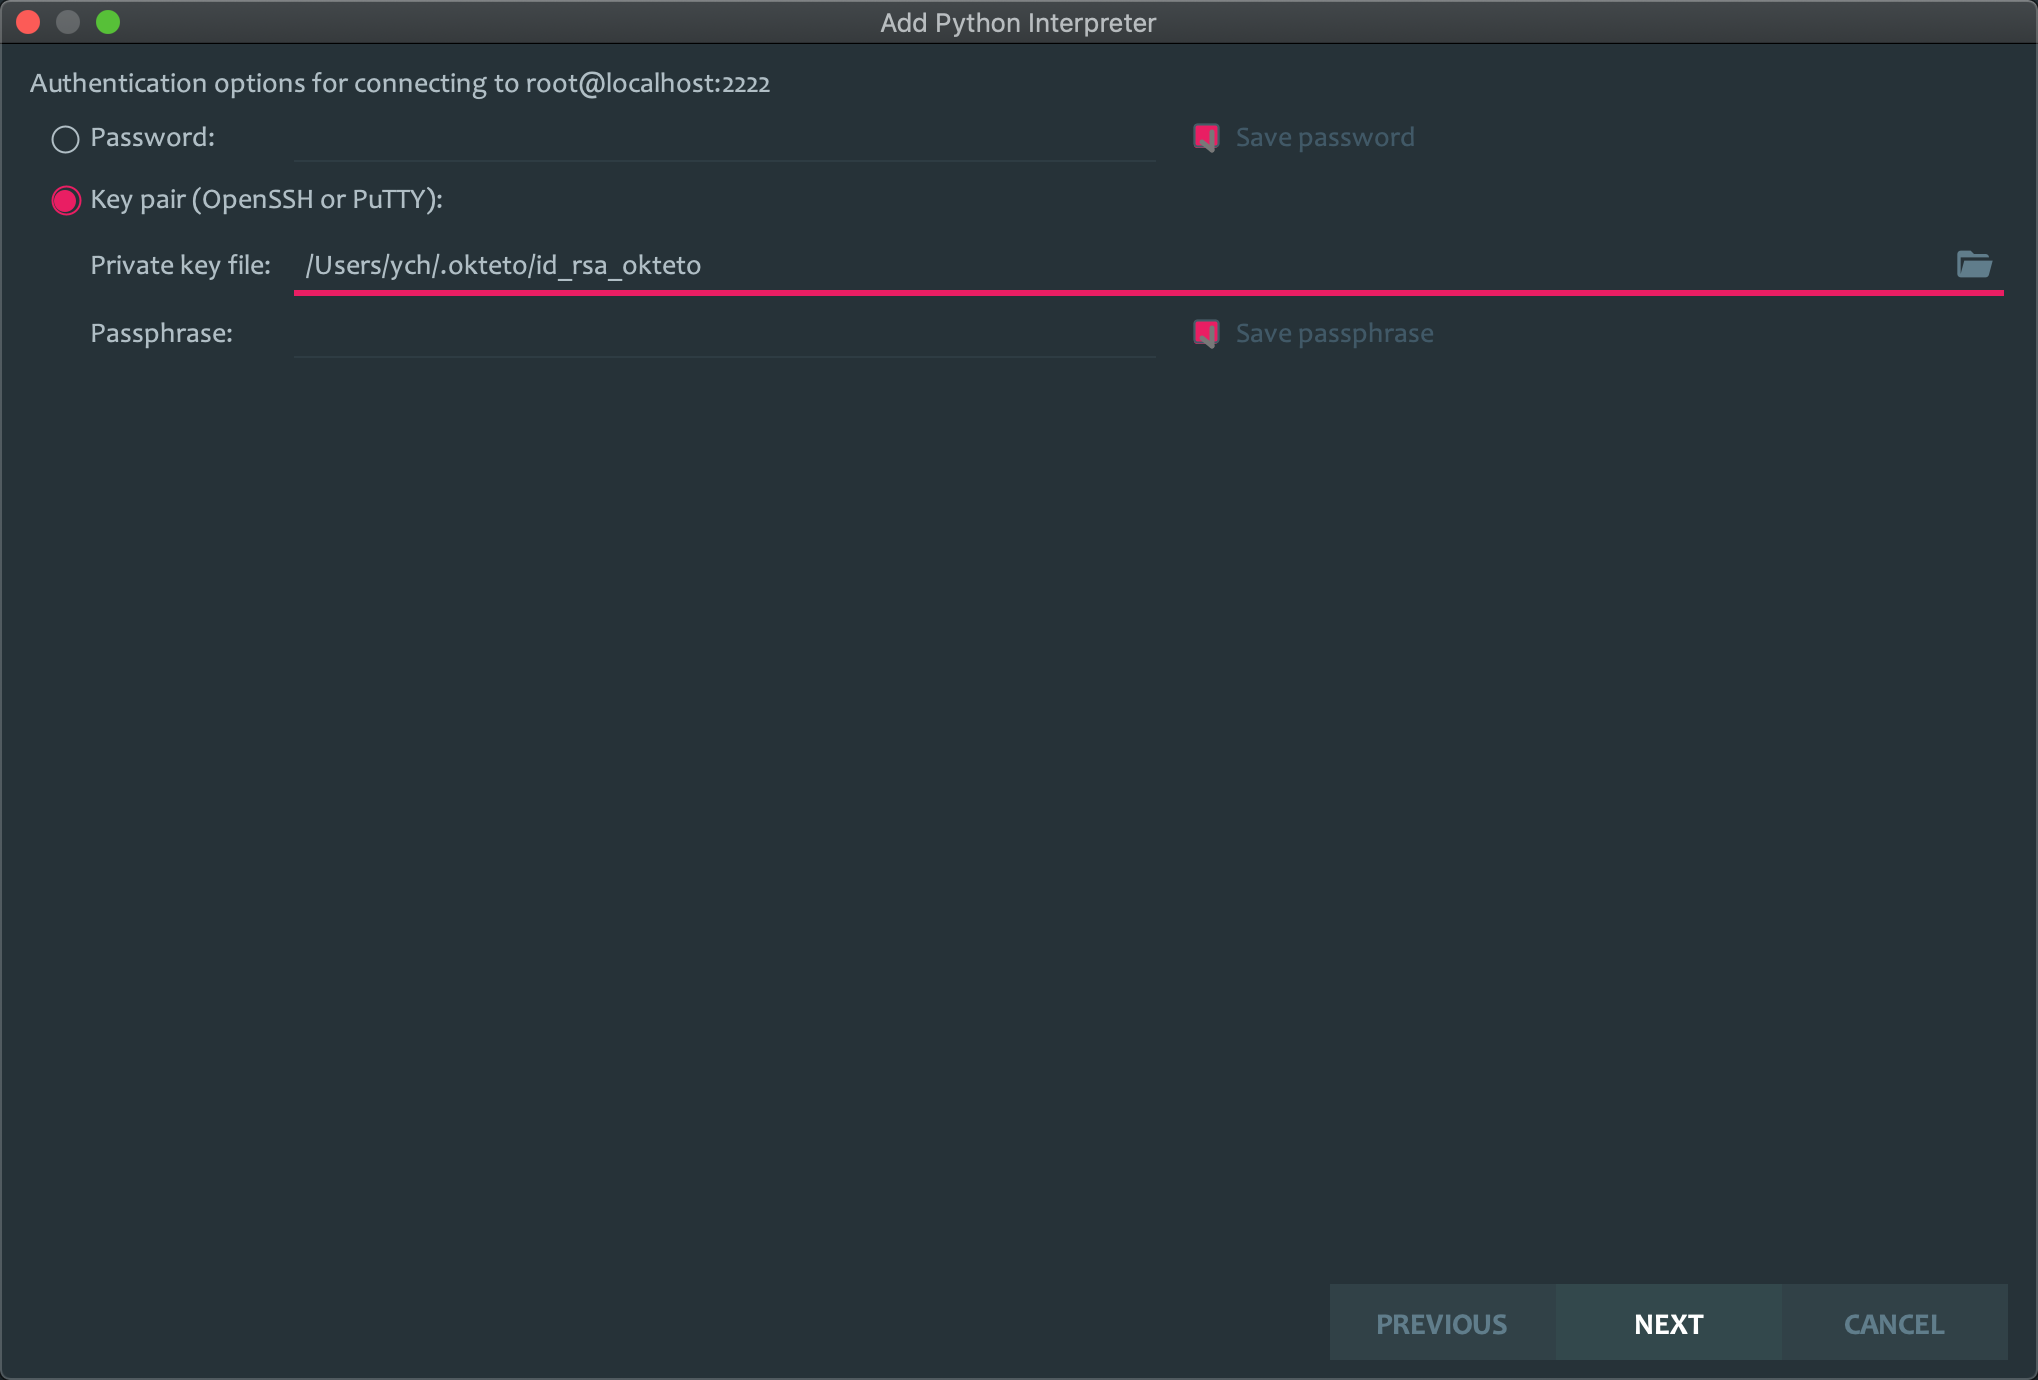
The first time the okteto up command is run, it creates an SSH key pair for us and saves it in the $HOME/.okteto/id_rsa_okteto and $HOME/.okteto/id_rsa_okteto.pub files, which are automatically used in SSH services started in the development environment These keys are used automatically for authentication in the SSH service started in the development environment.
After the SSH configuration is done, we can update the path to the interpreter, note that the current path is the path to the remote development environment, here we replace it with /usr/local/bin/python, set the folder mapping to <Project root> -> /okteto, and disable file uploads, because Okteto will automatically synchronize it for us.
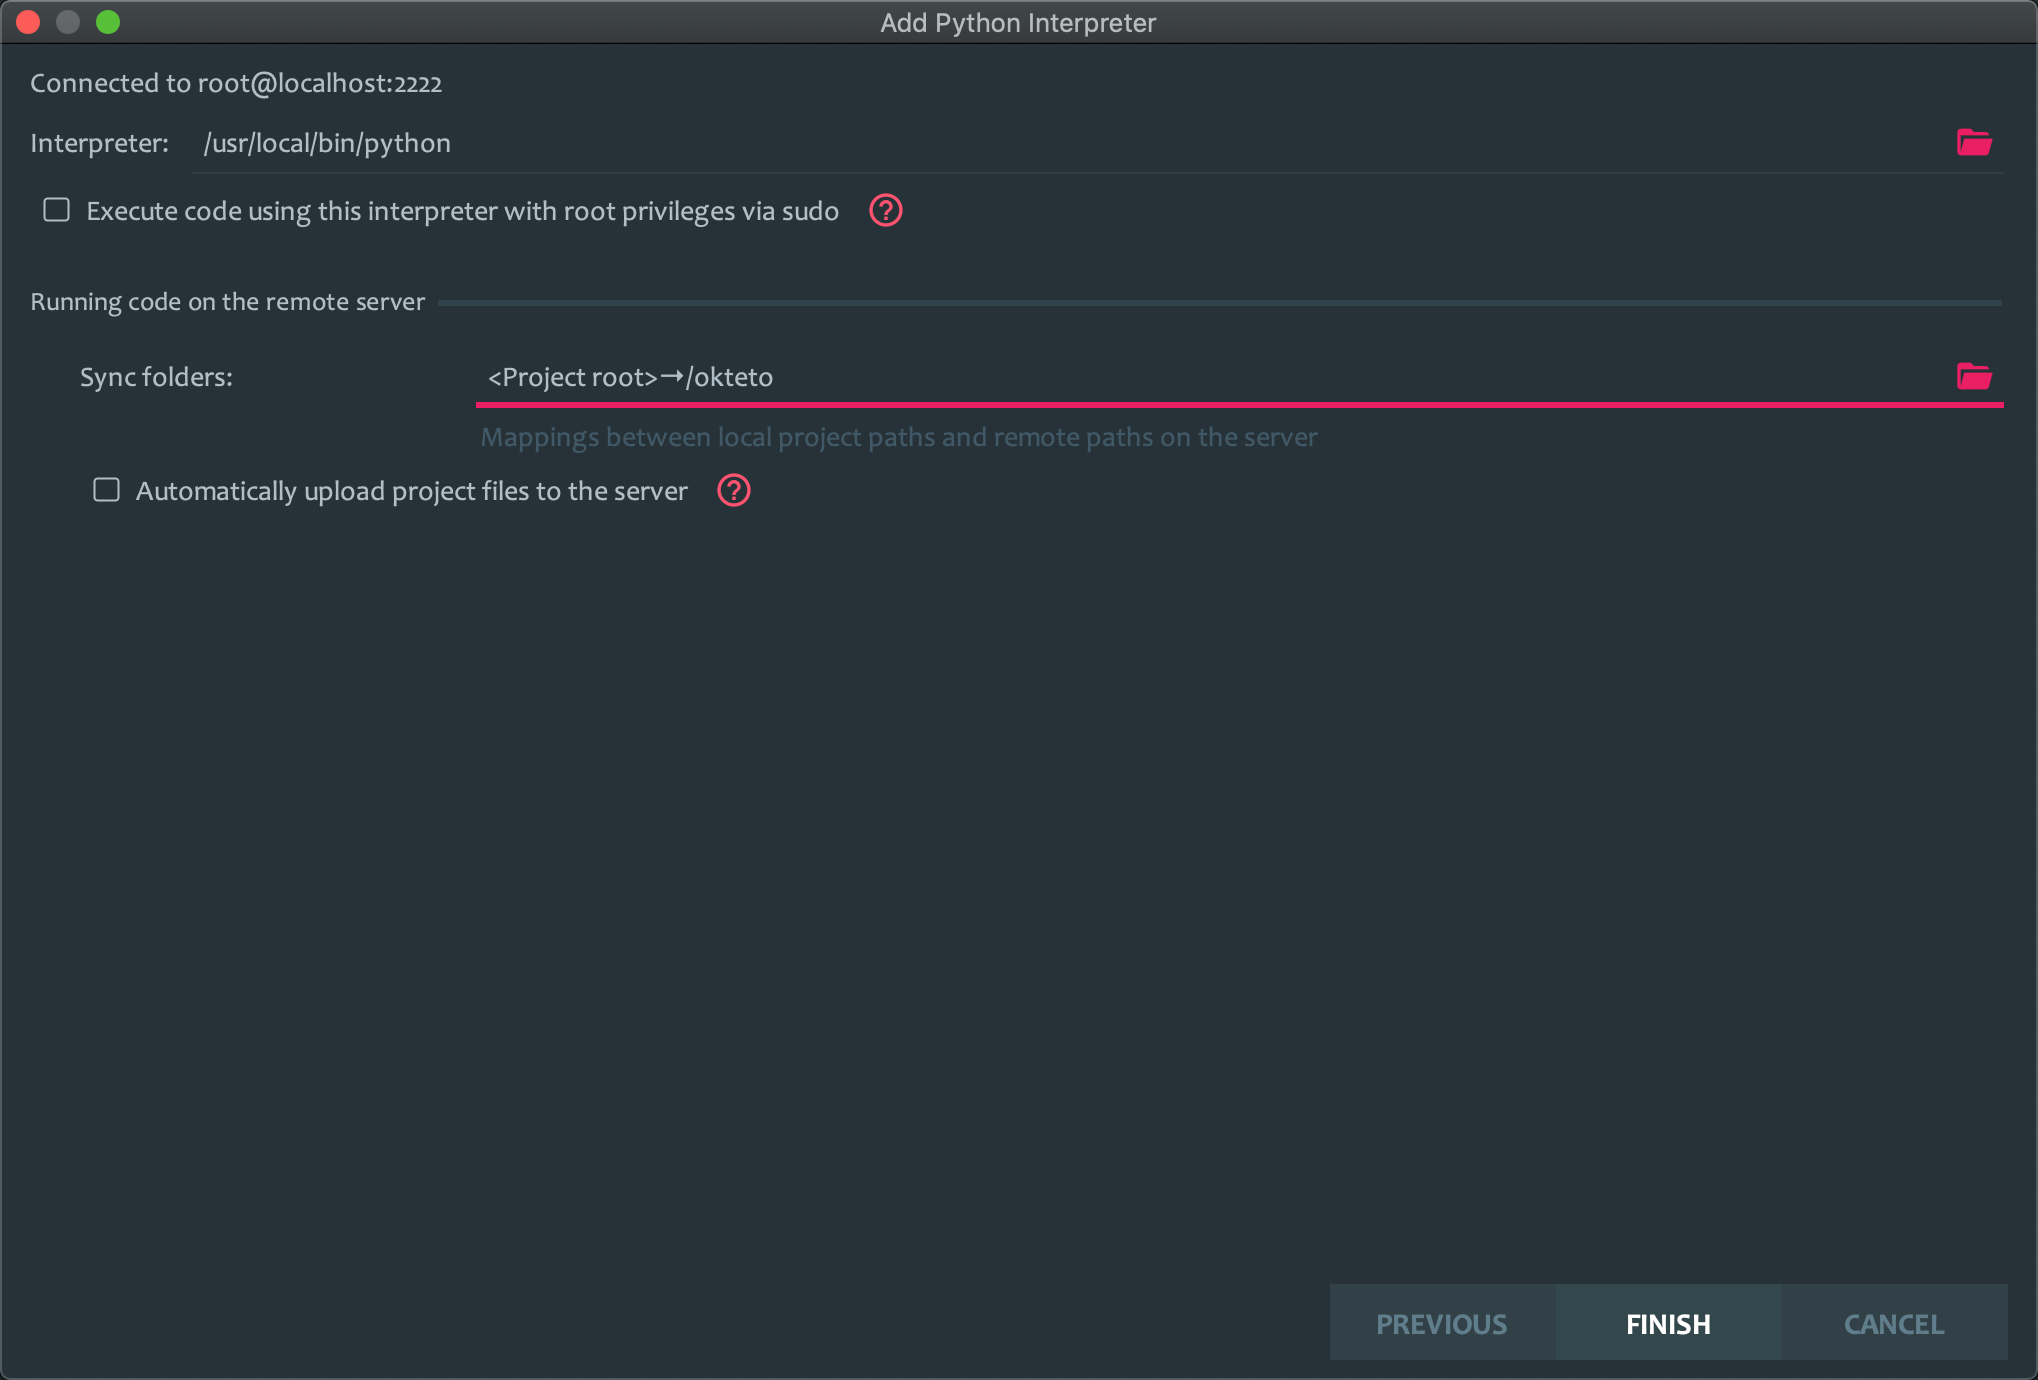
Click the FINISH button and you’re done. Now our project will use the Python interpreter directly from the remote development environment, instead of locally.
Testing
Test the application by creating a new file called app.py in the project with the following contents.
To start a simple Web Server with Flask, you now also need to install the environment dependencies and execute the following command in the console (note the one with the okteto > prompt).
|
|
Once the installation is complete, we can also add the dependencies to the requirements.txt file.
|
|
In fact, what we did above was executed in the remote Pod, but since Okteto automatically synchronizes the files, we will soon see the requirements.txt file in our local project as well. Similarly, we can now execute the python app.py command in the console to start the server.
|
|
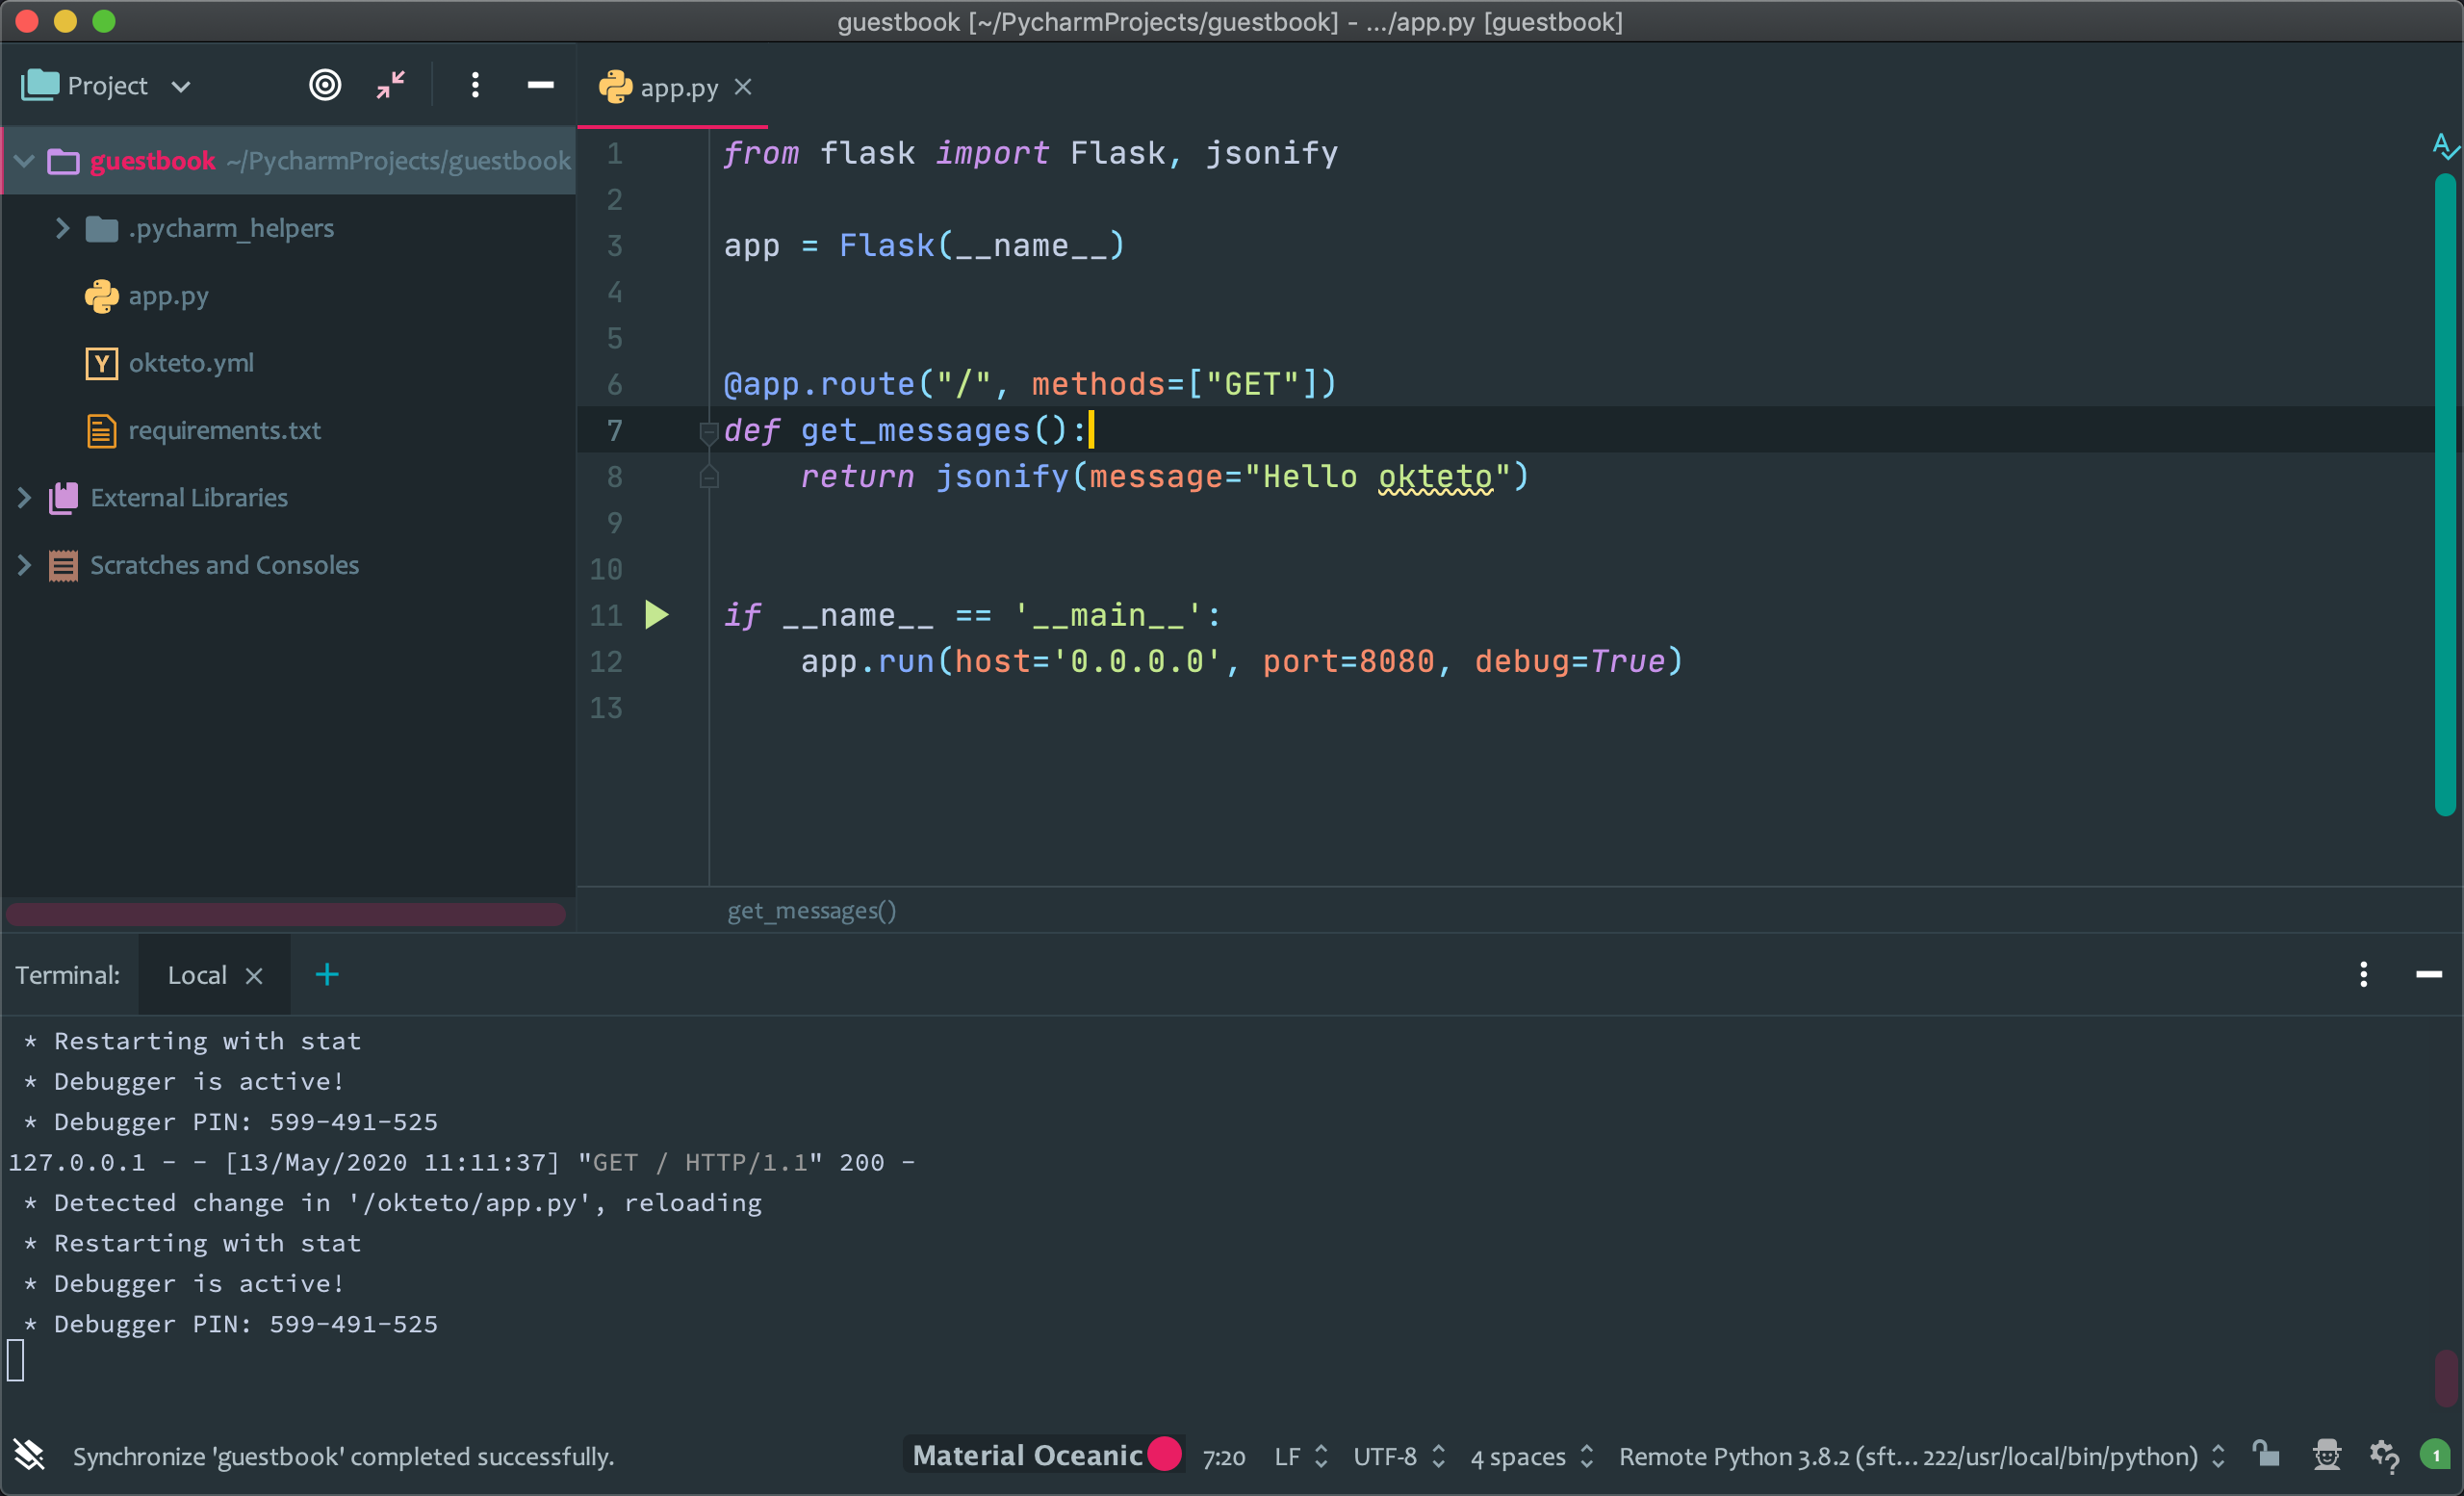
Once started, our application is up and running in the remote development environment, and since we configured in the okteto.yml file to forward the local port 8080 to the remote port 8080, we can also access it through the local port 8080, and every time we make a change to our code, Flask will automatically reload our application.
At this point we are done configuring the remote development environment for our Python application.