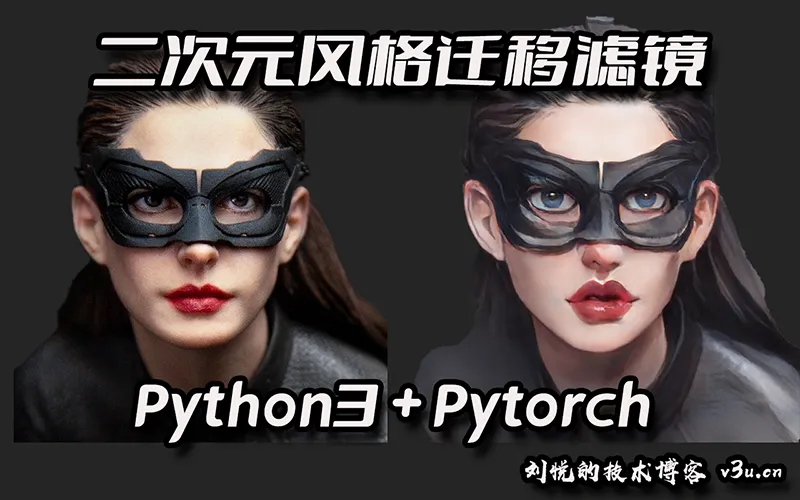
Some time ago, the industry’s most famous anime style transformation filter library AnimeGAN released its latest v2 version, and it has been the talk of the town for a while. When it comes to secondary yuan, the largest domestic user base is undoubtedly the Jitterbug client, which has a built-in animation conversion filter “Transformation Comic” that allows users to convert their actual appearance to secondary yuan “style” during live broadcasts. For secondary fans, the self-indulgent way of “breaking the next-dimensional wall and transforming into a paper man” is a tried and tested way:
But it is inevitable to see more aesthetic fatigue, a thousand people a “cone face”, the same “Kazran” type big eyes, so people are more or less the same feeling, not too much, lost reality.
The CartoonGan-based AnimeGAN anime style filter is able to retain the characteristics of the original image while retaining both the coolness of the secondary yuan and the realism of the tertiary yuan, which is quite a bit of a combination of soft and rigid, light feeling.

And the AnimeGAN project team has released the demo interface online, so you can run the model directly: https://huggingface.co/spaces/akhaliq/AnimeGANv2 However, due to bandwidth and online resource bottlenecks, the online migration queue is often in a queue state, and the upload of some original images may also The uploading of some original images may also cause leakage of personal privacy.
So this time we build AnimeGANV2 based on Pytorch deep learning framework in Mac os Monterey with M1 chip to convert still pictures and dynamic videos.
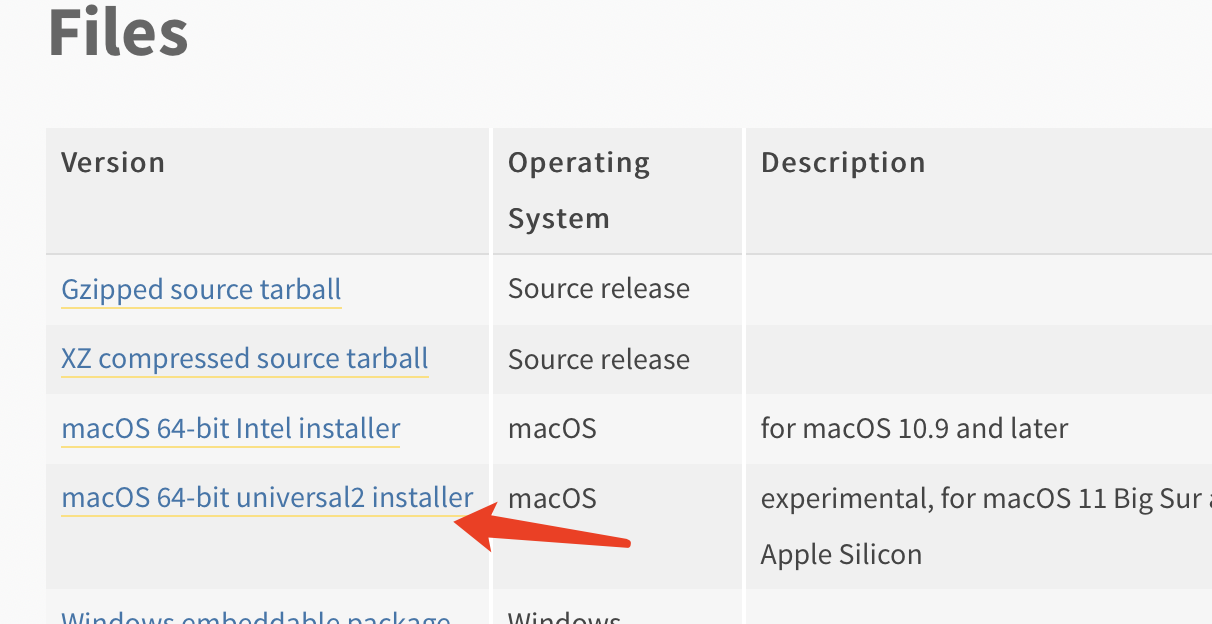
As we know, the current cpu version of Pytorch on the M1 chip mac is Python 3.8. This time we use the native installation package to install it, first go to the Python website and download Python 3.8.10 universal2 stable version: https://www.python.org/downloads/release/python-3810/
Just double-click to install, then go to the terminal and type the command to install Pytorch:
|
|
Here we install the latest stable version 1.10 by default, then go to the Python 3.8 command line and import the torch library at
After making sure that Pytorch is available, clone the official project
|
|
AnimeGAN is also based on Generative adversarial network, the principle is that we have a certain amount of original pictures on hand, we can call them cubic pictures, the real picture features will exist a distribution, such as: normal distribution, uniform distribution, or more complex forms of distribution, then the purpose of GAN is to generate a batch of data close to the real distribution by generator to generate a batch of data close to the real distribution. These data can be understood as quadratic optimization, but will retain some features of the third dimension, such as larger eyes, face shape closer to the drawing style of the filter model, etc. In our processing, this generator tends to use a neural network, because it can represent more complex data distribution situations.
After successful download, you can see four different weighting models in the weights folder, where celeba_distill.pt and paprika.pt are used to transform landscape images, while face_paint_512_v1.pt and face_paint_512_v2.pt are more focused on portrait transformation.
First install the image processing library Pillow:
|
|
This is followed by a new test_img.py file.
|
|
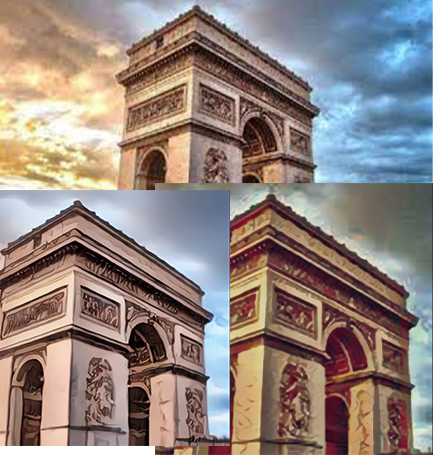
Here the Arc de Triomphe photo as an example, respectively use celeba_distill and paprika filter to view the effect, note that local requests need to turn off ssl certificate detection, while the first run need to download the online model parameters
Here the image size parameter refers to the total number of width and height channels, the next is the character portrait animation style conversion, adjust the imported model generator type, the input image to change into a character portrait:
|
|
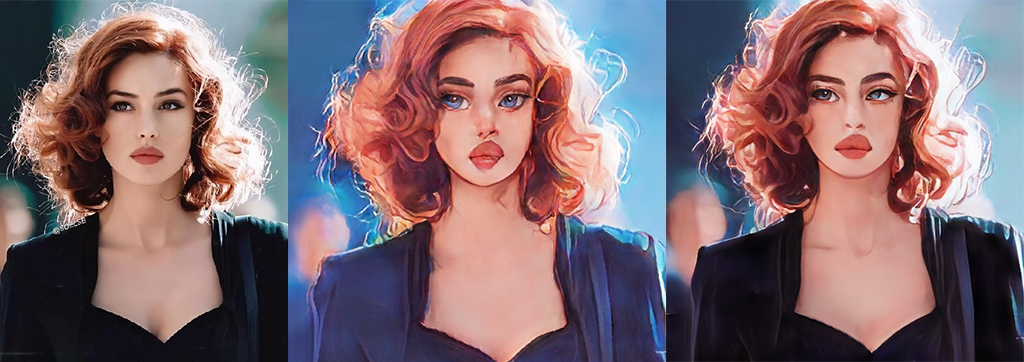
As you can see, the v1 filter is relatively more strongly stylized, while v2 relatively retains the characteristics of the original picture on the basis of stylization, which originates from the third dimension without being confined to the experience, overhead but not flowing in vain, and is higher than Jitterbug’s cartoon filter.
Let’s take a look at the anime filter conversion of dynamic video, video in a broad sense, is a multi-picture burst of playback, but depends on the video frame rate problem, frame rate is also known as FPS (Frames PerSecond) abbreviation - frame / second, refers to the number of frames per second to refresh the picture, but also It can be interpreted as the number of times per second the graphics processor can refresh. The higher the frame rate, the smoother and more realistic the animation will be, and the more frames per second (FPS), the smoother the action displayed will be.
Here you can convert coherent videos to pictures in FPS with third party software, in m1 mac os system, the famous video processing software:Ffmpeg is recommended
Homebrew for installation using the arm architecture.
|
|
After successful installation, type the ffmpeg command in the terminal to view the version:
|
|
There is no problem with the installation, then prepare a video file and create a new video_img.py:
Here we use Python3’s built-in os module to run the ffmpeg command directly, for the video in the current directory, converting it at 15 frames per second, with the -s parameter representing the video resolution, the -ss parameter controlling the start position and end position of the video, and finally the directory to export the image to.
After running the script, enter the myvideo directory.
|
|
As you can see, the images have been converted according to the number of frames as subscript file names.
Next, the images need to be batch converted using the AnimeGAN filter.
|
|
For each conversion, the original image is kept and the filtered image is stored in the relative directory myimg, then a new img_video.py is created to reconvert it to a video.
The rate is still 15 frames per second, the same as the original video.
If the original video has an audio track, you can first split the audio track: img_video.py to reconvert it to video:
After converting the anime filter, merge the converted video with the audio track of the original video:
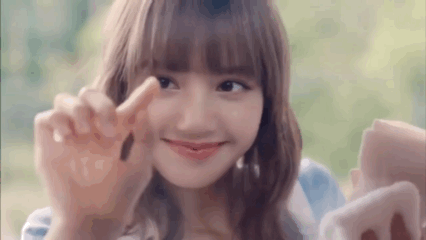
Test cases for the original video.
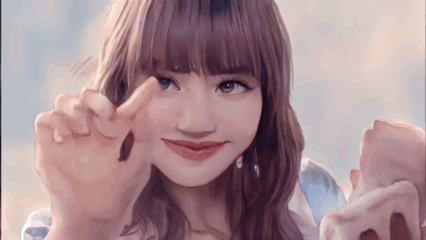
Post-conversion effect.
With the support of the m1 chip, the efficiency of the cpu-based version of Pytorch is still good, but unfortunately the gpu version of Pytorch adapted to the m1 chip we still need to wait a while, in the last month, Pytorch project team member soumith gave this response.
So, here’s an update.
We plan to get the M1 GPU supported. @albanD, @ezyang and a few core-devs have been looking into it. I can’t confirm/deny the involvement of any other folks right now.
So, what we have so far is that we had a prototype that was just about okay. We took the wrong approach (more graph-matching-ish), and the user-experience wasn’t great – some operations were really fast, some were really slow, there wasn’t a smooth experience overall. One had to guess-work which of their workflows would be fast.
So, we’re completely re-writing it using a new approach, which I think is a lot closer to your good ole PyTorch, but it is going to take some time. I don’t think we’re going to hit a public alpha in the next ~4 months.
We will open up development of this backend as soon as we can.
It can be seen that the project team should be completely reconstructed for the m1 chip Pytorch underlying, the public beta version will not be launched in the near future, perhaps the second half of next year will be released, or very much worth looking forward to.