
Whether you’re a fan of the Lord of the Rings movies or not, you’ll agree that almost everyone loves unity, and having a unified development experience is something that developers have always strived for and welcomed.
Development environments have long been tightly coupled with specific technologies, such as Visual Studio, for primarily .NET-based development. We’ve seen heated debates among developers who endlessly argue for one tool over another. This will never end, nor should it, because many times these arguments result in the awesome tools we are using today.
In this article I will share with you a simple C/C++ development environment setup using VS Code. If you are already using VS Code with some other programming languages, then you are already halfway there. For others, you can see how Linux users are building their own development environments and if you want to give it a try.
VS Code is a lightweight, open source, free and extensible IDE, and it’s getting better every day. I use it a lot in my Node.js development work.
In this tutorial, I will show you how to build a c/c++ development environment on Linux/MacOS using vscode. We will also explain how is to create c/c++ projects with vscode. How to use vscode to debug c/c++ projects. Install the debugger gdb for debugging c/c++, the compiler gcc and g++, and the syntax checker clang and cppcheck. vscode requires syntax highlighting, linter extensions such as C/C++ for Visual Studio Code, C/C++ Advanced Lint, etc.
Install the c/c++ development kit
Fedora/Red Hat/CentOS/Opensuse or Scientific
|
|
ubuntu/Debian
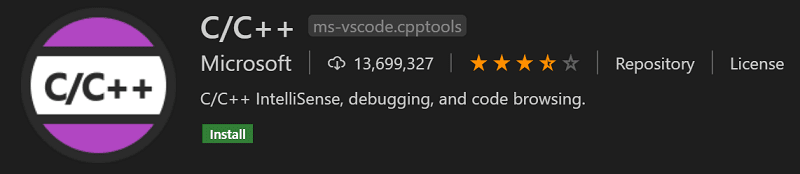
Install the C/C++ for Visual Studio Code extension
Open your Vscode, select the extension icon button in the active bar or press the shortcut Ctrl+Shift+X, then search for c++ and click Install.
Configuring C/C++ extensions
You may not be comfortable with the brackets { line break after a function, but this is the default style of C/C++. We think you should continue to use this style if you want to toss it around, after all it is the official standard and it is not hard to form this habit to see a lot of c/c++ code. This style is only for long-term use using the use of people who do not change the line will form a strong forced syndrome, the habit has been developed difficult to change, there is another point is to look for writing and writing in the parentheses do not know where. Next we change the style of this function after the line break in parentheses.
Open your vsocde settings, find the c/c++ extension settings, type format in the search box, find the C_Cpp: Clang_format_fallback Style setting, which is an input box that you can output values for including Visual Studio , LLVM , Google , Chromium , Mozilla , WebKit , Microsoft , GNU , none , personally choose Google. please install your personal preference configuration, here is not a detailed description of the individual style settings.
You can also edit the vscode settings json directly, like the following.
Install the C/C++ Advanced Lint for VS Code extension
Open your Vscode, select the extension icon button in the active bar or press the shortcut Ctrl+Shift+X, then search for c++ and click Install.

Configuring C/C++ Advanced Lint for VS Code extension
C/C++ Advanced Lint is just a plugin, the code is analyzed using clang or cppcheck for lint checking. So we also need to install clang and cppcheck programs. For Linux users installing this is also very easy. Just simply execute the following command.
Debian/Ubuntu installation of clang and cppcheck
|
|
macOS
For macOS users, Clang is included with the installation of Xcode and its CLI tools.
|
|
Now, the lint checking tool is installed. But by default, C/C++ Advanced Lint does lint checking for both c/c++. This can lead to some syntax conflicts. Therefore, we need to enable the get close plugin for a specific c project or c++ project. If you are writing c++ or c in one project at the same time. Then you can see for yourself, I believe you are already a big brother.
Next we talk about how to turn on and off the c/c++ lint check. Open the settings of your C/C++ Advanced Lint extension, find the checkbox for C-cpp-flylint ’ Clang: Enable and check the box to enable it. For c++, c++ uses cppcheck. the option to enable or disable lint checking for c++ is C-cpp-flylint ’ Cppcheck: Enable, this one checkbox, check it to enable.
Create a project in c
Use the cd command to switch to your home directory and use the mkdir command to execute mkdir -p c/helloworld to create the folder in which we will create the c project. Next, let’s turn off the c++ lint check for the C/C++ Advanced Lint extension with the option C-cpp-flylint ’ Cppcheck. Next, create a helloworld.c file, and please output the following in the c file.
|
|
Create a c++ language project
Use the cd command to switch to your Home home directory and use the mkdir command to execute mkdir -p cpp/helloworld to create the folder in which we will create the c++ project. Next, we turn off the c lint check for the C/C++ Advanced Lint extension with the option C-cpp-flylint ’ Clang. Next, create a helloworld.cpp file, and please output the following in the helloworld.cpp file.
How to use Vscode to debug c++ projects
Now that we have created the required files for our c++ project, next we have to configure vscode so that vscode can debug c++ code. Create the folder .vscode in your project root directory using the mkdir command: mkdir -p cpp/helloworld/.vscode and create three files c_cpp_properties.json, launch.json and tasks.json with the following contents.
The c_cpp_properties.json file is mainly to configure the path of the include for the c++ project and the version of c/c++ to be used, in this example the standard version of c is c11 and the standard version of c++ is c17. The include path is the standard Linux system header path and all the include directories in the project folder.
|
|
|
|
When all the above files you have created, please press ctrl+shift+b to build the binary of the cpp file first, unpack it and press F5 to start debugging.
Conclusion
At this point, you have basically finished how to build a c/c++ development environment in Linux/MacOS using vscode.