CookieStore API

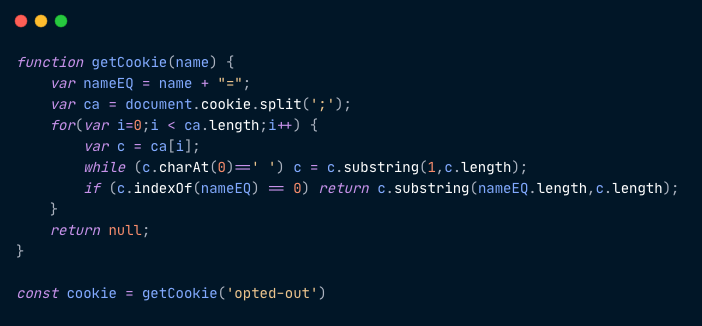
Currently, browsers can store cookie/sessionStorage/localStorage/IndexedDB, all of which expose a very developer friendly API, except for cookies. Think back to how we normally manipulate cookies. For example, if you want to retrieve a cookie, you have to parse it manually to get the value of a cookie because document.cookie returns a string that is the union of all cookies.

image

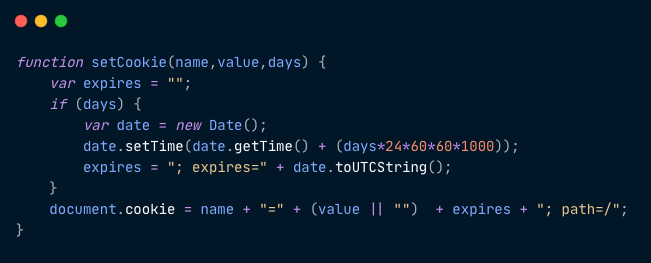
If you want to add a cookie, then you need to convert the cookie to a string and assign it to document.cookie as below.

image

Isn’t it strange that document.cookie is a collection of all cookies, but adding a cookie is a direct assignment to document.cookie? Another oddity is that sometimes adding a cookie doesn’t work at all, but the browser doesn’t give any error messages, so you have to use getCookie after setCookie to see if it works.

1
2
3
4
5
6
setCookie('name', 'value', 1);
if (getCookie('name')) {
  console.log('success to setCookie');
} else {
  console.log('fail to setCookie');
}

However, deleting a cookie is even stranger, as we cannot just delete it, but let it expire.

image

A new CookieStore API has been introduced based on the above issues.

First, a cookieStore object is added to the window, and then get/set/delete methods are mounted on the cookieStore object for the get/add/delete operations of a single cookie. Note that get/set/delete all return a Promise, so exceptions need to be handled.

 1
 2
 3
 4
 5
 6
 7
 8
 9
10
11
12
13
14
15
16
17
18
19
20
21
/** 获取一个 cookie */
try {
  // 根据 name 获取
  const cookie = await window.cookieStore.get('name');
  // 获取根据条件获取
  const cookie = await window.cookieStore.get({
    value: 'xxx',
  });
  if (cookie === null) {
    console.log('name is a emtpy cookie');
  } else {
    console.log(cookie);
    /**
     * cookie 包含以下字段
     * { domain, expires, name, path, sameSite, secure, value }
     * 如果某些字段未设置则为 null
     */
  }
} catch (error) {
  // do with error
}
 1
 2
 3
 4
 5
 6
 7
 8
 9
10
11
12
13
14
/** 添加一个 cookie, 修改一个 cookie 跟之前一样通过覆盖实现 */
try {
  /**
   * 可配置的字段如下
   * { domain, expires, name, path, sameSite, secure, value }
   */
  await window.cookieStore.set({
    name: 'name',
    value: 'value',
    expires: Date.now() + 1000 * 60 * 60 * 24, // 一天后过期
  });
} catch (error) {
  // do with error
}
1
2
3
4
5
6
/** 删除一个 cookie */
try {
  await window.cookieStore.delete('name');
} catch (error) {
  // do with error
}

The cookieStore also provides the getAll method, which is used to obtain a list of cookies.

 1
 2
 3
 4
 5
 6
 7
 8
 9
10
11
12
13
try {
  // 根据 name 获取, 因为 cookie 可以存在同名的 cookie
  const cookieList = await window.cookieStore.getAll('name');
  // 或者根据条件获取
  const cookieList = await window.cookieStore.getAll({
    value: 'xxx',
  });
  // 如果没有条件, 则返回所有 cookie
  const cookieList = await window.cookieStore.getAll();
  // ...
} catch (error) {
  // do with error
}

Previously, the only way to listen for cookie changes was to check for them at regular intervals using a timer, but cookieStore provides the ability to listen for cookie changes directly.

1
2
3
4
5
6
7
cookieStore.addEventlistener('change', (event) => {
  const {
    changed, // 发生变化的 cookie 数组
    deleted, // 删除的 cookie 数组
  } = event;
  // ...
});

Compatibility and reference

Media Session API

If you want to control audio/video on a page, you can only do so by using the browser’s own control component or by implementing your own control component, and you will not be able to control audio/video when the page is unclickable (e.g. switching to another tab or minimizing the browser window).

The Media Session API exposes control of the page audio/video, enabling the system media centre to control the page audio/video, including basic information about the media being played (title/author/cover) and actions (play/pause/fast forward/fast rewind/next media/previous media).

 1
 2
 3
 4
 5
 6
 7
 8
 9
10
11
12
13
14
15
16
17
18
19
20
21
22
import JpegInsomnia from "./static/insomnia_flight.jpeg";

const audio = document.querySelector("audio");

if ("mediaSession" in navigator) {
  // eslint-disable-next-line
  navigator.mediaSession.metadata = new MediaMetadata({
    title: "失眠飞行",
    artist: "接个吻,开一枪,沈以诚,薛明媛",
    artwork: [{ src: JpegInsomnia, sizes: "512x512", type: "image/jpeg" }]
  });
  navigator.mediaSession.setActionHandler("play", () => audio.play());
  navigator.mediaSession.setActionHandler("pause", () => audio.pause());
  navigator.mediaSession.setActionHandler("seekbackward", () => alert("快退"));
  navigator.mediaSession.setActionHandler("seekforward", () => alert("快进"));
  navigator.mediaSession.setActionHandler("previoustrack", () =>
    alert("上一首")
  );
  navigator.mediaSession.setActionHandler("nexttrack", () => alert("下一首"));
} else {
  alert("Your browser do not support mediaSession");
}

Open SandBox

The above example implements a basic MediaSession. The basic information is instantiated by the global object MediaMetadata, where artwork can be set to multiple values, and the browser automatically selects the best size for the scene, which is then assigned to navigator.mediaSession.metadata. Media control is set via the navigator.mediaSession.setActionHandler method, with play/pause/seekbackward/seekforward/previoustrack/nexttrack corresponding to play/pause/nexttrack respectively. play/pause/seekbackward/seekforward/previoustrack/nexttrack` operations. Once the media has been played, the browser maps the basic information and actions to the system and provides the corresponding action menus in the system.

Under Windows 10, for example, the Media Control Panel appears near the volume control.

image

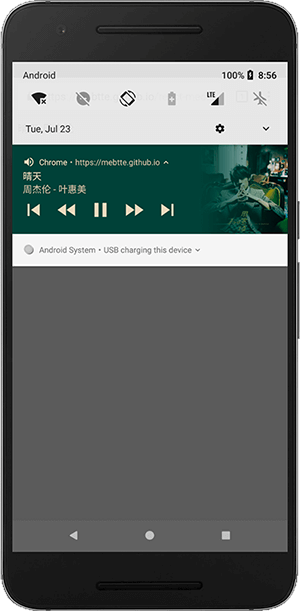
On Android, the Media Control Panel will appear in the status bar.

image

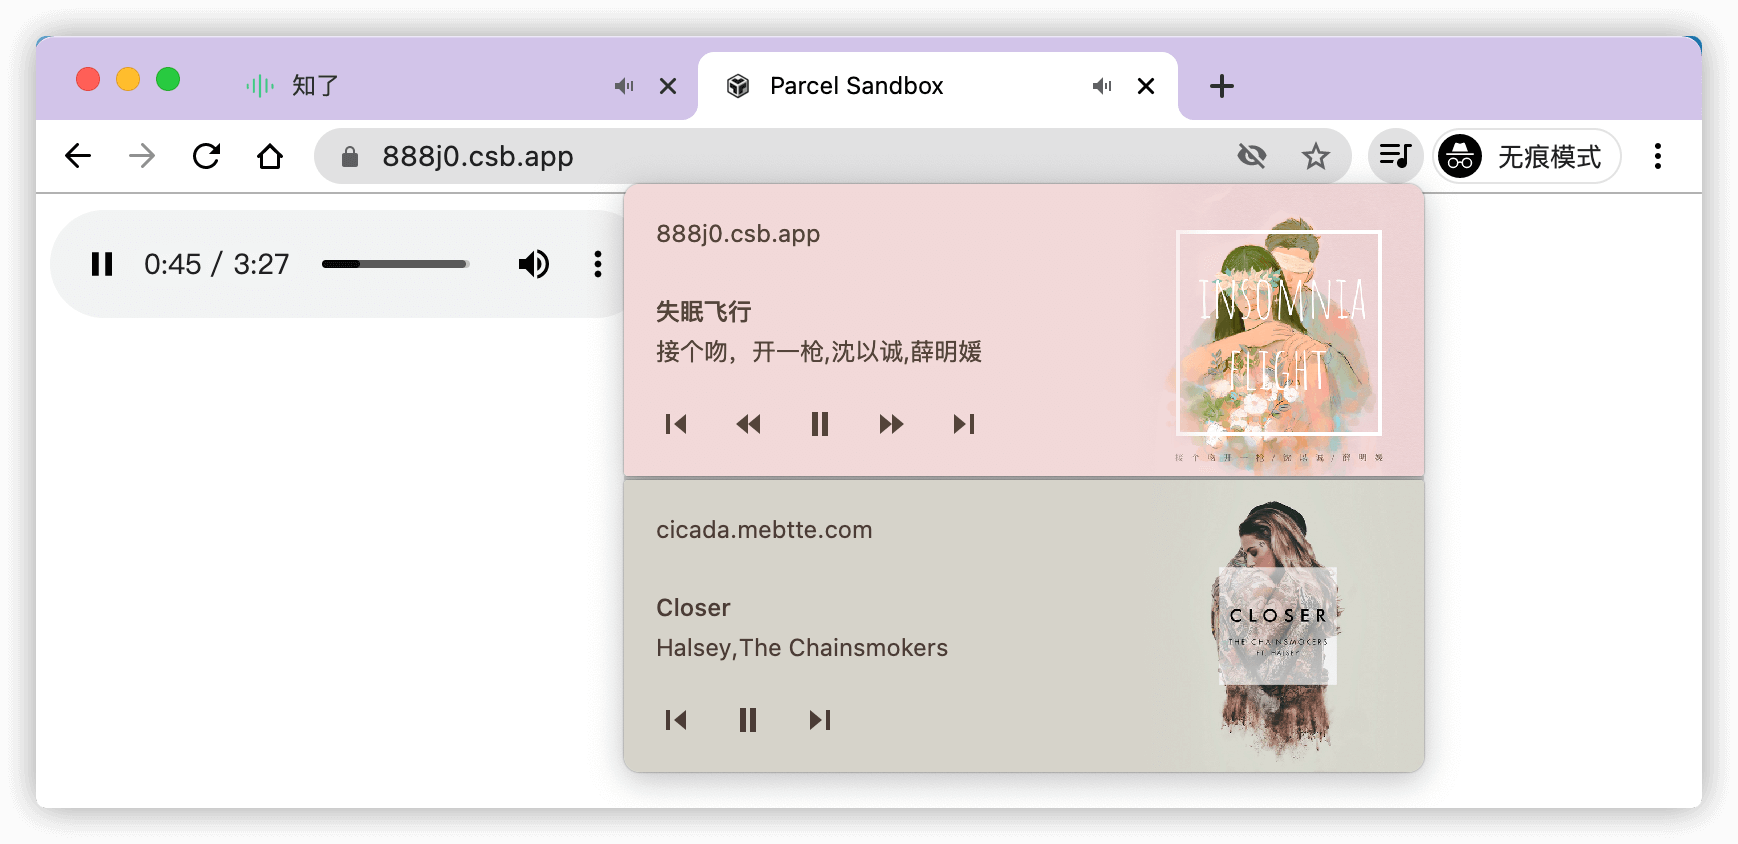
The Media Control Panel also appears in the header of some browsers.

image

Compatibility and reference

Shape Detection API

QR codes are everywhere nowadays, but recognising them on the web is not an easy task, either by uploading them to the backend for parsing or by using complex JS libraries. The new BarcodeDetector feature provides a user-friendly API to recognize QR codes locally without the backend.

To use BarcodeDetector you first need to instantiate it, and then pass the image data to the detect method of the instance, which is an asynchronous operation, so the return value is a Promise. Also, a single image may contain multiple QR codes, so the result is an array.

 1
 2
 3
 4
 5
 6
 7
 8
 9
10
11
12
13
14
15
16
17
18
19
20
21
22
23
24
25
26
27
28
29
30
31
32
33
34
35
36
37
38
39
40
41
42
43
44
45
46
47
48
49
50
51
52
53
54
55
56
57
58
59
60
61
62
63
/* global BarcodeDetector */
if (!("BarcodeDetector" in window)) {
  document.write("Your browser do not support BarcodeDetector.");
} else {
  const loadImage = (url) =>
    new Promise((resolve, reject) => {
      const img = document.createElement("img");
      img.src = url;
      img.onload = () => resolve(img);
      img.onerror = () =>
        reject(new Error(`Can not load image from '${url}'.`));
    });

  const localDetectButton = document.querySelector("#local-detect");
  localDetectButton.addEventListener("click", async () => {
    localDetectButton.disabled = true;
    localDetectButton.textContent = "识别中...";

    try {
      const barcodeDetector = new BarcodeDetector();
      const barcodes = await barcodeDetector.detect(
        document.querySelector("#local-img")
      );
      console.log("识别结果:");
      console.log(barcodes);
      alert(`识别结果: ${barcodes.map((b) => b.rawValue).join(", ")}`);
    } catch (error) {
      alert(error.message);
    }

    localDetectButton.disabled = false;
    localDetectButton.textContent = "识别左侧二维码";
  });

  const uploadInput = document.querySelector("#upload");
  const uploadDetectButton = document.querySelector("#upload-detect");

  uploadDetectButton.addEventListener("click", async () => {
    const file = uploadInput.files[0];
    if (!file) {
      return;
    }

    uploadDetectButton.disabled = true;
    uploadDetectButton.textContent = "识别中...";

    try {
      const url = URL.createObjectURL(file);
      const image = await loadImage(url);
      URL.revokeObjectURL(url);
      const barcodeDetector = new BarcodeDetector();
      const barcodes = await barcodeDetector.detect(image);
      console.log("识别结果:");
      console.log(barcodes);
      alert(`识别结果: ${barcodes.map((b) => b.rawValue).join(", ")}`);
    } catch (error) {
      alert(error.message);
    }

    uploadDetectButton.disabled = false;
    uploadDetectButton.textContent = "识别二维码";
  });
}

Open SandBox

BarcodeDetector not only recognises 2D codes, but also supports various barcode formats, including aztec / code_128 / code_39 / code_93 / codabar / data_matrix / ean_13 / ean_8 / itf / pdf417 / qr_code / upc_a / upc_e . BarcodeDetector recognises all barcode formats by default, if you only want to recognise certain formats, you can specify this when instantiating:

1
2
3
const detector = new BarcodeDetector({
  formats: ['qr_code', 'codabar'], // 只识别图片中的 qr_code 和 codebar
});

The BarcodeDetector is part of the Shape Detection API, in addition to the TextDetector and the FaceDetector, which correspond to text recognition and face recognition respectively, the following is an example of text recognition

TextDetector is not yet stable, so it may not be able to recognize text on canvas, and uploaded images may not be recognized accurately.

 1
 2
 3
 4
 5
 6
 7
 8
 9
10
11
12
13
14
15
16
17
18
19
20
21
22
23
24
25
26
27
28
29
30
31
32
33
34
35
36
37
38
39
40
41
42
43
44
45
46
47
48
49
50
51
52
53
54
55
56
57
58
59
60
61
62
63
64
65
66
67
68
69
/* global fabric, TextDetector */
import "./index.scss";

if (!("TextDetector" in window)) {
  document.write("Your browser do not support TextDetector.");
} else {
  const loadImage = (url) =>
    new Promise((resolve, reject) => {
      const img = document.createElement("img");
      img.src = url;
      img.onload = () => resolve(img);
      img.onerror = () =>
        reject(new Error(`Can not load image from '${url}'.`));
    });

  const canvas = new fabric.Canvas("canvas", {
    isDrawingMode: true,
    width: 500,
    height: 250
  });
  canvas.freeDrawingBrush.width = 10;
  const canvasDetectButton = document.querySelector("#canvas-detect");

  document
    .querySelector("#clear")
    .addEventListener("click", () => canvas.clear());
  canvasDetectButton.addEventListener("click", async () => {
    canvasDetectButton.disabled = true;
    canvasDetectButton.textContent = "识别中...";

    try {
      const dataUrl = canvas.toDataURL({ format: "png" });
      const image = await loadImage(dataUrl);
      const texts = await new TextDetector().detect(image);
      console.log("识别结果:");
      console.log(texts);
    } catch (error) {
      alert(error.message);
    }

    canvasDetectButton.disabled = false;
    canvasDetectButton.textContent = "识别文本";
  });

  const uploadDetectButton = document.querySelector("#upload-detect");
  uploadDetectButton.addEventListener("click", async () => {
    const uploadFile = document.querySelector("#upload").files[0];
    if (!uploadFile) {
      return;
    }

    uploadDetectButton.disabled = true;
    uploadDetectButton.textContent = "识别中...";

    try {
      const url = URL.createObjectURL(uploadFile);
      const image = await loadImage(url);
      URL.revokeObjectURL(url);
      const texts = await new TextDetector().detect(image);
      console.log("识别结果:");
      console.log(texts);
    } catch (error) {
      alert(error.message);
    }

    uploadDetectButton.disabled = false;
    uploadDetectButton.textContent = "识别文本";
  });
}

Open SandBox

Compatibility and reference

Top-level await

Previously the await keyword was only allowed inside the async function, top-level await allows us to use the await keyword directly outside the async function.

1
2
3
4
5
6
// module-a.js
(async function() {
  const { default: axios } = await import('axios');
  const response = await axios.request('https://registry.npm.taobao.org/react');
  console.log(response.data.name); // react
})();

Use the script above top-level await to directly remove the async function .

1
2
3
4
// module-a.js
const { default: axios } = await import('axios');
const response = await axios.request('https://registry.npm.taobao.org/react');
console.log(response.data.name); // react

If a module uses top-level await , then other modules that refer to it will wait for it to resolve .

 1
 2
 3
 4
 5
 6
 7
 8
 9
10
11
12
// a.js
console.log(1);
const { default: axios } = await import('axios');
const response = await axios.request('https://registry.npm.taobao.org/react');
console.log(2);

export default response.data.name;

// b.js
import name from './a.js';

console.log(name); // react

In the above code, the output order is 1 2 react, which means that the b module will wait for the a module to resolve before it continues to execute. Similarly, when the a module reject, the b module will not work properly. For the b module to work properly, an error handler needs to be added to the a module.

 1
 2
 3
 4
 5
 6
 7
 8
 9
10
11
12
13
14
15
16
// a.js
let name = 'default name';

try {
  const { default: axios } = await import('axios');
  const response = await axios.request('https://registry.npm.taobao.org/react');
} catch (error) {
  // do with error
}

export default name;

// b.js
import name from './a.js';

console.log(name); // 没有发生错误输出 react, 发生错误输出 default name

The top-level await is ideal for certain scenarios.

Conditional introduction of modules

We know that static import does not allow for conditional import, for example the following code is not legal.

1
2
3
4
5
if (process.env.NODE_ENV === 'production') {
  import a from 'a.js';
} else {
  import a from 'a_development.js';
}

Conditional static imports can be simulated by using top-level await in conjunction with dynamic import.

1
2
3
4
5
6
7
let a;

if (process.env.NODE_ENV === 'production') {
  a = await import('a.js');
} else {
  a = await import('a_development.js');
}

Dependency fallback

When we introduce a static module, if the module fails to load, then all other modules that reference it will not work properly.

1
2
3
4
import $ from 'https://cdn.example.com/jquery.js';

// 如果 https://cdn.example.com/jquery.js 加载失败, 那么下面的代码都无法正常工作
// do with $

Dependency fallback can be achieved with top-level await and dynamic import.

 1
 2
 3
 4
 5
 6
 7
 8
 9
10
11
12
13
14
// jquery_wrapper.js
let $;
try {
  $ = await import('https://cdn_a.example_a.com/jquery.js');
} catch (error) {
  $ = await import('https://cdn_b.example_b.com/jquery.js');
}

export default $;

// example.js
import $ from 'path_to/jquery_wrapper.js';

// do with $

Resource initialization

Previously, when a resource needed to be initialized asynchronously, it was usually written in the following way.

 1
 2
 3
 4
 5
 6
 7
 8
 9
10
11
12
13
14
15
16
17
// ws.js
let ws;

async function getWs() {
  if (!ws) {
    const url = await getUrl();
    ws = new Websocket(url);
  }
  return ws;
}

export default {
  sendMessage: async (message) => {
    const ws = await getWs();
    return ws.sendMessage(message);
  },
};

Note that the above code is only an example, there is a lot of error handling required in practice

In the above code, the synchronous sendMessage method is forced to become asynchronous by the asynchronous getWs method, which can be avoided by using top-level await.

1
2
3
4
const url = await getUrl();
const ws = new Websocket(url);

export default ws;

Compatibility and reference

BigInt

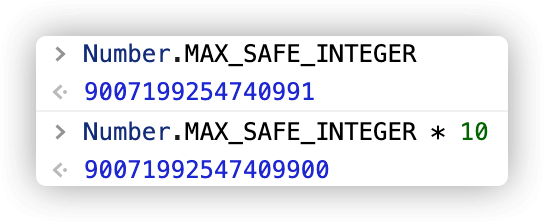
In JavaScript, the range of integers is [Number.MIN_SAFE_INTEGER, Number.MAX_SAFE_INTEGER], which is from the 53rd power of minus 2 minus 1 to the 53rd power of 2 minus 1, outside of which precision is not guaranteed, for example:

image

If you want to accurately represent integers beyond SAFE_INTEGER, it is common to convert them to strings and then implement various string operations (I’m sure many of you have done the algorithm for adding strings of numbers, e.g. '123' + '789' = '912').

BigInt can represent an arbitrarily large integer, even if it is outside the range of SAFE_INTEGER, to ensure precision. A BigInt can be declared by adding n to the number or by using the BigInt method:

1
2
3
const a = 123n;
const b = BigInt(123);
const c = BigInt('123');

The above a / b / c all represent 123n . BigInt supports the + / - / * / / / ** / % operators, but cannot be mixed with other types:

 1
 2
 3
 4
 5
 6
 7
 8
 9
10
11
12
13
14
15
16
const a = 1n + 2n; // 3n
const b = 2n - 1n; // 1n
const c = 3n * 3n; // 9n
const d = 4n / 2n; // 2n
const e = 2n ** 2n; // 4n
const f = 5n % 3n; // 2n

/** 除数不能为 0n */
const g = 2n / 0n; // Uncaught RangeError: Division by zero

/** 不能与其他类型运算 */
const h = 2n + 1; // Uncaught TypeError: Cannot mix BigInt and other types

/** 运算结果将会忽略小数 */
const i = 3n / 2n; // 1n
const k = -3n / 2n; // -1n

BigInt can be converted to number, and if BigInt exceeds the range of SAFE_INTER, then the converted number will lose precision:

1
2
3
const a = BigInt(Number.MAX_SAFE_INTEGER);
const b = a + a;
const c = Number(b); // c 不能保证准确

BigInt also supports comparison operations, and can be compared with number:

1
2
3
4
5
6
7
/** 与 number 不严格相等 */
1n == 1; // true
1n === 1; // false

2n > 1; // true
2 > 1n; // true
2n >= 2; // true

BigInt also has some limitations, firstly it does not support calling methods on Math objects, and secondly it does not support JSON.stringify, so if you want to serialize it, you can implement the toJSON method of BigInt:

1
2
3
4
5
6
BigInt.prototype.toJSON = function() {
  // BigInt toString 不会带上 n, 例如 2n.toString() === '2'
  return this.toString();
};

JSON.stringify({ value: 2n }); // { "value": "2" }

Note that BigInt is a normal method like Symbol, not a constructor, so it cannot be instantiated by new:

1
const a = new BigInt(1); // Uncaught TypeError: BigInt is not a constructor

JavaScript has 7 data types undefined / null / boolean / number / string / symbol / object , BigInt is the 8th data type, the value of typeof 1n is bigint , and is a basic type.

Compatibility and reference

Number separators

Often, if a number is unusually large, we add separators to the display to make it more readable:

image

is now usually a thousand-digit separator, supposedly derived from the English thousond/million/billion/trillion/…, with a proper noun for each additional 3 digits (https://en.wikipedia.org/wiki/Namesoflarge_numbers). For me it’s more of a ten-thousand separator, probably because I got used to it in primary school maths.

But at JavaScript level, we can only concatenate numbers no matter how big they are, e.g. 1032467823482.32134324, which requires careful counting to get the exact value.

Now, the Numeric separators feature allows the insertion of _ separators between numeric literals to make them more readable.

1
2
const a = 123_456;
const b = 123.345_789;

_ The separator can appear in the integer part, or in the decimal part. In addition to decimal, separators can also appear in other decimal systems

1
2
3
const a = 0b101_101; // 二进制
const b = 0o765_432; // 八进制
const c = 0xfed_dba_987; // 十六进制

The above code adds separators every 3 digits, however, it is important to note that separators can only be added between numbers, not at the beginning/end of numbers/binary symbols/decimal points/scientific notation, and not two separators in a row, as the following separator positions are wrong.

 1
 2
 3
 4
 5
 6
 7
 8
 9
10
11
12
_123; // 开头, 这其实是一个合法的变量名
123_; // 结尾

/** 进制标志 */
0_b101; // 进制中间
0x_fd9; // 进制后面

/** 科学计数法 */
1.23_e14; // 科学计数法前面
1.23e_14; // 科学计数法后面

123__456; // 连续两个分隔符

The number separator is only there to improve readability and has no real meaning; numbers with a separator are converted to strings without the separator. Similarly, strings with _ are not converted to numbers correctly

1
2
3
4
(123_456.123_456).toString(); // 123456.123456
Number('123_456.123_456'); // NaN
Number.parseInt('123_456', 10); // 123
Number.parseFloat('123_456.123_456', 10); // 123

In addition, the number separator also applies to the BigInt mentioned above.

Compatibility and references

New syntax for CSS colour methods

There are 4 colour methods in CSS, rgb / rgba / hsl / hsla . Previously, the arguments to each method were separated by a comma, but now the new syntax for rgb / hsl allows the comma to be omitted and the arguments to be separated by a space.

1
2
3
4
5
6
7
color: rgb(1, 2, 3);
/* 等同于 */
color: rgb(1 2 3);

color: hsl(1, 2%, 3%);
/* 等同于 */
color: hsl(1 2% 3%);

While omitting the comma, rgb / hsl both support the 4th parameter, indicating transparency, thereby replacing rgba and hsla .

1
2
3
4
5
6
7
color: rgba(1, 2, 3, 0.4);
/* 等同于 */
color: rgb(1 2 3 / 0.4);

color: hsla(1, 2%, 3%, 0.4);
/* 等同于 */
color: hsl(1 2% 3% / 0.4);

Where, the spaces on either side of / are optional.

Compatibility and references

aspect-ratio

If you want to achieve a rectangle with a specified ratio, you usually use padding, which takes advantage of the fact that the percentage is calculated based on the width of the parent element, but the real content often needs to be placed in an additional child element and absolute positioning needs to be set:

 1
 2
 3
 4
 5
 6
 7
 8
 9
10
11
12
13
14
15
16
17
18
19
<!-- 4 / 1 的矩形 -->
<style>
  .container {
    padding-bottom: 25%;
    background-color: pink;
    position: relative;
  }
  .content {
    position: absolute;
    top: 0;
    left: 0;
    width: 100%;
    height: 100%;
  }
</style>

<div class="container">
  <div class="content">内容内容内容</div>
</div>

The aspect-ratio property allows us to set the aspect ratio of an element directly. The example above using aspect-ratio would look like this

1
2
3
4
5
6
7
8
<style>
  .content {
    background-color: pink;
    aspect-ratio: 4 / 1;
  }
</style>

<div class="content">内容内容内容</div>

Compatibility and reference

gap

The grid-gap property can be used to set row-to-row and column-to-column gaps in the grid layout, but now the gap property can be used directly instead of grid-gap, and the gap property adds support for flex and column-count.

 1
 2
 3
 4
 5
 6
 7
 8
 9
10
11
12
13
14
15
16
17
18
19
20
21
22
23
24
25
26
27
28
29
30
31
32
33
34
35
36
37
38
39
40
41
42
43
44
45
46
47
48
49
<!DOCTYPE html>
<html>
  <head>
    <title>Gap Property</title>
    <meta charset="UTF-8" />
  </head>

  <body>
    <style>
      .flex-container {
        background: pink;
        width: 300px;
        display: flex;
        flex-wrap: wrap;
        gap: 20px 10px;
      }
      .flex-item {
        background: green;
        width: 145px;
        height: 20px;
      }
    </style>
    <div class="flex-container">
      <div class="flex-item"></div>
      <div class="flex-item"></div>
      <div class="flex-item"></div>
      <div class="flex-item"></div>
      <div class="flex-item"></div>
      <div class="flex-item"></div>
      <div class="flex-item"></div>
    </div>

    <style>
      .multi-column-container {
        column-count: 4;
        gap: 30px;
      }
    </style>
    <p class="multi-column-container">
      这是一段内容, 这是一段内容, 这是一段内容, 这是一段内容, 这是一段内容,
      这是一段内容, 这是一段内容, 这是一段内容, 这是一段内容, 这是一段内容,
      这是一段内容, 这是一段内容, 这是一段内容, 这是一段内容, 这是一段内容,
      这是一段内容, 这是一段内容, 这是一段内容, 这是一段内容,
      这是一段内容,这是一段内容, 这是一段内容, 这是一段内容, 这是一段内容,
      这是一段内容, 这是一段内容, 这是一段内容, 这是一段内容, 这是一段内容,
      这是一段内容.
    </p>
  </body>
</html>

Open SandBox

Compatibility and reference

CSS math functions

The calc method can be used to perform mathematical calculations in CSS, and now there are three new methods min / max / clamp .

The min method takes one or more values and returns the smallest of them, e.g. width: min(1vw, 4rem, 80px); , if the width of viewport is equal to 800px , then 1vw === 8px , 4rem === 64px , so the result is width: 1vw; .

The max method takes one or more values and returns the maximum of them, in the example above, the result is width: 80px; .

The clamp method takes 3 values clamp(MIN, VAL, MAX) , from left to right they are min/preferred/max values, if the preferred value is less than the min value then the min value is returned, if it is greater than the max value then the max value is returned, if the preferred value is between the min and max values then the preferred value is returned, the logic can be expressed in JS like this

 1
 2
 3
 4
 5
 6
 7
 8
 9
10
11
12
function clamp(min, val, max) {
  // 小于最小值的话返回最小值
  if (val < min) {
    return min;
  }
  // 大于最大值的话返回最大值
  if (val > max) {
    return max;
  }
  // 介于最小值和最大值, 返回首选值
  return val;
}

That is, clamp limits the range of values of VAL, e.g. width: clamp(1rem, 10vw, 2rem); where the width of viewport is equal to 800px, the result is width: 2rem; , because (10vw = 80px) > (2rem = 32px) .

Interestingly, min / max / clamp can also be nested with other methods, such as clamp(1rem, calc(10vw - 5px), min(2rem, 20vw)) , so clamp can be written as max(MIN, min(VAL, MAX)) or min(MAX, max (VAL, MIN)) .

Compatibility and reference