Raspberry Pi is the most popular single-board computer ever made. It can be used for a variety of purposes such as desktops, home media centers, smart Wi-Fi routers, automation systems, and gaming servers. The use cases are endless.
If your Raspberry Pi does NOT have an SD card with NOOBS pre-installed, you will need to manually install the OS on the SD card. You can run many different operating systems on your Raspberry Pi, including Windows 10 IoT, FreeBSD, and various Linux distributions such as Arch Linux and Raspbian .
This tutorial explains how to install Ubuntu on a Raspberry Pi. Ubuntu is the most popular Linux distribution and runs on a variety of hardware, from high-end computers to small devices such as the Raspberry Pi.
Installing Ubuntu is as easy as writing an OS image file to an SD card. We will show you how to install the Ubuntu image, boot up the Raspberry Pi and connect it to the Internet.
Write image to SD card
There are several freely available applications that will write your ISO image to the SD card. In this tutorial, we will use Raspberry Pi Imager.
Raspberry Pi Imager is an open source program for writing the operating system running on your Raspberry Pi to the SD card. It is available for Windows, macOS and Ubuntu.
Go to the Raspberry Pi download page, download the latest version of Imager for your operating system, and then install the application.
Please note that writing the image to the SD card is a destructive process that will delete all existing data. If you have data on your SD card, please make a backup of it first.
Insert the SD card into the SD card drive and launch the Raspberry Pi Imager application.
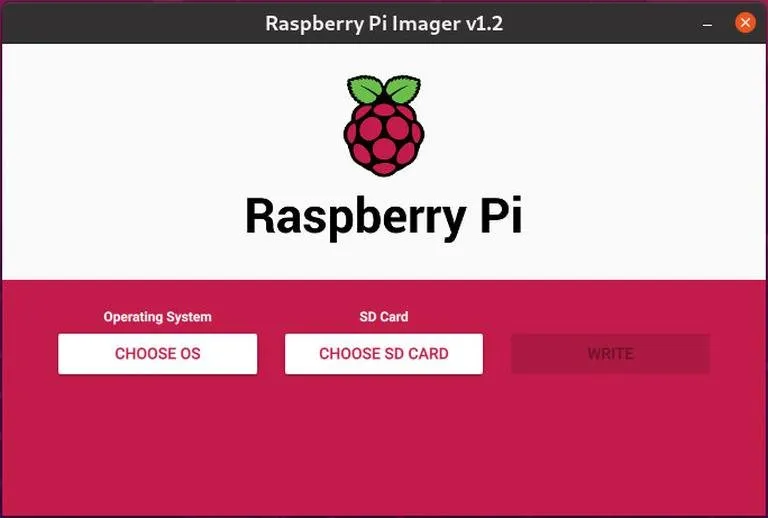
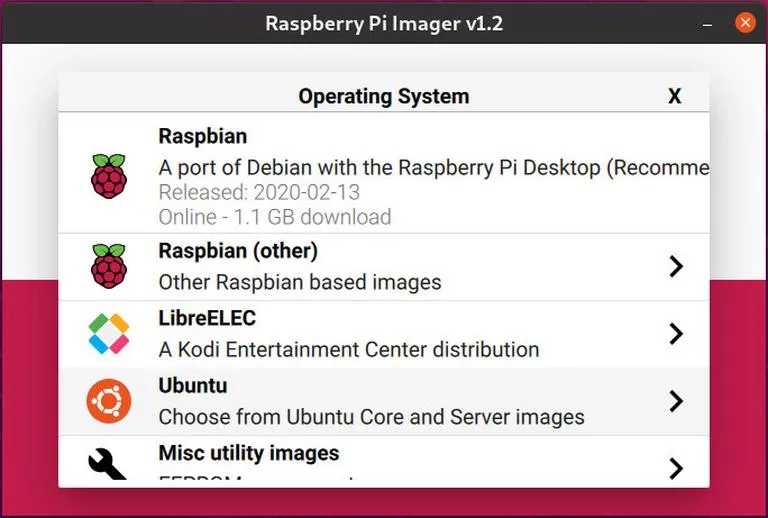
Click the “Select OS” button to open the menu for selecting an operating system. Scroll down and click on “Ubuntu”.
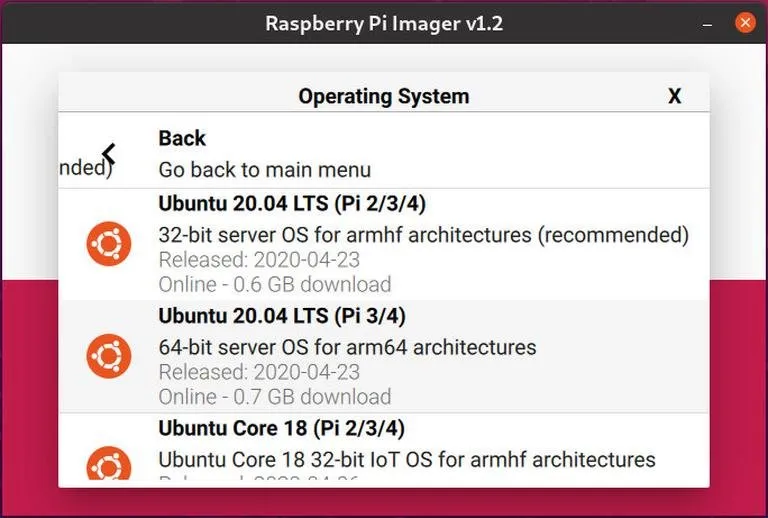
You will see a list of available Ubuntu mirrors. Choose a mirror based on your Pi version. In this guide, we will use a Raspberry Pi 4 with 4GB of RAM and select Ubuntu 20.04 64-bit.
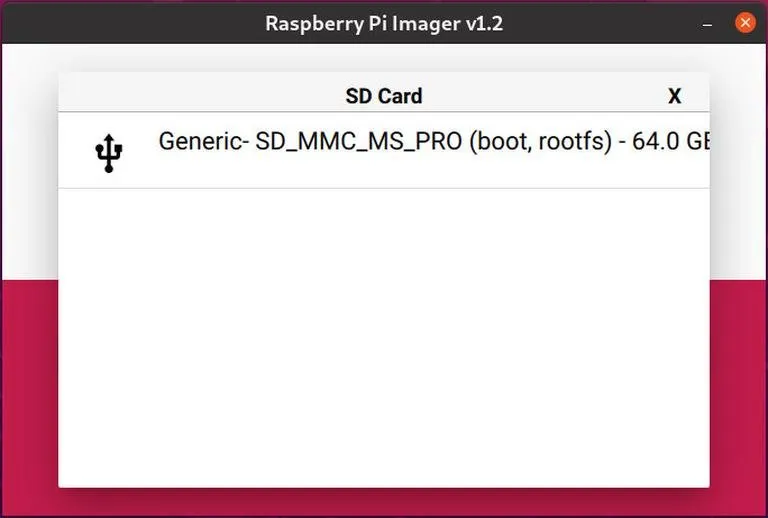
Click the “Select SD card” button and then select your inserted SD card in the new menu. If there are multiple SD cards attached to your system, make sure you select the correct drive before writing the image.
By clicking the “WRITE” button, Raspberry Pi Imager will download the selected image and start the writing process.
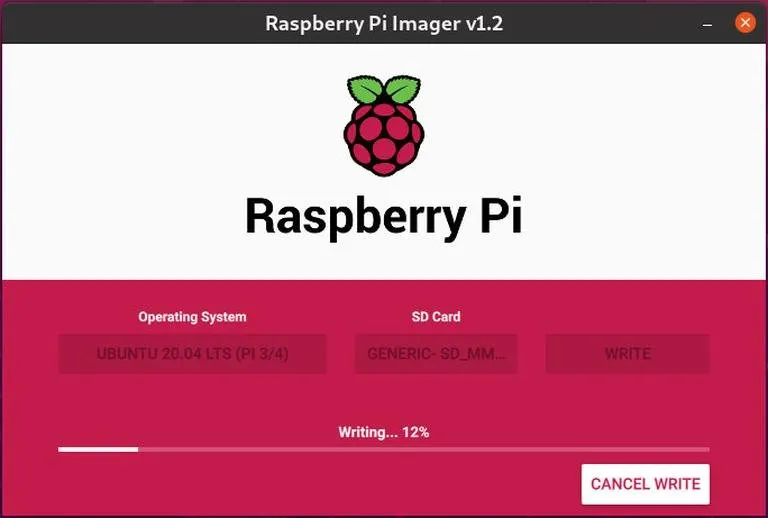
Depending on the file size and the speed of the memory card, this process may take a few minutes.
Upon success, the application will display the following message.
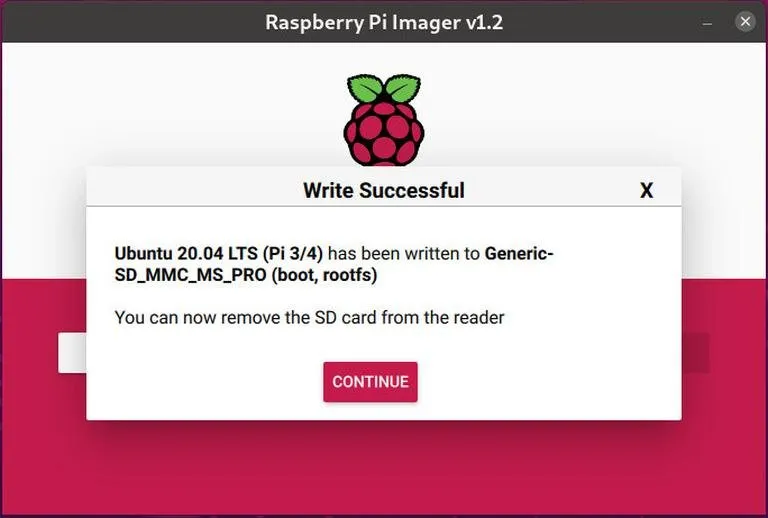
Now! You have bootable Ubuntu on your SD card.
Network Configuration
You can connect your PI to the Internet using either Ethernet or Wi-Fi. To use a wired connection, connect your Raspberry Pi to your home router using a cable, and then skip the subsequent steps in this section.
To connect your Pi to the network wirelessly at boot time, you will need to edit the network profile and enter the Wi-Fi information.
If you have removed the SD card from your computer’s card reader, reinsert it. The SD card will be installed automatically.
Use the OS file manager to navigate to the system-boot partition on the SD card.
Open the network-config file and update it with the Wi-Fi credentials. For example, if your wifi network name is “my-router” and the wifi password is “S3kr1t”, you can edit the file as follows: network-config
Save the file and delete the SD card from your computer. At startup, your Pi will automatically connect to the specified network.
Booting the Raspberry Pi
You can use your Raspberry Pi as a machine without a GUI and connect to it via SSH or plug in an HDMI display.
Place the SD card into your Raspberry Pi and turn on the power. If you are also using a monitor and keyboard, plug them in before powering up the Raspberry Pi board.
The default username is ubuntu and the password is ubuntu.
It may take a few minutes for the Pi to boot up. Once online, you can find the Raspberry Pi IP address in the router’s DHCP lease table and then log in to Ubuntu via ssh.
|
|
The first time you log in, you will be asked to change your ubuntu user password.
Conclusion
Installing Ubuntu on your Raspberry Pi is a very simple process. All you need to do is write the image to the SD card and boot the Raspberry Pi.