This tutorial is an introductory level tutorial for newcomers. The tutorial references the official documentation.
It is assumed that you already have the necessary development environment such as node, npm (or yarn) installed.
I. JavaScript’s Compiler
Babel is a compiler for JavaScript. I don’t think the word compiler is very accurate to describe Babel, because JavaScript doesn’t need to be pre-compiled to run like C++ or C#, JavaScript is an interpreted language.
The main roles of Babel are as follows.
- Convert syntax.
- Pre-population, which allows running programs with new functions in environments that do not support some of them, thanks to third-party libraries (e.g. core-js).
- Source code conversion.
- Other functions.
For example, using Babel, you can convert arrow functions to normal functions.
II. Using the command line for compilation
All Babel packages are published on npm and prefixed with the name @babel (since version 7.0). Next, let’s look at the packages @babel/core and @babel/cli together.
Core library - @babel/core
core, which means core in Chinese. Encapsulates the core functionality of Babel. Can already be installed via npm or yarn.
Install @babel/core into the development dependency with the above command, because the production environment does not need @babel/core and the main function of @babel/core is to convert the code (compile the code).
Once installed, we can introduce the babel module directly into the js code for converting code.
The first parameter of the transformSync function is the code to be transformed, the second parameter is optional and is used to set the configuration of the babel.
Command Line Tools - @babel/cli
The CLI is called Command Line Interface, i.e. Command Line Interface. With @babel/cli, we can use babel from the command line.
Install @babel/cli via yarn or npm.
After installation, the code can be compiled from the command line.
|
|
This command calls the . /node_modules/.bin file and the babel script, which runs babel and compiles the code with src as the source path and the -out-dir option setting the output directory to lib. The successful compilation outputs the following message.

We set the output directory using the -out-dir configuration option, and @babel/cli supports other configuration options, which can be viewed via --help.
|
|

After executing the command, a list of options will be output with all the configurable options of the CLI, but for now we are only interested in the two most important configuration options --plugins and --presets (plugins and predefined configurations).
III. Plug-ins and predefined configurations
Plugins
Plugins are javascript programs that instruct babel how to transform code. You can write your own plugins or use plugins written by others. For example, the official plugin @babel/plugin-transform-arrow-functions is used to convert ES2015+ arrow functions to functions in the form of the function keyword.
Install @babel/plugin-transform-arrow-functions.
Use the --plugins configuration option to set up compilation with @babel/plugin-transform-arrow-functions.
|
|
After executing the command, all arrow functions in your source code will be converted to functions defined by the function keyword.
Great, we already know what a plugin is and how to configure it for use, that’s great. But what if there are many plugins, wouldn’t it be a pain to add each one to the command line. Fortunately the CLI provides the -presets option to combine multiple plugins.
Predefined configurations
As with plugins, you can create your own predefined configurations for sharing plugin combinations.
The official predefined configuration @babel/preset-env has already been provided for us.
Install it with the following command.
Specify the use of predefined configurations with the -presets option.
|
|
There is no need for us to set additional configuration, @babel/env contains plugins that support all modern JavaScript (ES2015, ES2016, etc.). The predefined configuration also supports option configuration, where the options for the predefined configuration are set via the configuration file.
IV. Configuration files
First, create a babel.config.json file in the project directory (requires v7.8.0 and higher) and add the following.
With this configuration file, @babel/env will load the plugin only for the browsers with targets configured in the json file. If a syntax of a modern JavaScript (ES2015, ES2016, etc.) is not supported in the target browser, the corresponding plugin will be loaded for the conversion when performing the babel conversion.
V. Polyfill
The MDN glossary explains that.
Polyfill is a piece of code (usually JavaScript on the Web) that is used to provide newer functionality to older browsers that it does not natively support.
I’ll translate this as prefill. The main purpose is that certain newer syntax, which browsers don’t yet support natively, is used so that developers can use the new syntax directly without having to consider whether the browser already supports it. The syntax here is not the same as arrow functions and function keywords, it refers to “functions”, such as Promise, WeakMap, Array.from or Object.assign and so on.
I remember a project where QQ browser did not support the String.prototype.replaceAll method, causing the project to run with errors on QQ browser, if you use the pre-fill function, you should be able to solve the problem. (For those who are interested, try to see if the String.prototype.replaceAll method is currently supported by QQ browser).
Install.
Note: The
-saveoption here installs into production dependencies, not development dependencies (be careful).
Once the installation is complete, open the node_modules/@babel/polyfill/package.json file and you will see a core-js package in the dependencies.
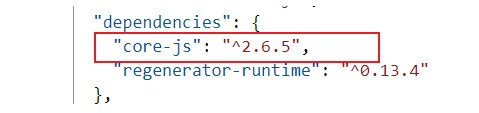
core-js is a modern javascript syntax library, @babel/polyfill is prefilled using core-js, you can also bring in the functionality you need directly from core-js functions you need.
The env predefined configuration has a "useBuiltIns" option, which if set to "usage" will prefill with the latest features and bring in the corresponding features in the module file that needs a certain feature.
Suppose you have the following code.
|
|
The code after conversion using babel is as follows.
If you don’t set "useBuiltIns": "usage" , you need to set "useBuiltIns": "entry" so that the compiled file will introduce the function module in the entry file, if you don’t set the "useBuiltIns" option, the compiled file will not introduce any new function module.