GitHub Actions has grown in popularity since GitHub announced its availability on the platform for all developers and repositories. Many third-party platforms have speed and other limitations in the ecosystem that will further push developers to migrate their software automation to GitHub Actions.
In this article, I want to show you how I use GitHub Actions to publish npm packages that I maintain in open source projects. If you follow the GitHub process, which consists of a GitHub pull request workflow, this will further unify the workflow and improve the experience for your team and community contributors.
GitHub Actions
GitHub Actions is a technology developed by GitHub to provide developers with a way to automate their workflows around continuous integration - helping them build, deploy, schedule recurring tasks, etc. GitHub Actions is natively available and integrated into the GitHub repository repository, and features many reusable workflows from community contributors, such as publishing npm packages, publishing docker images, running security tests, and more.
Github Actions is essentially a continuous integration tool from Github. Each time you commit code to a Github repository, Github automatically creates a virtual machine (e.g. Mac / Windows / Linux) to execute one or more instructions, such as:
The way we integrate Github Action is to create a .github folder in the root of our repository and put a *.yaml file inside, which is the file we use to configure Github Action.
Github Action usage limits
- Each job in a Workflow can be executed for a maximum of 6 hours
- Each Workflow can execute for up to 72 hours
- A maximum of 24 hours per Workflow job can be queued
- Up to 1000 API requests in an hour across all Actions in a repository
- Number of concurrent jobs: Linux: 20, Mac: 5
What is GitHub Workflow?
A GitHub workflow is a set of jobs that run on a trigger-based or cron-based schedule. A job consists of one or more steps that make up an automated workflow. We create Workflow configurations by creating YAML files.
Building Npm package continuous integration from scratch
After understanding the basics, I will take you through a practical project to quickly get started with Github Action. The ultimate goal: after pushing our code to github, we will automatically package the project with Github Action and publish it to npm and a Github Page website with one click.

Obtaining an Npm Access Token
To give Github Action the right to publish specific npm packages, you need to get an npm access token. This access token is the npm token, so we need to login to the npm website and generate a token.

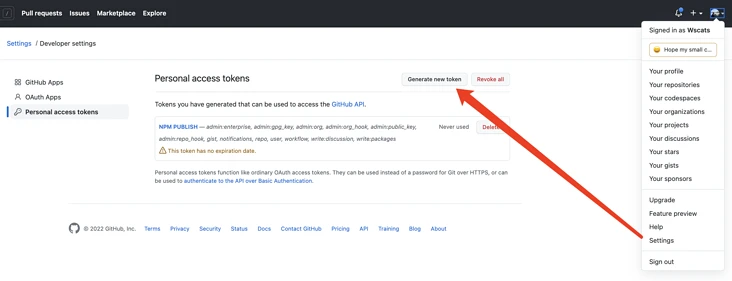
Get Personal Access Token
Click Generate new token to generate a new token and copy it. Note that this Personal Access Token, like the Npm Access Token above, will only be displayed when it is successfully generated and cannot be viewed once you exit.
Setting up a Github Secret
After we get the npm token, we open the Github repository of the corresponding project, switch to the settings panel, find the secrets submenu, create a new secret, copy the npm token to the content area and name it.

Fill in the Name and Value fields, Name for ACCESS_TOKEN and NODE_AUTH_TOKEN, and Value for the Personal Access Token and Npm Access Token values you just saved.
| Token Name | Key | Vale |
|---|---|---|
| Personal Access Token | ACCESS_TOKEN | ${{ secrets.ACCESS_TOKEN }} |
| Npm Access Token | NODE_AUTH_TOKEN | ${{secrets.NPM_TOKEN}} |
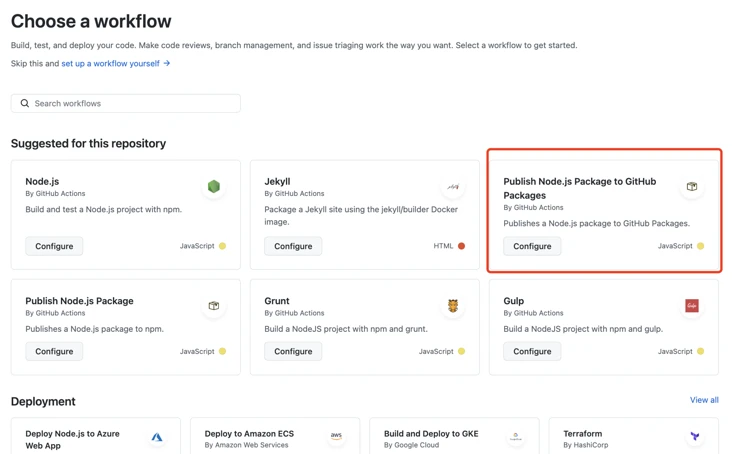
Using the Workflows template
We switch to the actions panel to see a number of workflows templates, we select the following template:
Of course, if you have a yaml configuration, you can also create a workflow yourself for others to use.
After we click the install button, we will be redirected to the edit screen, where we can directly click the commit button on the top right.
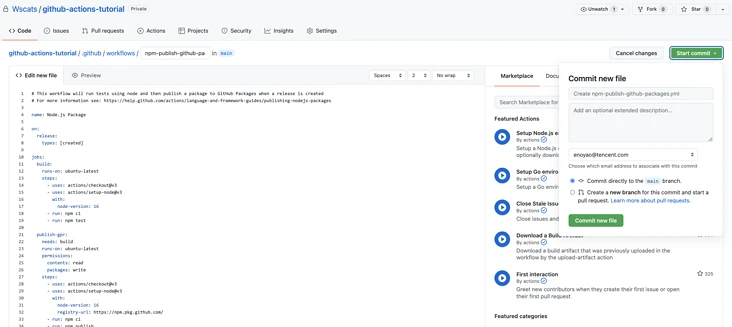
At this point a workflow is created.
Configuring workflows
I’ll list the workflow for github-actions-tutorial here.
|
|
There are a few terms to introduce to you:
- name of the Workflow, Github displays the name of the Workflow on the Action page of the repository
- on The name of the event that triggers the execution of a Workflow, such as on: push (single event), on: push, workflow_dispatch (multiple events)
- jobs A Workflow consists of one or more jobs, meaning a single continuously integrated run that can accomplish multiple tasks
- steps Each job consists of multiple steps, which are executed sequentially from top to bottom
- env environment variable, secrets.NPM_TOKEN is the secret we defined before
Commit test
Let’s modify the project code, then execute the commit.
After a successful commit we open the github action panel of the project.
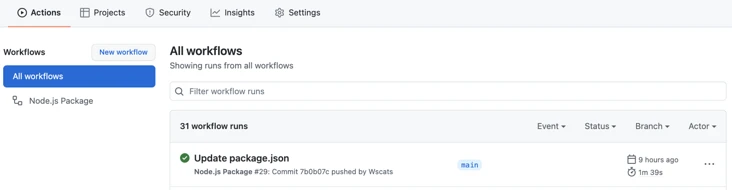
Click on the Actions tab of the corresponding Github repository to see the build process for each step. You can see that the push event we defined in *.yml is triggered, executing all the steps in jobs, packaging and pushing the packaged content to the build folder to the pages branch of the github repository.
When the jobs option is complete, go to the Settings => Pages menu of the repository, set the Source Branch field to pages, and select the root root folder.
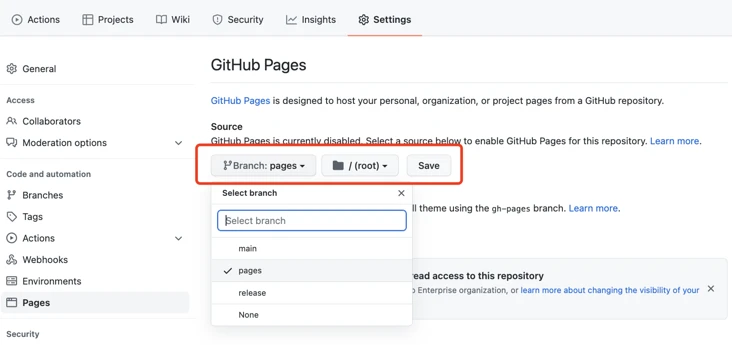
Click the Save button and wait for a moment until a notification appears on top that the build was successful. Click the link to see the finished application automatically built. From now on, you only need to push to the branch specified in the yml file to automatically trigger the build and update your site automatically.