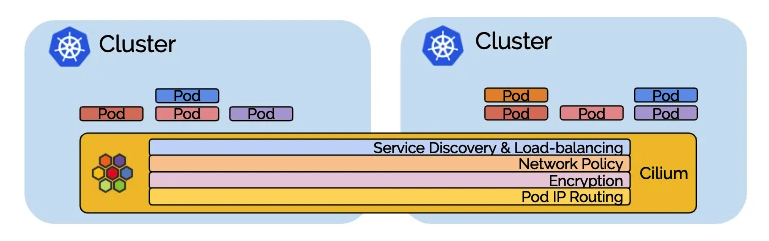
Cluster Mesh is a multi-cluster implementation of Cilium that helps Cilium achieve multi-Kubernetes cluster management across data centers and VPCs. Cluster Mesh has the following main features.
- Pod IP routing between multiple Kubernetes clusters through tunneling or direct routing without any gateway or proxy.
- Use standard Kubernetes service discovery mechanisms.
- Network policies across multiple clusters. Policies can use Kubernetes native NetworkPolicy resources or the extended CiliumNetworkPolicy CRD.
- Transparent encryption of all traffic communicated within and across cluster nodes.
Let’s take a look at some specific usage scenarios for Cilium Cluster Mesh.
1 Usage Scenarios
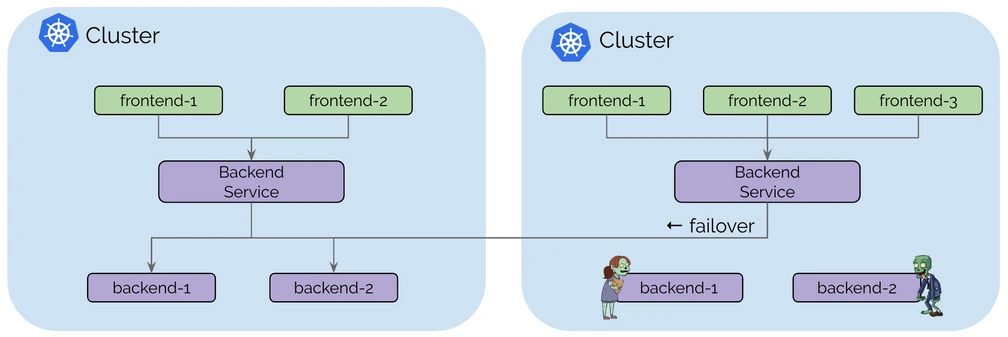
1.1 High Availability
For most people, high availability is the most common usage scenario. Multiple Kubernetes clusters can be run in multiple regions or availability zones, with copies of the same services running in each cluster. In the event of an exception, requests can be failover to other clusters.
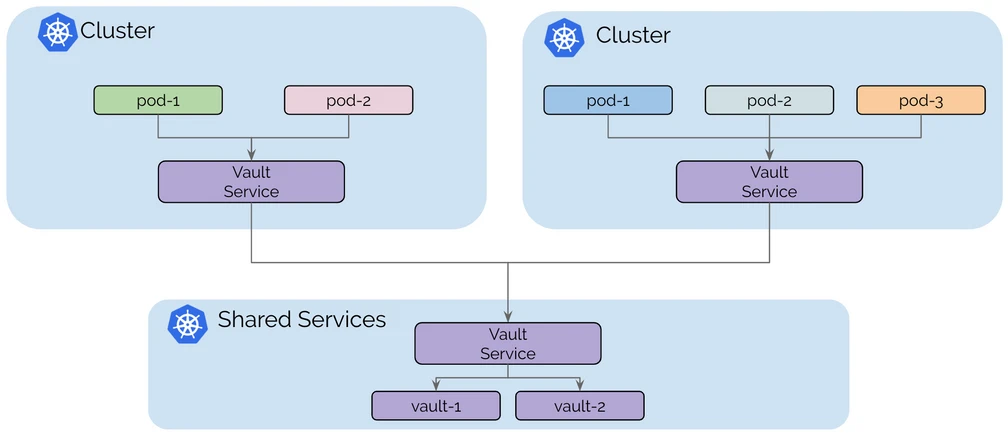
1.2 Shared Services
Certain public infrastructure services can be shared across clusters (e.g. key management, logging, monitoring or DNS services, etc.) to avoid additional resource overhead.
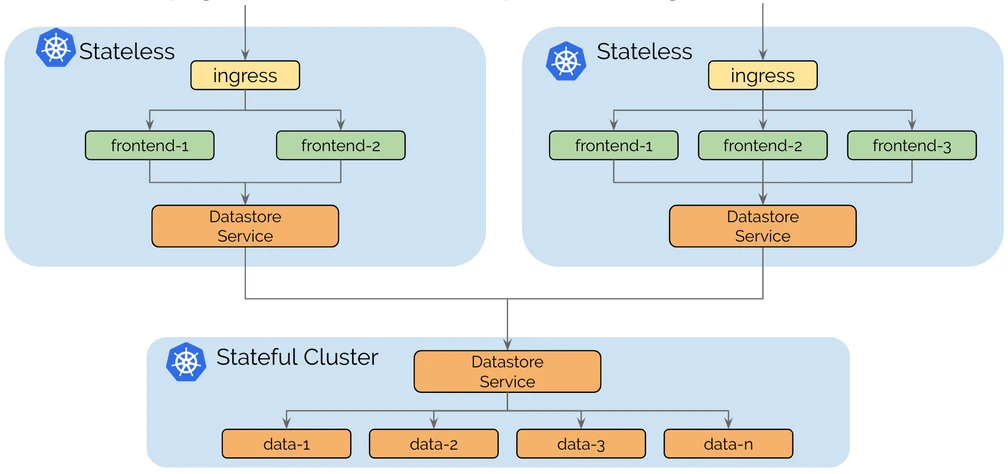
1.3 Splitting Stateful and Stateless Services
The operational complexity of running a stateful or stateless service is very different. Stateless services are easy to scale, migrate and upgrade. Running a cluster entirely with stateless services allows the cluster to remain flexible and agile. Stateful services (e.g. MySQL, Elasticsearch, Etcd, etc.) can introduce potentially complex dependencies, and migrating stateful services usually involves the migration of storage. Running separate clusters for stateless and stateful services can isolate dependency complexity to a smaller number of clusters.
2 Architecture
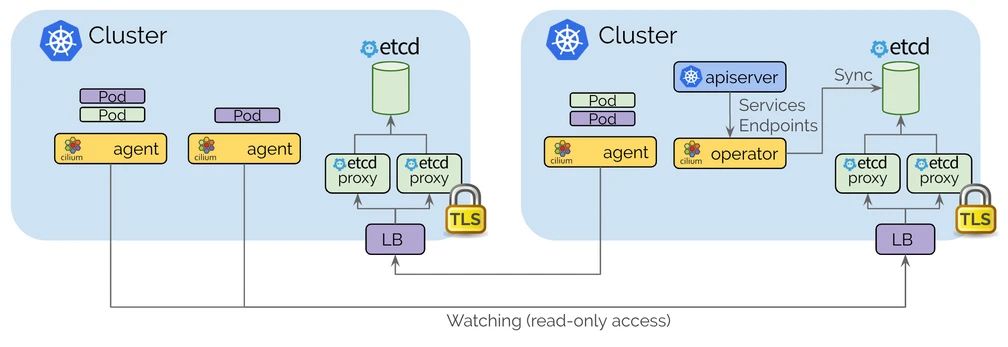
The architecture of Cilium Cluster Mesh is as follows.
- Each Kubernetes cluster maintains its own etcd cluster that keeps the state of its own cluster. State from multiple clusters is never obfuscated in the etcd of this cluster.
- Each cluster exposes its own etcd through a set of etcd agents, and Cilium agents running in other clusters connect to the etcd agents to monitor changes.
- Cilium uses the clustermesh-apiserver Pod to establish multi-cluster interconnections. There are two containers in the clustermesh-apiserver Pod: the apiserver container is responsible for writing multi-cluster related information to the etcd container; the etcd container (etcd agent) is used to store Cluster Mesh-related configuration information.
- Access from one cluster to another is always read-only . This ensures that the failure domain remains unchanged, i.e. a failure in one cluster is never propagated to other clusters.
3 Prerequisites
3.1 Installation of related software
- Install Kubectl: https://kubernetes.io/zh/docs/tasks/tools/
- Install Kind: https://kind.sigs.k8s.io/docs/user/quick-start/#installation
- Installation of Helm: https://helm.sh/docs/intro/install/
- Install Cilium Cli: https://github.com/cilium/cilium-cli
Kind (Kubernetes in Docker) is a tool for running local Kubernetes clusters using Docker containers. To facilitate experimentation, this article uses Kind to build a Kubernetes multicluster environment.
3.2 Environment Requirements
- All Kubernetes worker nodes must be assigned unique IP addresses and IP routing between nodes must be reachable.
- Each cluster must be assigned a unique Pod CIDR.
- Cilium must use etcd as kv storage.
- The network between clusters must be interoperable, see Firewall Rules for the specific port numbers for communication.
The configuration file for this experiment is available at: cluster_mesh.
4 Preparing the Kubernetes Environment
Prepare two Kind configuration files for building a Kubernetes cluster.
c1 Cluster configuration file.
c2 cluster configuration file.
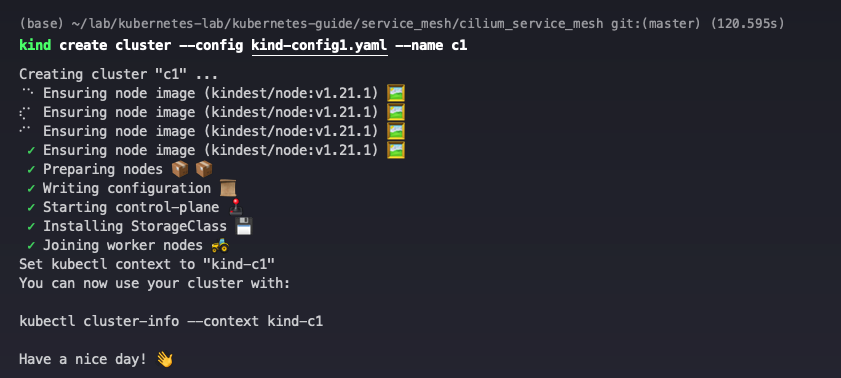
Use the kind create cluster command to create two Kubernetes clusters.
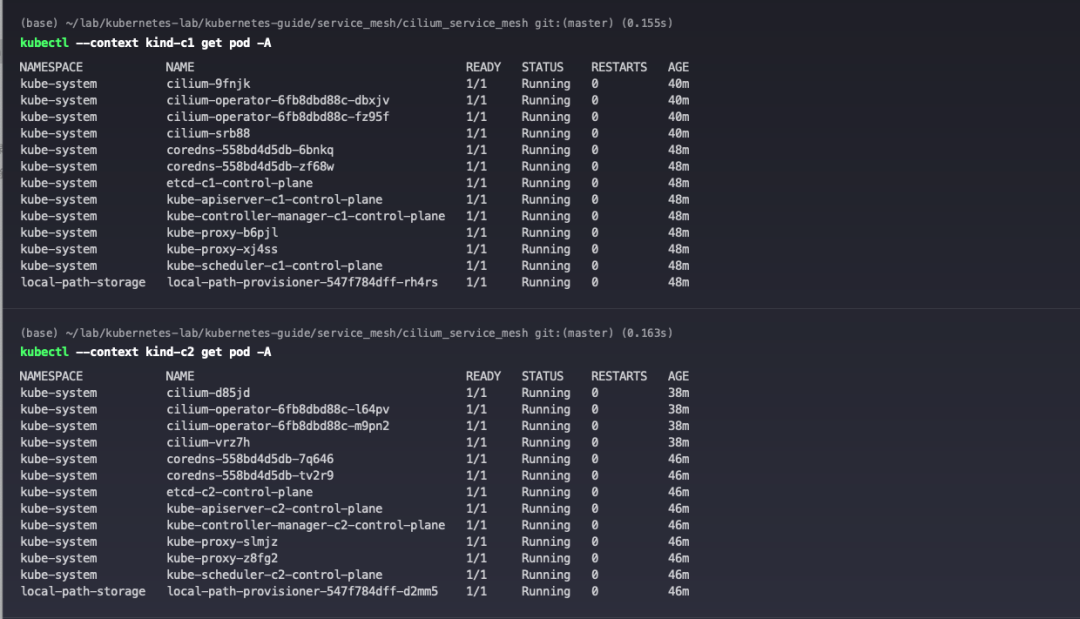
View two Kubernetes clusters.

5 Installing Cilium
Add Helm Repo.
|
|
Install Cilium on the c1 cluster, using the -kube-context parameter to specify a different cluster context. Each cluster must be assigned a unique name and cluster id, the -cluster.id parameter specifies the cluster id in the range 1-255, and the -cluster.name parameter specifies the cluster name.
Install Cilium on the c2 cluster.
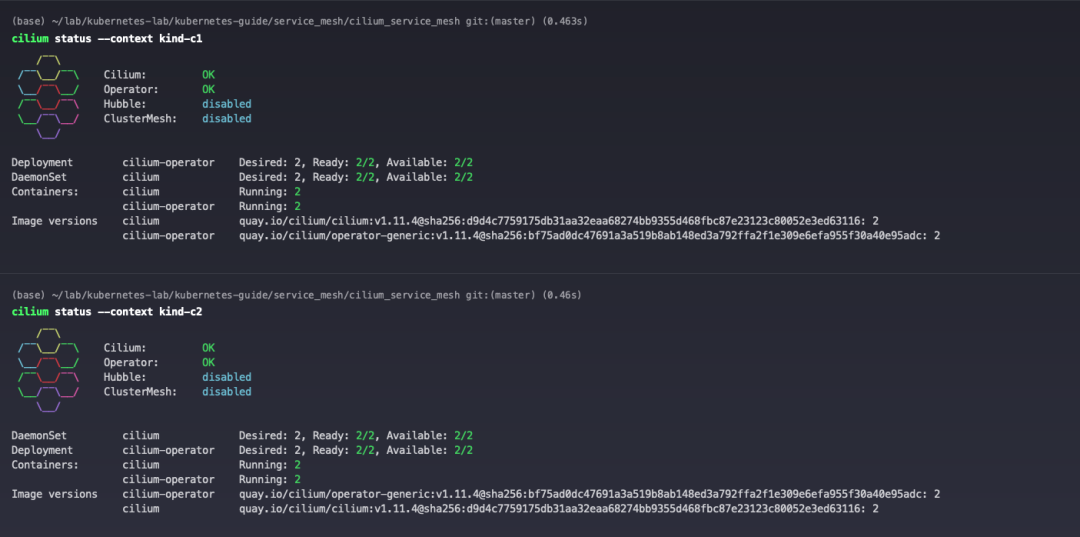
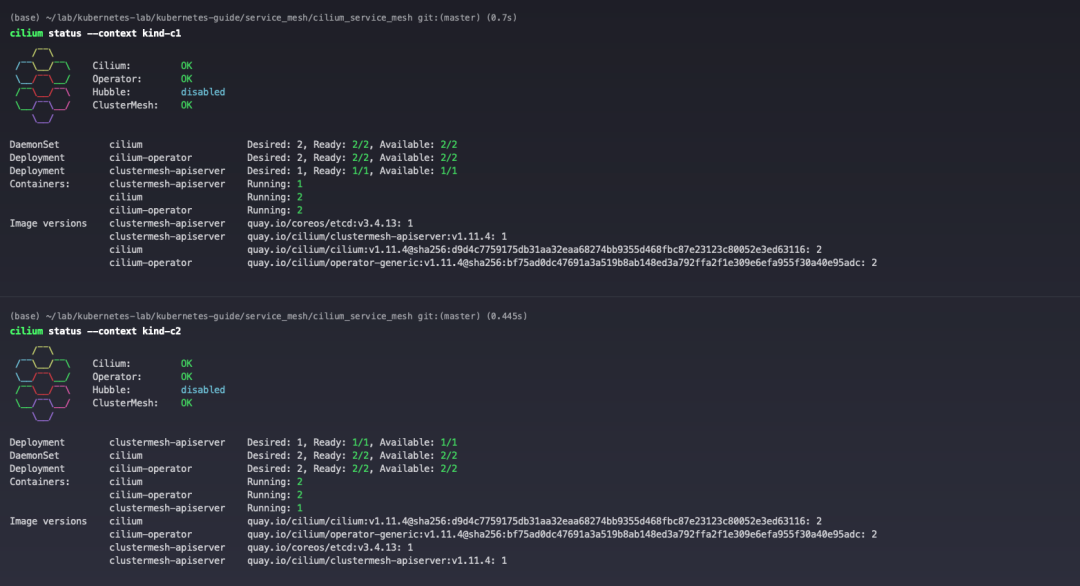
View Cilium Pod status.
View Cilium status.
6 Install Metallb (optional)
In the 7 Enabling Cluster Mesh section, the Service type used to publish the clustermesh-apiserver service is described. In Kubernetes clusters provided by public clouds, LoadBalancer type services are usually distributed through load balancing devices in public clouds (e.g., AWS’s ELB, Aliyun’s SLB, etc.). In a private environment, you can use MetalLB to implement it.
Prepare the Metallb configuration files for both clusters. c1 Cluster configuration file. Note that the assigned network should be in the same network segment as the node IPs.
c2 cluster configuration file.
Use the following command to deploy Metallb in the c1 and c2 clusters.
View Metallb Pod status.

7 Enabling Cluster Mesh
Use the cilium clustermesh enable command to enable Cluster Mesh on the c1 cluster.
- The
-create-caparameter indicates that a CA certificate is automatically created, which needs to be shared between clusters to ensure that mTLS works properly across clusters. - The
-service-typeparameter specifies the way to publish the clustermesh-apiserver service, which has the following 3 ways.- LoadBalancer (recommended): Use a LoadBalancer type Service to publish the service, which allows the use of a stable LoadBalancer IP and is usually the best choice.
- NodePort : Use NodePort type Service to publish services, if a node disappears, Cluster Mesh will have to reconnect to another node, which may cause network outages.
- ClusterIP : Use a ClusterIP type Service to publish services, which requires that the ClusterIP is routable between clusters.
|
|
Executing the command will deploy the clustermesh-apiserver service in the cluster and generate the relevant necessary certificates.
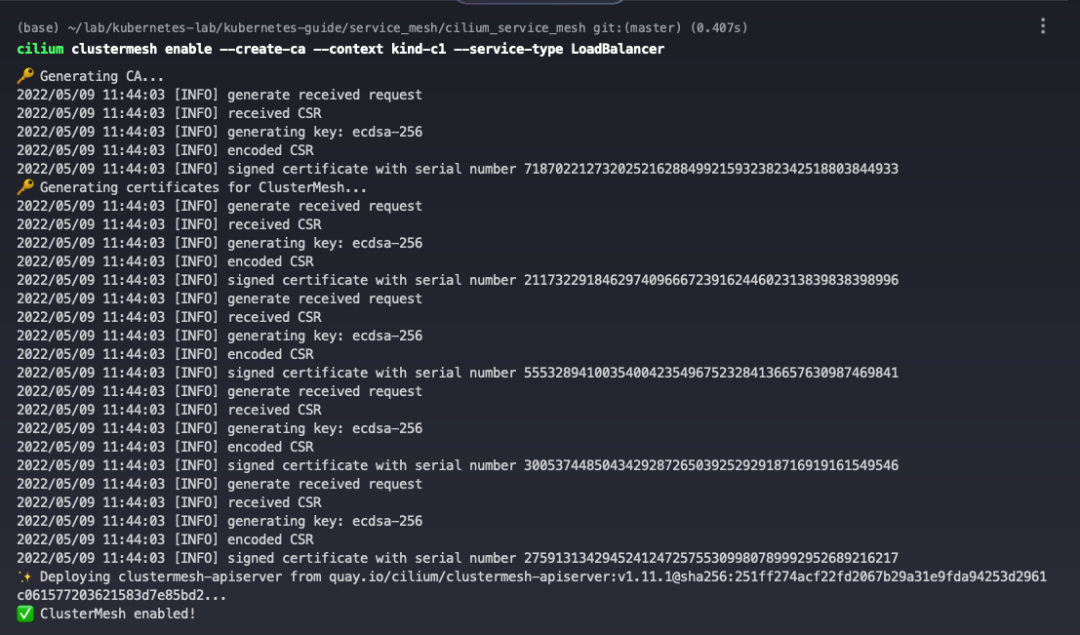
The created CA is stored in the cilium-ca Secret under the kube-system Namespace.
|
|
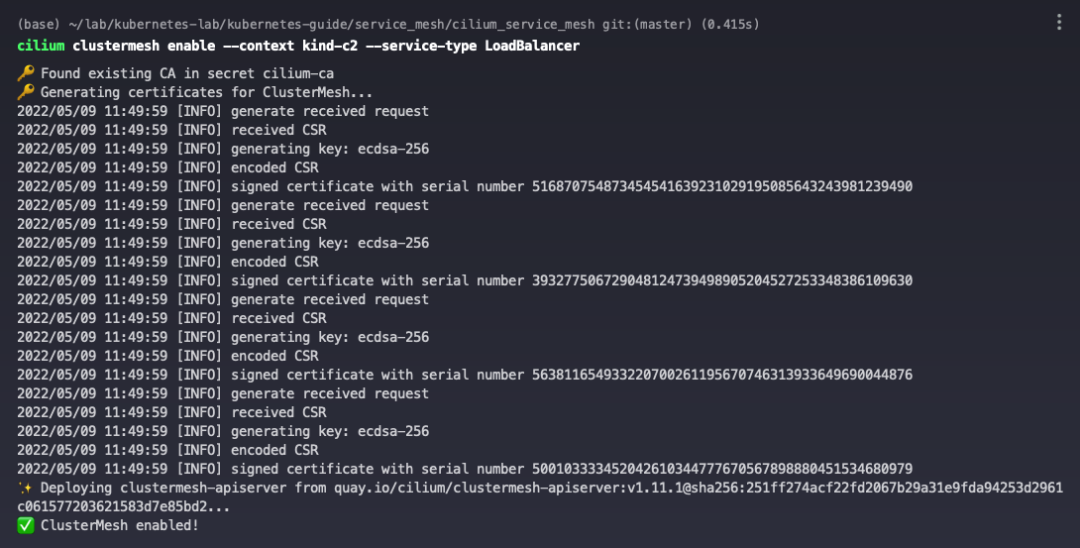
Import the Cilium CA certificate of cluster c1 to cluster c2.
Enable Cluster Mesh on the c2 cluster.
|
|
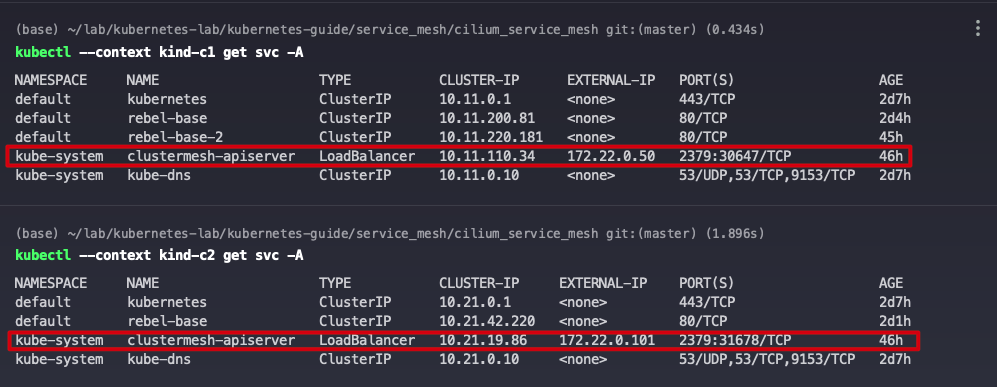
View the clustermesh-apiserver Pod status for clusters c1 and c2.
Looking at the clustermesh-apiserver service for clusters c1 and c2, you can see that the Servie type is LoadBalancer, which is the IP address assigned by Metallb.
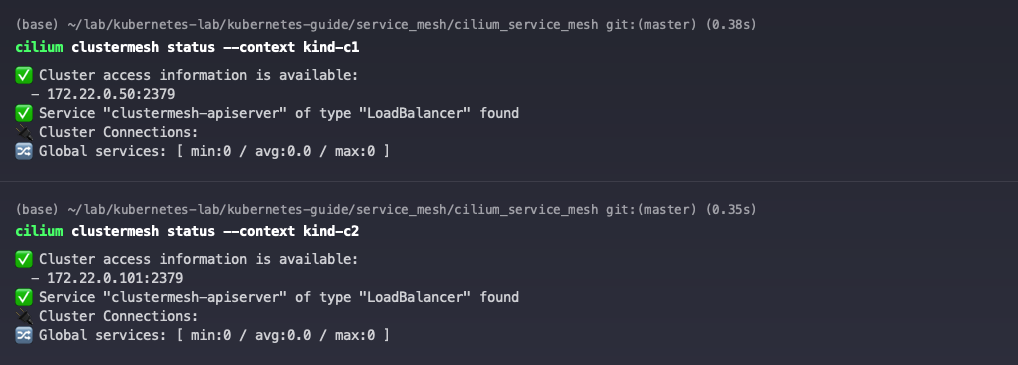
View Cilium status.
Check the Cluster Mesh status of the c1 and c2 clusters. Both clusters are currently successfully enabled for Cluster Mesh, but are not yet connected to each other.
8 Connecting to a cluster
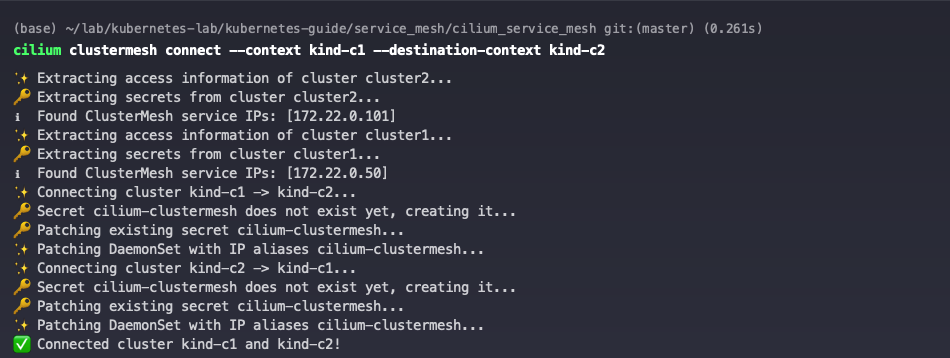
Execute the cilium clustermesh connect command on the c1 cluster to connect to the c2 cluster. This only needs to be executed on one cluster.
|
|
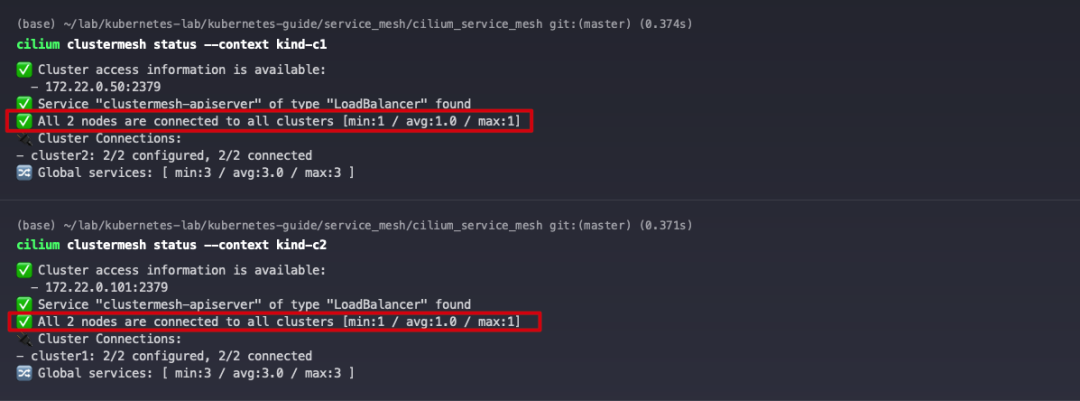
Check the Cilium Cluster Mesh status, at which point the c1 and c1 clusters have established a Cluster Mesh connection.
Now that we have successfully established the interconnection between clusters, let’s verify the load balancing and network policies in Cluster Mesh mode.
9 Load balancing
9.1 Global Load Balancing
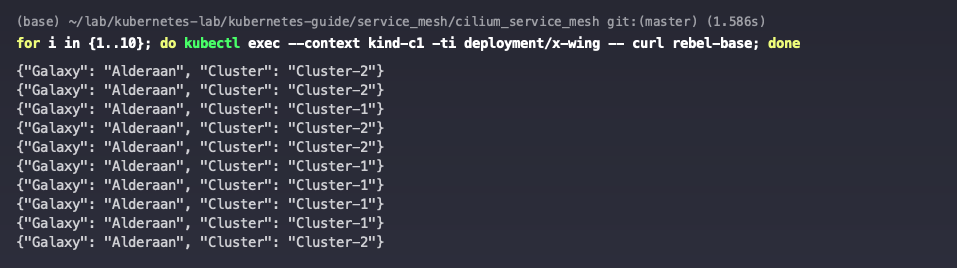
Deploy two applications in a cluster, where x-wing is the client and rebel-base is the server, and require global load balancing for the rebel-base service. You need to ensure that the rebel-base service in each cluster has the same name and is in the same namespace, then add io.cilium/global-service: "true" to declare it as a global service so that Cilium will automatically perform load balancing on the Pods in both clusters.
Create application services in c1 and c2 clusters.
Check out the service.
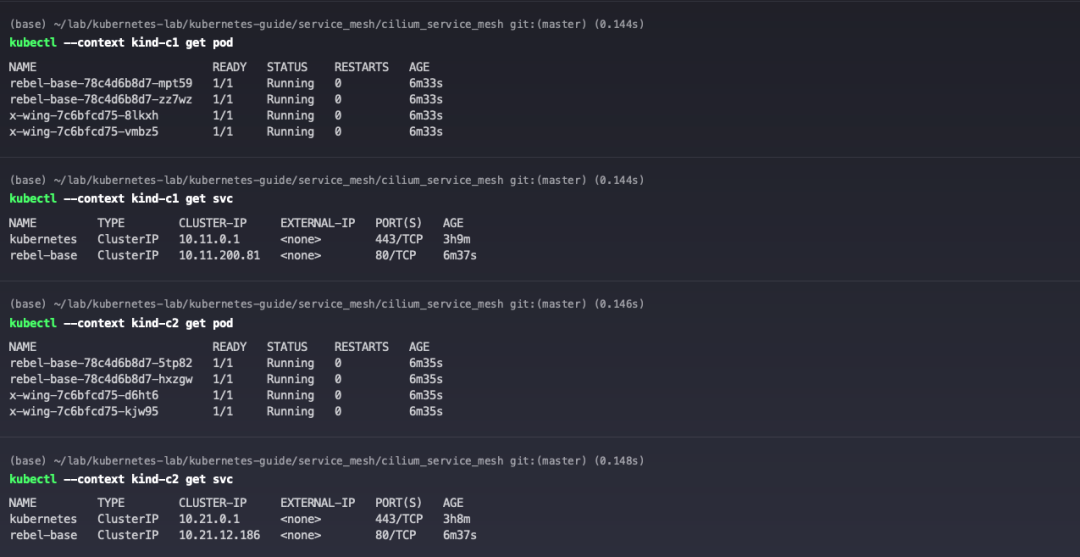
Accessing the rebel-base service from either cluster, you can see that traffic is distributed to both clusters.
|
|
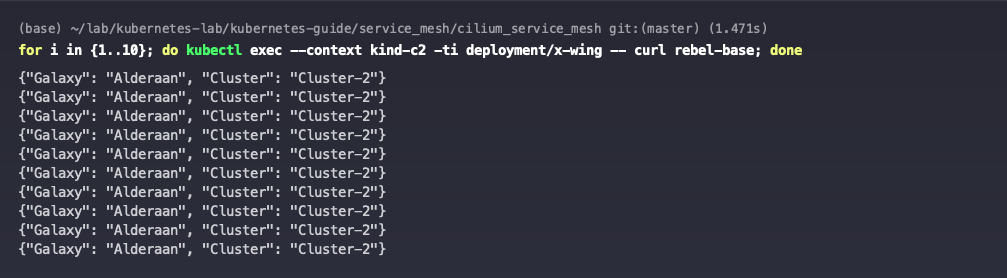
9.2 Disable global service sharing
By default, global services will be load balanced across backends in multiple clusters. If you want to disable services from this cluster from being shared to other clusters, you can do so by setting the io.cilium/shared-services: "false" annotation.
The rebel-base service is accessible to both clusters in the c1 cluster.
|
|

But then the c2 cluster will only be able to access the rebel-base service of this cluster.
|
|
Remove the annotation io.cilium/shared-service from the c1 cluster rebel-base service.
|
|
The c2 cluster can now re-access the rebel-base service for both clusters.
|
|

10 Network Policy
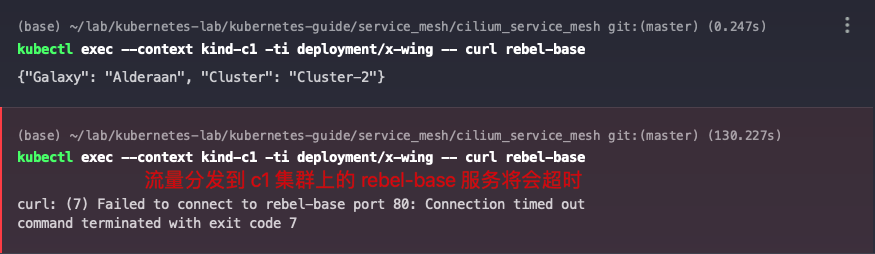
Create a CiliumNetworkPolicy policy to allow only Pods in cluster c1 with the x-wing tag to access Pods in cluster c2 with the rebel-base tag. cluster names are specified in the 5 Installing Cilium chapter with the -cluster-name parameter, and can also be found in cilium- config Configmap. In addition to the traffic between application services, care should be taken to release the DNS traffic, otherwise it cannot be accessed directly by the Service name.
|
|
Kubernetes network policies are not automatically published to all clusters; you need to issue NetworkPolicy or CiliumNetworkPolicy on each cluster.
When you access the rebel-base service on cluster c1, you can see that only requests distributed to cluster c2 are successfully responded to.
|
|
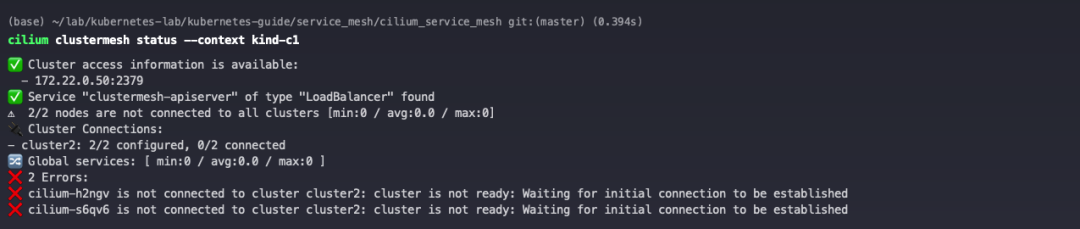
11 Troubleshooting
The following exception was encountered while enabling Cluster Mesh.
|
|
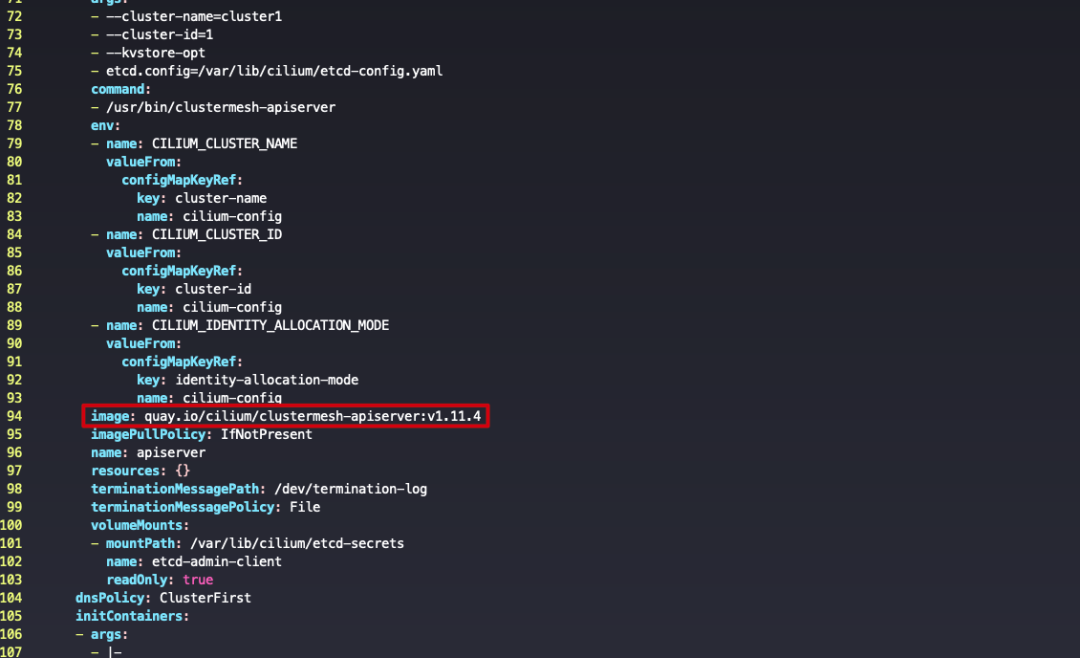
Checking the Pod information reveals that the pulled image does not exist.
|
|
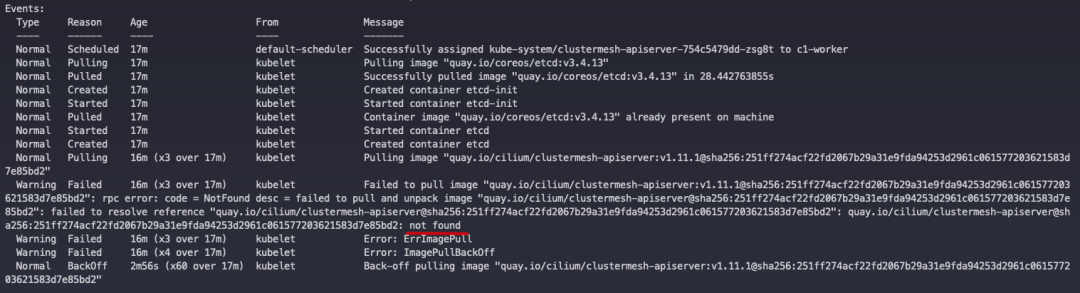
I went to the Cilium image repository and found that the sha256 value behind the image did not match.

Edit the image of clustermesh-apiserver Deployment and remove the shasum value after the image version.