Security is a top priority for cloud-native applications, and while security is a very broad topic, Linkerd still has an important role to play: its two-way TLS (mTLS) feature is designed to enable a zero-trust approach to security in Kubernetes. Zero-trust security is an IT security model that requires strict authentication for every person and every device that attempts to access resources on a private network, whether located inside or outside the network boundary.

What is mTLS
An increasingly common approach to communications security in cloud environments is the Zero Trust approach, and while a comprehensive treatment of zero trust security is beyond the scope of this section, the core goal is to reduce the application’s security perimeter to the smallest possible level. For example, instead of putting firewalls around the data center to secure incoming traffic, leaving a “soft interior” without further authentication, each application in the data center can enforce security at its own boundary. This zero-trust approach is a natural fit for cloud environments where the underlying hardware and network infrastructure is not under your control.
The Linkerd security model enables zero-trust security by providing transparent, two-way TLS communication between services. Two-way TLS (mTLS) is a form of transport security that provides confidentiality and authentication of communications. In other words, not only are communications encrypted, but identities are also authenticated on both ends of the connection (the bidirectional component of mTLS differs from the TLS used by browsers in that it only authenticates the server side of the connection. mTLS authenticates both the client and the server). Linkerd’s goal is to authenticate and encryption, allowing you to adopt a zero-trust approach to Kubernetes clusters.
Authentication is especially important, and while most people think the value of TLS is in encryption, it is equally important to verify the identity of the entities on both sides of the connection. After all, encryption is only useful if you can trust that the entity on the other side of the communication with you is who they say they are - an encrypted message from a bad actor is still a message from a bad actor.
In Linkerd, identities authenticated by mTLS are associated with Kubernetes ServiceAccounts. This means that Linkerd’s mTLS identity system uses the exact same model that Kubernetes uses to establish identity and access control for workloads on a cluster, rather than inventing a new framework.
mTLS with Linkerd
One of Linkerd’s design principles is that complexity is the enemy of security. The harder it is to configure something, the less likely you are to use it; the more options and settings you have, the more likely you are to accidentally configure it in an insecure way.
By default, Linkerd enables mTLS for all pod-to-pod communication in the grid, and as long as both sides inject a data plane proxy, congratulations: you’ve already authenticated encrypted mTLS between services. but we didn’t realize it.
There are a few things to keep in mind about Linkerd’s ability to automatically add mTLS.
-
Both endpoints must be in the grid. linkerd needs to handle both client-side and server-side connections to work its mTLS magic.
-
In Linkerd 2.8.1 and earlier, Linkerd could only add mTLS to HTTP and gRPC traffic, and even then it could not perform this operation for certain types of permissions, hosts, or Headers; these restrictions have been removed in Linkerd 2.9, which adds mTLS to all TCP traffic, regardless of the protocol.
-
Connections where the client initiates TLS cannot be mTLSed by Linkerd. instead, Linkerd will treat these connections as TCP traffic. Note that this also means that Linkerd can only provide TCP-level metrics for these connections.
Next let’s understand how mTLS works and how to verify that our connection does indeed have mTLS.
Linkerd Identity component
The Identity component of the Linkerd control plane was discussed earlier. It plays the role of a CA or Certificate Authority. A Certificate Authority is the entity that issues digital certificates and makes the Identity component the issuer of digital certificates.
Linkerd uses the same “type” of certificate as the TLS certificate used by the website to authenticate its identity. Unlike websites, these certificates are not validated by third-party entities such as Verisign, as they do not require authentication, and they are only used by Linkerd agents within a cluster.
Linkerd’s CA (Identity service) is deployed to the cluster as part of the Linkerd control plane. During this deployment, the Linkerd CLI generates a certificate and stores it in a Kubernetes Secret named linkerd-identity-token-XXXXX in the Linkerd namespace.
By looking at the Secret, we can see a Secret object prefixed with linkerd-identity-token-, which we can export for viewing.
|
|
The field named ca.crt in the data section of the output is the UTF-8 encoded root certificate generated during the Linkerd installation. This certificate is called the “trust anchor” because it is used as the basis for all certificates issued to the proxy.
The trust anchor is also used to create another certificate and key pair at installation time: the issuer credentials, which are stored in a separate Kubernetes Secret called linkerd-identity-issuer. The issuer credentials are used to issue certificates to the Linkerd proxy, and we can also view the data for that Secret.
|
|
Next we will learn how to use these keys to issue certificates to the proxy to enable mTLS.
How the Linkerd proxy obtains a certificate
First, when a Pod is injected into the Linkerd agent, the agent sends a certificate signing request (CSR) to Linkerd’s identity service. The identity service issues a signed certificate to the agent using the issuer credentials (the scope of the CSR is the Kubernetes ServiceAccount where the Pod is running, so the generated certificate is associated with that ServiceAccount), and the certificate expires after 24 hours. Before the certificate expires, the agent sends a new certificate signing request to the identity service to obtain a new certificate; this process continues throughout the life of the Linkerd agent and is called Certificate Rotation, an automated way to minimize the damage caused by compromised certificates: in the worst case, any compromised certificate can only be used for 24 hours.
The -linkerd check command has a simple way to ensure that the proxies all have certificates issued by the identity service, and we can check the status of the proxies ourselves by passing the --proxy flag.
|
|
The above output includes a linkerd-identity-data-plane section to indicate whether the proxy is using a certificate issued by a trust anchor.
We can also enable debug mode in the Linkerd agent and identity service to see the agent send the CSR to the identity service and retrieve the certificate.
|
|
When the identity service is re-updated, we can observe the log information of the corresponding Pod.
|
|
The above command outputs a lot of logs to the console. In the Linkerd identity log output, we can see the output related to Request Body and Response Body, which includes a long UTF-8 encoded data, i.e. CSR and the certificate issued to the proxy.
|
|
Next, let’s take a look at the security between the Emojivoto application services. First, we can use the linkerd viz edges command to see how Pods are connected to each other.
|
|
We can see that the output above contains a column SECURED at the end, indicating whether it is a secure connection or not, and the following values are all √, indicating a secure connection.
We then use the linkerd viz tap command again to capture the live traffic, and the output also contains a tag value of tls=true, as shown below.
|
|
At this point we understand how Linkerd’s Identity component issues certificates to Linkerd proxies in the data plane, and how Linkerd’s mTLS implementation in the proxy uses these certificates to encrypt communication and authenticate both parties.
Automatic Rotation of Controller Plane TLS Credentials
Linkerd’s automatic mTLS feature uses a set of TLS credentials to generate TLS certificates for the agent: a trust anchor, issuer certificate, and private key. While Linkerd automatically rotates TLS certificates for data plane agents every 24 hours, it does not rotate the TLS credentials used to issue these certificates. Next, let’s learn how to use Cert-manager to automatically rotate issuer certificates and private keys.
Cert-manager
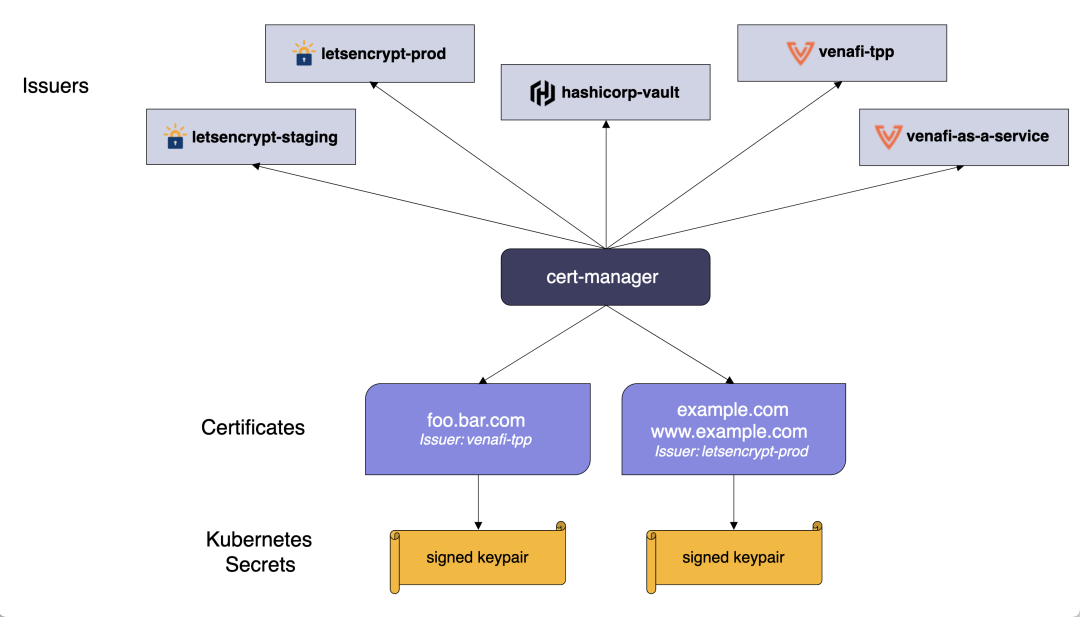
Cert-manager is a very popular cloud-native certificate management tool. Cert-manager adds certificates and certificate authorities to Kubernetes clusters as CRD resource types, simplifying the process of obtaining, renewing, and using these certificates. It can issue certificates from a variety of supported sources, including Let's Encrypt, HashiCorp Vault, and Venafi, as well as private PKI’s. It will ensure that certificates are valid and up-to-date, and attempt to update them at the configured time before they expire.
The installation of Cert-manager is also very simple and can be done in one click directly using the official resource list file provided as follows.
|
|
By default, related resources are installed into a namespace named cert-manager.
Issuing a certificate
Next we use the step tool to create a signed key pair and store it in a Secret object in Kubernetes.
Then save the generated ca.crt and ca.key to the Secret object.
With Secret, we can create an Issuer resource that references the key’s certificate authority.
Then we can issue certificates and write them to a Secret object. Finally, we can create a cert-manager “Certificate” resource that uses this Issuer to generate the required certificates.
|
|
In the resource manifest file above, duration instructs cert-manager to treat the certificate as valid for 48 hours, while renewBefore instructs cert-manager to attempt to issue a new certificate 25 hours before the current certificate expires.
At this point, cert-manager can now use this certificate resource to obtain TLS credentials, which will be stored in a Secret named linkerd-identity-issuer. To verify your newly issued certificate, we can run the following command.
Now we just need to inform Linkerd to use these credentials. Since we are installing via the linkerd command line tool, the Linkerd control plane will by default be installed via the --identity-external-issuer flag, which instructs Linkerd to read the credentials from the linkerd-identity-issuer Secret. Whenever the certificate and key stored in the Secret are updated, the identity service will automatically detect this change and reload the new credentials.
This sets up automatic rotation of Linkerd control plane TLS credentials, and if you want to monitor the update process, you can check the IssuerUpdated event issued by the service.
You can see that the Updated identity issuer has been executed.