SonarQube is a code quality management open platform that integrates thousands of automatic static code analysis rules designed to improve the quality and security of developers’ code, enabling developers to write cleaner, safer code. Three main and larger features are provided.
- Code reliability support: catch and alert errors in code in advance, thus avoiding undefined behaviors affecting end users.
- Application Security Support: Fixes vulnerabilities that could compromise applications and learns
AppSecthrough security hotspots (simply understood to mean that it will learn and identify new vulnerabilities). - Technical debt support: Ensure that the managed code base is clean and maintainable in order to improve the development efficiency of developers.
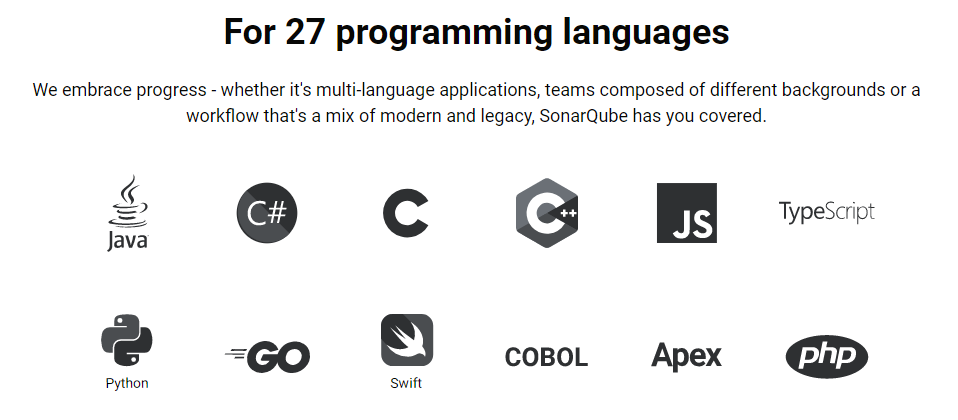
Currently SonarQube supports 27 programming languages, basically covering projects written in the current mainstream programming languages:
While the features mentioned above may be rather general, the R&D team can actually do the following things based on SonarQube:
- The
CI/CDprocess adds aSonarQubescanning session. - A code quality threshold is implemented, and only after passing this quality threshold test can we move to the next process.
- Projects with code quality below the threshold have to adjust the corresponding code in time.
Quality thresholds can be customized, and SonarQube will have detailed panel information for each project, which will give the current health status of the project, classification and breakdown of different levels of vulnerabilities, vulnerabilities corresponding to the submitter and other multi-dimensional statistical information to facilitate the tracking and repair of problems. For example, the author’s project in the last company needs to run a pipeline, and SonarQube set different levels of thresholds, for old projects, will use the lowest level of thresholds: the number of blocking errors required for 0, for some new projects, the quality of strict requirements such as the number of serious errors required for 0, etc., as long as it can not pass the quality threshold check, then the project is unable to go online
SonarQube Installation
In general, you only need to install the community version of the free SonarQube service, which can be installed based on binaries or directly using Docker to download images to start. The binary installation process is more complicated because SonarQube internally relies on the built-in ElasticSearch to do searches in Linux systems You need to add a non-root user and modify some system parameters such as the maximum number of open files supported by the system. In addition, SonarQube is a Java application and requires a local installation of the JDK. Since version 7.9 of SonarQube, the support for MySQL database has been dropped, and only four storage engines are supported under version 8.3.1, namely, in-memory mode, PostgreSQL, Microsoft SQL Server and Oracle. I have researched that the installation of PostgreSQL is relatively easy among the three databases in persistent mode. The following is a detailed documentation of the process of installing SonarQube service based on binary files.
| Software/System | Version |
|---|---|
| CentOS | 7.x |
| OpenJDK | 11.x |
| PostgreSQL | 12.x |
| SonarQube | 8.3.1 |
If the firewall is on, you need to open the corresponding port number.
Install JDK11
The installation of OpenJDK is relatively simple
If there is no default JDK on the system, you can add it to /etc/profile:
To test:
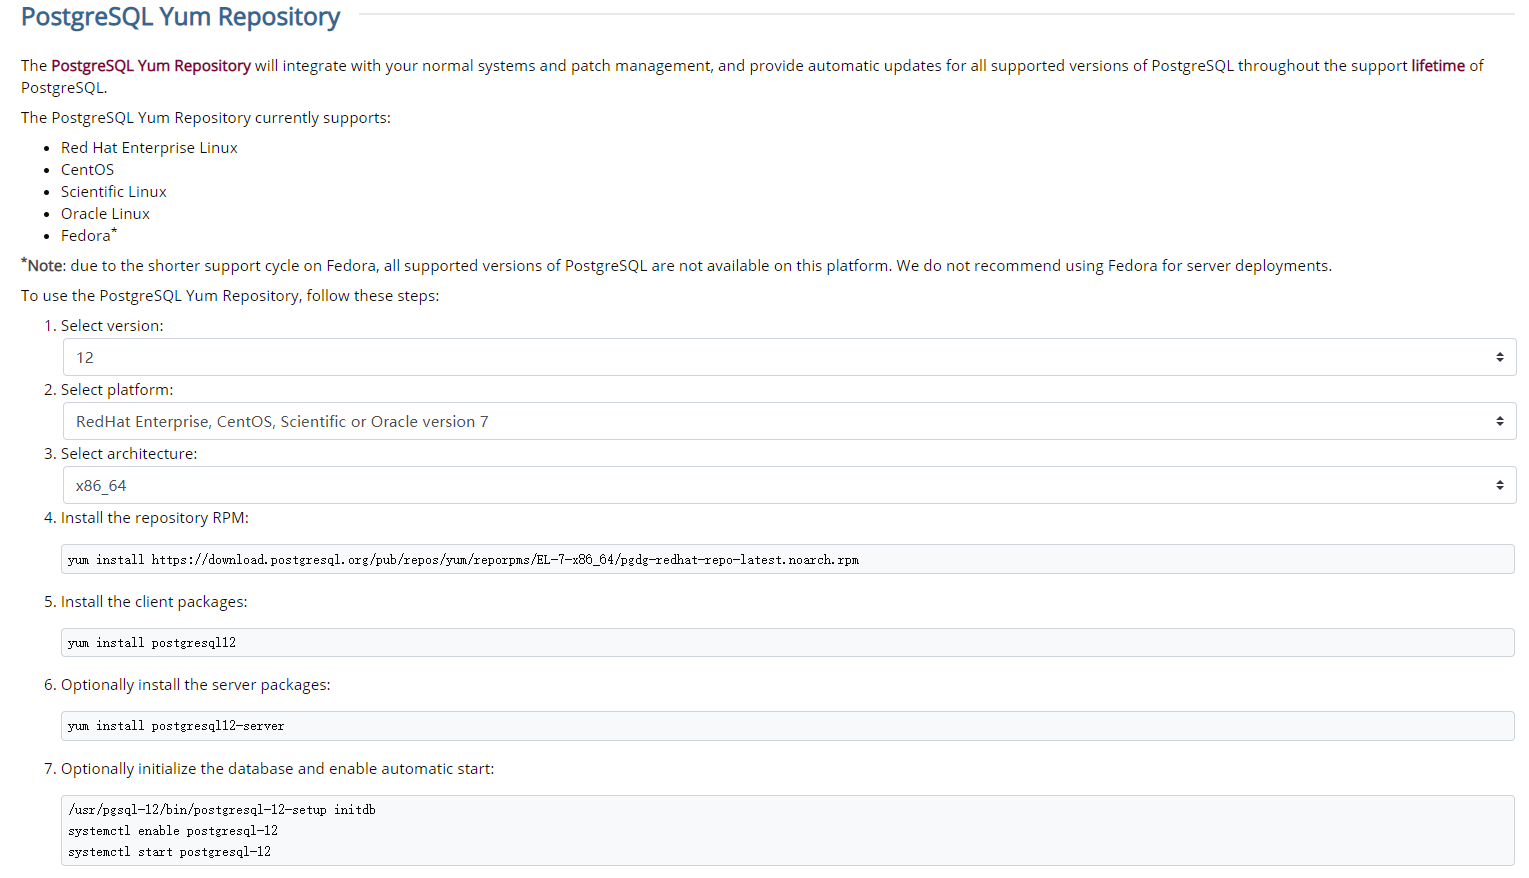
Installing PostgreSQL database
The installation of PostgreSQL is also relatively simple, and the official documentation has very detailed steps:
Modify the /var/lib/pgsql/12/data/pg_hba.conf configuration to open access to all Hosts.
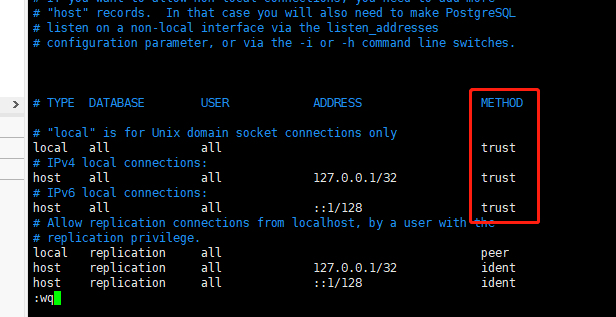
Next, restart PostgreSQL:
|
|
Switch users to the PostgreSQL command line, and add a new database user sonar and a new database sonar for backup
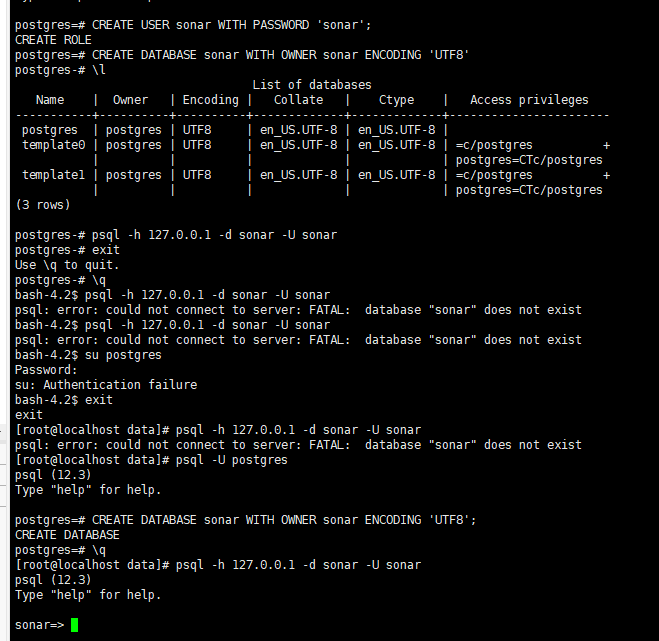
This creates a database with the name sonar, the username sonar and the password sonar.
Installing the SonarQube service
Before installing the SonarQube service, you can refer to the Prerequisites and Overview to adjust the system parameters, most of which are actually related to ElasticSearch, check the parameters:
|
|
If the current session is the root user, you can modify these four parameters directly with the following command:
Otherwise, you need to manually modify the /etc/security/limits.conf file by adding at the end of the file:
Modify the /etc/sysctl.conf file by adding at the end of the file:
/etc/security/limits.conf and /etc/sysctl.conf must be restarted after updating the server.
Next, add a new user sonarqube (the underlying reason is that ElasticSearch cannot be started with the root user).
Next, download and install SonarQube

Modify the configuration /data/sonarquebe-/sonarquebe-8.3.1.34397/conf/sonar.properties to add the following properties:
After completing all the configuration, you can try to start the SonarQube service from the console:
If it starts normally, the logs are as follows:
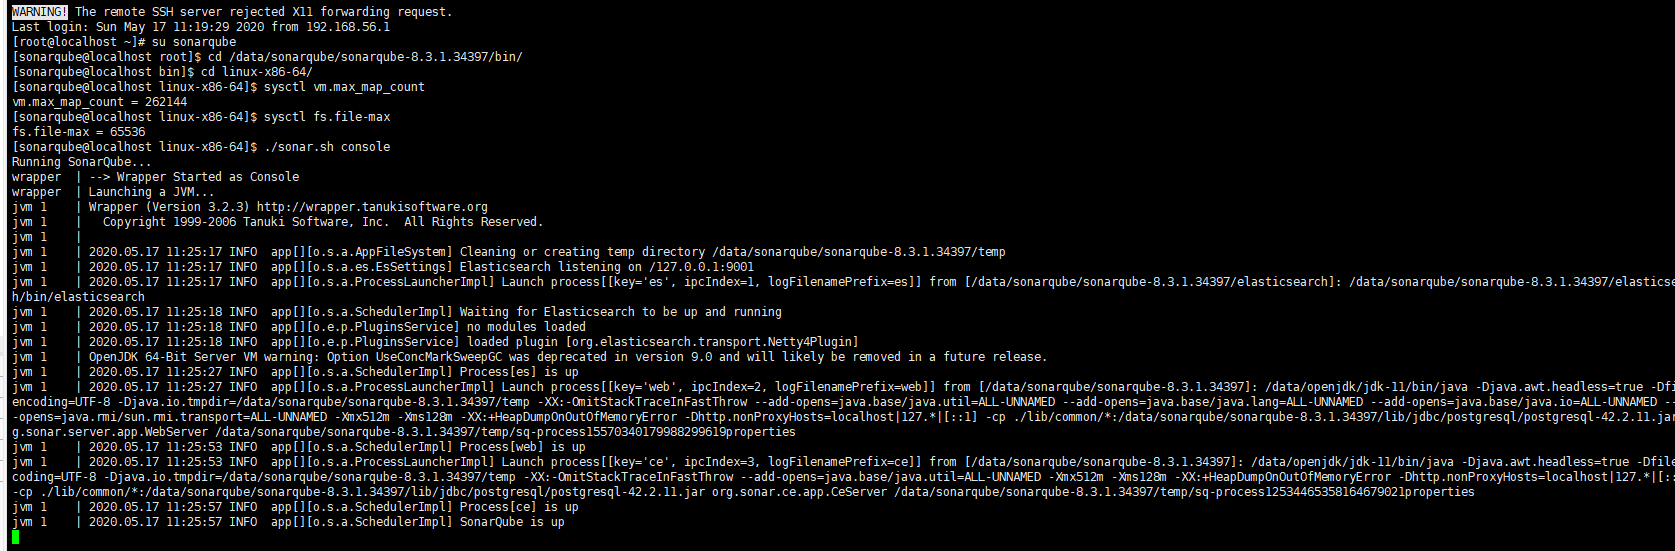
Then Ctrl C to exit the console and use . /sonar.sh start to start the SonarQube service in the background
The problems that may be encountered are categorized here
- The root user cannot start because
ElasticSearchdoes not allow therootuser to start, so a new normal user can be created. - Some folders are not accessible, usually because the new normal user has not been assigned write access to the directory where
SonarQubeis located. - The limit on the number of file descriptors or threads is usually caused by not changing
vm.max_map_count,fs.file-max,ulimit -nandulimit -uparameters.
SonarQube use
The initialized account password for
SonarQubeadministrators areadmin. If you need to change the password or assign users with different privileges, you can do it in the menu bar of the administrator.
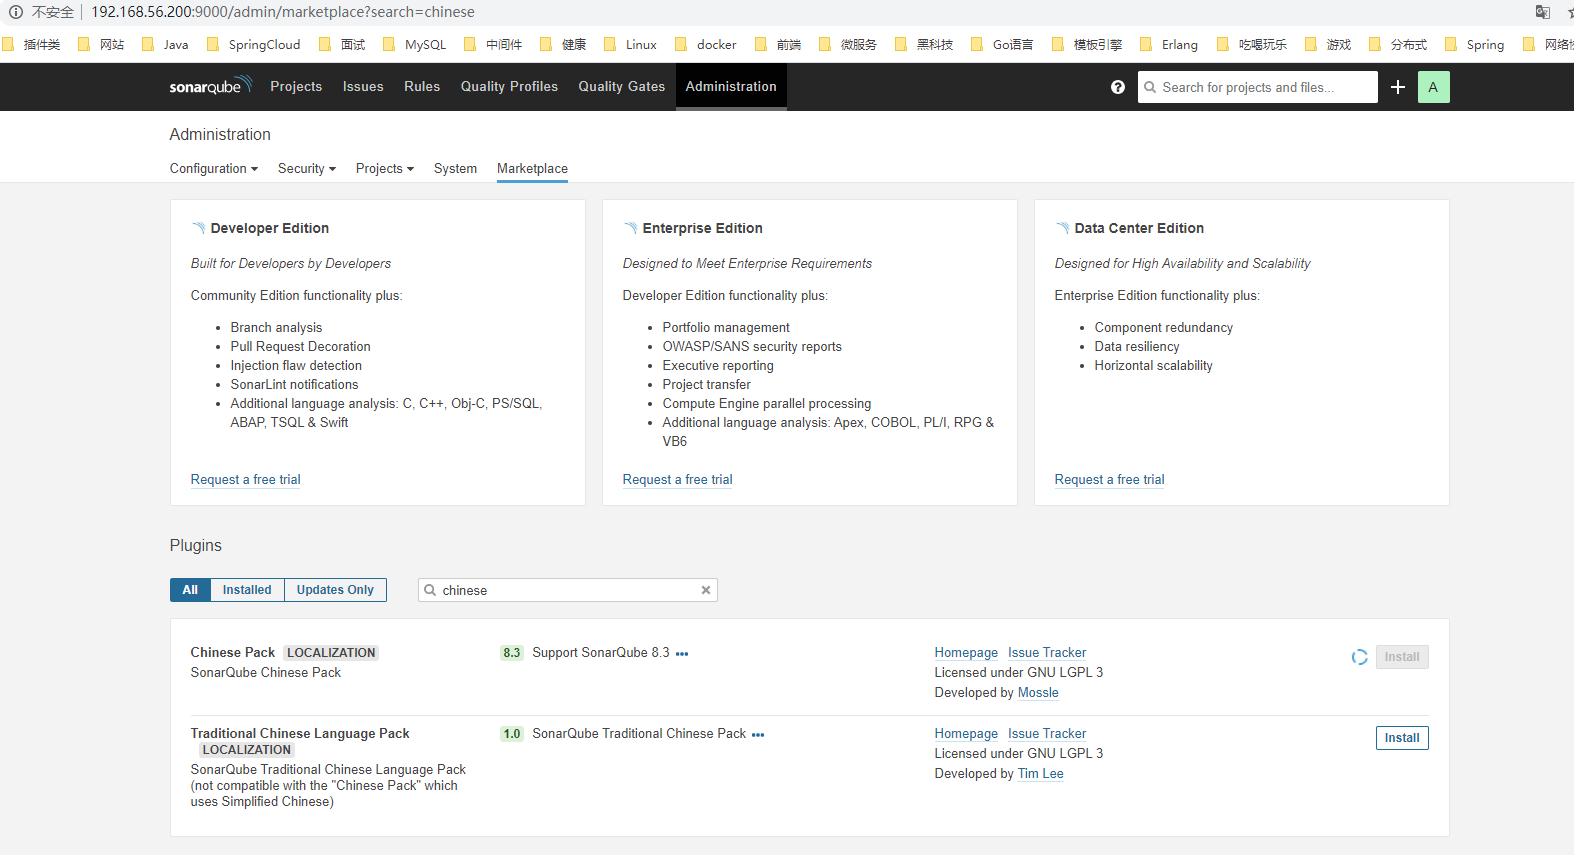
Visit http://192.168.56.200:9000 to enter WebUI of SonarQube, you can first go to the plug-in market to install a Chinese plug-in Chinese Pack, and restart the service after the plug-in installation is finished to realize the Chineseization.
SonarQube provides different types of SonarScanner for code scanning and result submission, here is Maven as an example. The settings.xml of Maven needs to introduce the following configuration (note that the parent tag already exists, adding the parent tag repeatedly will cause an exception).
|
|
The Maven plugin sonar-maven-plugin needs to be introduced in the project to be scanned, the current version is:
After completing the configuration, simply execute the command to scan in the project. The first execution will be slow because it requires downloading a large number of rulebases and plug-ins
In addition, the parameters of SonarQube can be specified via <properties> in the pom file, such as:
|
|
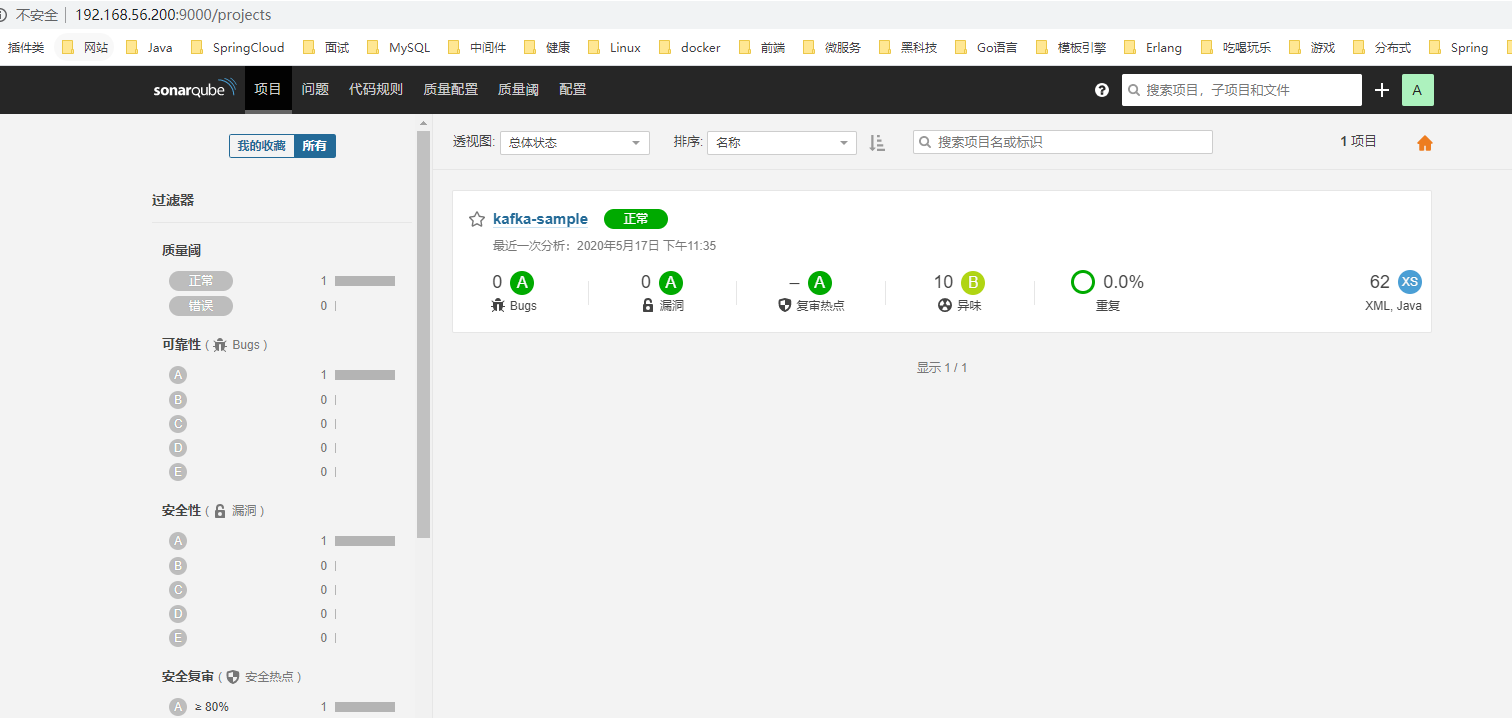
After the project scan results are submitted, you can see the project list at http://192.168.56.200:9000/projects.
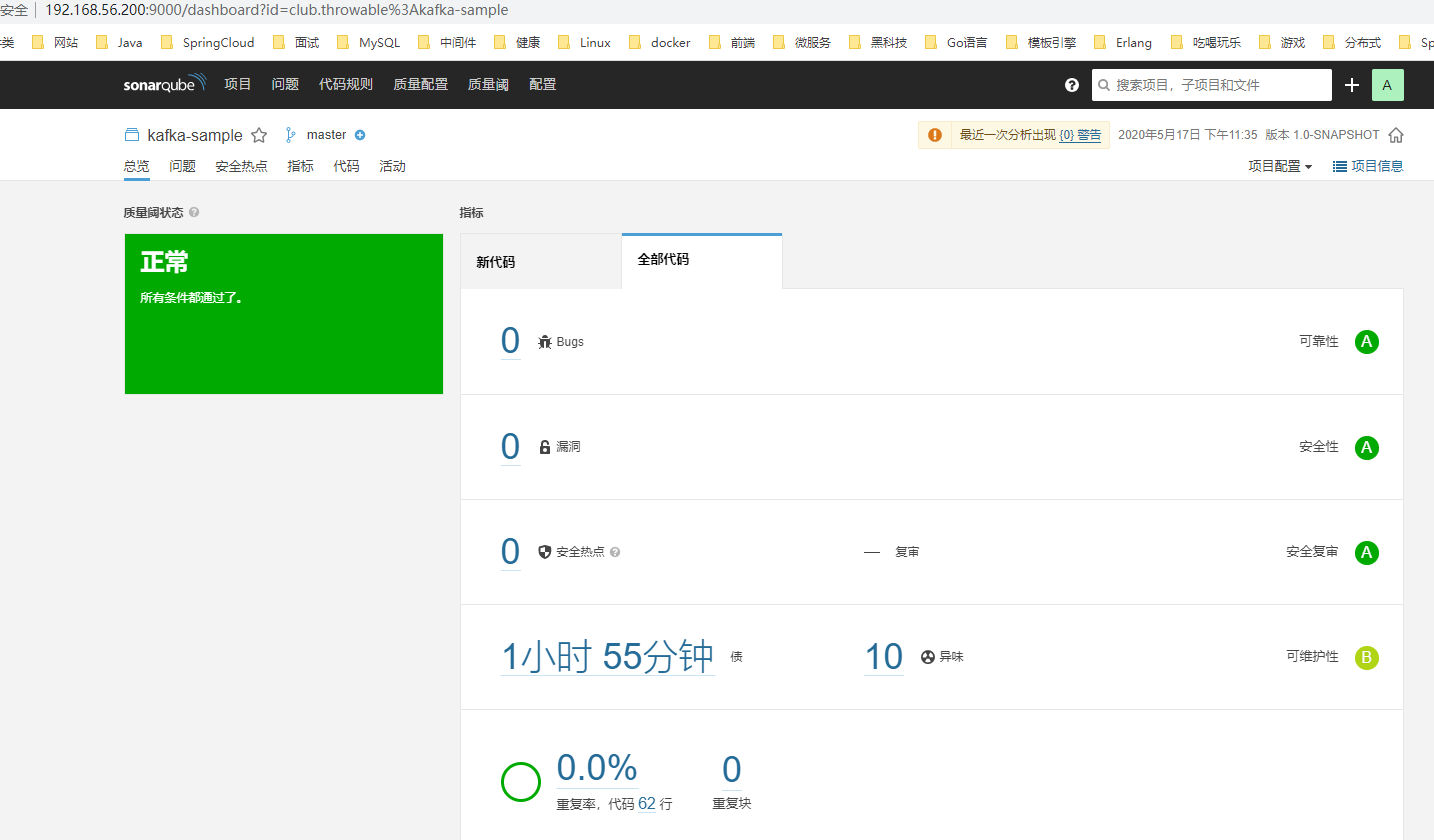
Detailed reports and statistics from the project scan can be seen by clicking in.
Summary
Quality management is an important part of DevOps, SonarQube is a very good open platform for code quality management, I previously migrated services to cloud services, the pipeline configuration on the cloud can be introduced into the SonarQube service through the form of plug-ins, which has played a low-cost and high-yield effect.
Reference
Reference https://www.throwx.cn/2020/05/17/sonarqube-install-guide/