It took us about two weeks to migrate our GitHub code to Gitlab, and the biggest impact was on our product release pipeline, which needed to be adapted to Gitlab and some services on our intranet environment. Basically, we had to rewrite the entire product release pipeline, and it was exhausting 🥺. At the time, I thought migrating the code to Gitlab was purely backwards 😅, but after all the adaptations were done, I suddenly realized that Gitlab was really good!
Ultimately, the Gitlab network on the intranet is ten times better than GitHub. As we all know, GitHub’s direct connection speed and stability is very poor in learning wall countries. That’s why the GitHub pipeline was often disturbed by network jitter, sometimes fetching a repo for 10 or 20 minutes! After migrating to Gitlab, it’s been a blast! It used to take at least 10 minutes to complete the pipeline, but now it takes less than 5 minutes to complete 😂.
So today I’m going to write a blog about what I’ve learned while tossing around Gitlab 👓.
Gitlab
Documentation and tools for Gitlab used in the tossing process.
- Gitlab workflow: learn about Gitlab’s workflow, which is different from GitHub’s PR, in that Gitlab uses the MR approach.
- Gitlab API: the official documentation for the Gitlab API, which you can use with the following tools.
- python-gitlab API client: A Python implementation of the Gitlab API client, which you can use for specific needs tools, such as getting a file or directory in a repo based on a tag or branch.
- python-gitlab CLI: based on the python-gitlab API client wrapped into a command-line tool that can be easily integrated into some pipeline scripts because it is a CLI tool.
- go-gitlab API client: A Gitlab API client implemented in Golang. Since one of the phases of the release pipeline is to collect specific files and directories from other repo’s based on a list, the tools used are written in golang. The tools are written in golang, and go-gitlab is used instead of python-gitlab to reduce the amount of code changes.
Gitlab workflow
PR
On GitHub, we generally use PR to merge code, and the process is as follows.
- clone the Fork repository to the local repository
- Create a new branch locally, make changes and commits based on the new branch, and push the new branch to the Fork repository
- Launch a Pull Request to the target branch of the original repository based on the new branch in the Fork repository
- @ Reviewer in the comments of the PR, requesting review changes
- The reviewer receives the request email, reviews the code, and comments directly at the suggestion
- The committer continues to commit changes based on the suggestions and responds to the comments
- After the reviewer has no objections, @ admin in the comments of the PR, request to merge the code, the admin accepts the PR, and the code is merged into the master branch
MR
But when we got to Gitlab, we used MR to do the code merge, and the process was as follows.
- member Clone the original repository locally, create a new branch based on the branch you want to modify
- local changes and commits, pushing the new branch to the original repository
- Merge Request is launched in the original repository to the target protected branch based on the new branch.
- Reviewers review code, administrators merge code
In comparison, the MR and approach are more suitable for collaborative development within a team, and the PR approach is suitable for collaborative development of open source projects.
Gitlab API
The main GitLab API is a REST API. Because of this, the documentation in this section assumes that you’re familiar with REST concepts.
Referring to the official document API resources, we can see that there are three API groups, Projects, Groups, and Standalone.
- Projects: These are repo-related APIs, such as tag, commit, branch, MR, and Issue.
- Groups: This is similar to Organizations on GitHub. Generally speaking, repo’s in a company are organized by team, and repo’s in the same team are placed under the same Groups in gitlab, rather than being stored as individuals.
- Standalone: API resources other than Projects and Groups, such as user
Most of the time, we use the Projects API to add, delete, and check repo’s. After a brief introduction to the Gitlab API types, this article will introduce a few tools for using the Gitlab API. If you encounter any errors while using these tools, you can use the Status codes API to return status codes to troubleshoot the problem.
python-gitlab CLI
This is a gitlab command-line tool wrapped with the python-gitlab API client, and you can use it to do most of the operations supported by the Gitlab API. Because many of the operations in the previous pipeline were accessed from GitHub, such as committing PRs, getting repo tags, viewing PR labels, etc., they were written in Jenkinsfile and called with various scripts and tools. If you switch to Gitlab, you’ll need a tool to do the same thing. The python-gitlab CLI is a great tool for this, and it’s even more convenient than the previous tool. I haven’t seen anything like python-gitlab on GitHub so far. Anyway, for anyone who uses Gitlab and wants to automate some of the work you do with your repo, this CLI tool is highly recommended, and it can be easily integrated into your pipeline.
安装
The python-gitlab CLI relies on Python 2.7 or 3.4+, so don’t use Python 2.7 in 2021 😊. After installing python3 and pip3 locally, use the following command to install it.
Since most of the scenarios using this tool are executed in the slave pod created by Jenkins, it is also possible to build a docker image with the following Dockerfile
|
|
Configuration
The Gitlab CLI tool requires a python-gitlab.cfg configuration file to connect to the Gitlab server and to complete some authentication, in the form of an ini file as follows.
Global connection parameters
| Option | Possible values | Description |
|---|---|---|
| ssl_verify | True or False | Whether to enable SSL encryption authentication |
| timeout | Certificates | Connection timeout time |
| api_version | 4 | API version, the default is 4, refer to API V3 to API V4 |
| per_page | 1 ~ 100 | The number of elements returned at a time is limited to 100 by Gitlab, and you can get all of them with the –all parameter |
Customizing GitLab server parameters
| Option | Description |
|---|---|
| url | GitLab server URL |
| private_token | Generate tokens by accessing -/profile/personal_access_tokens on the gitlab server |
| oauth_token | |
| job_token | |
| api_version | API version, the default is 4, or you can leave it undefined and use the global parameters |
| http_username | Gitlab username, which is not recommended for connecting to the Gitlab server |
| http_password | Gitlab password, which is not recommended for connecting to the Gitlab server |
Save the file in ~/.python-gitlab.cfg or /etc/python-gitlab.cfg, or you can use the environment variable PYTHON_GITLAB_CFG or -config-file to execute the path to the configuration file, but to save yourself the trouble put it in ~/. python-gitlab.cfg.
Once the configuration is done, you can use the -gitlab current-user get command to test if the connection is working, and if it returns the correct username, the configuration is successful.
Basic Use
The gitlab command line tool is used to add, delete, and update various objects on the Gitlab server, such as user, project, file, repo, mr, tag, commit, and so on (get, list, create, delete, and update). The command line format used is as follows.
|
|
In general, only 4 parameters are needed.
- The first argument is the one immediately following the gitlab command. It is the output and configuration argument for the gitlab command line, such as the
-oargument specifies the format of the output; the-fargument stores the output to a file; and the-gargument enforces which Gitlab server to connect to. - The second parameter specifies the object you want to operate on, such as project-merge-request, project-tag, etc. There are a number of supported objects, which basically cover all of the objects supported by the Gitlab API, as follows.
|
|
- The third argument is the action argument, which specifies what kind of operation is to be performed on the object being operated on, and generally supports add, delete, change and check operations (get, list, create, update, delete) $ gitlab project-tag usage: gitlab project-tag [-h] {list,get,create,delete,set-release-description} …
- The fourth parameter is the parameter on which the object + action depends, for example, specifying the project id
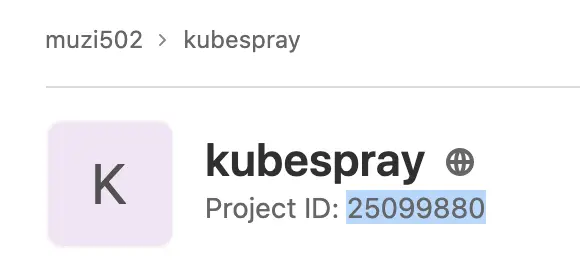
- Project-ID: is the unique ID of the repo on gitlab, there are two types, one is in the form of
group/project, where/should be translated to%2Flike:muzi502%2Fkubespray; the other is in the form of numbers, which can be seen on the web page of the repo, the second one is recommended.
- In the pipeline you can get the user’s username and email based on the token, which can be used to configure the repo git information in the pipeline to avoid failing due to CLA.
project
- Get repo ssh url address
Since the repo url for clone in the Jenkins pipeline uses token+ https, if you want to push code to the repo in the pipeline, you need to change it to ssh, and you can use the following method to get the ssh url of the repo based on the project id.
file
For manipulation of files in the repo use project-file
- Get the file, via the get operation of the
project-fileobject
|
|
- The raw method of project-file can get the raw content of the file without base64 decoding
|
|
- To create a file, add, delete, or change it, you need to commit it, so you need to specify the branch you want to operate on and the commit-message. In addition, if the file to be operated is a master branch to get other protected branches, make sure the current user has write permission, otherwise the following error will be prompted.
There was a set of CIs on GitHub that didn’t work for Gitlab, so you need to create CI flowlines for all branches to check if the code is in spec, and you can create files to all branches in bulk by doing the following.
|
|
- Update files
For example, bulk update github.com to gitlab.com in the Makefile of all branches
|
|
- Delete files
MR
- Create MR, specifying the source branch and target branch and the title of the mr. It is better to add -o json parameter in front to get the iid of the mr, which can be used to add, delete and check the mr.
|
|
The -o json parameter returns information about this mr, where iid is the unique identifier of this mr in this repo
|
|
- Merge MR
|
|
- View MR Status
|
|
- Integrating in Jenkinsfile to create MRs, merge MRs, and check MRs
When you call it, you only need to pass the parameters SOURCE_BRANCH, TARGET_BRANCH, MR_TITLE.
|
|
Tag
- List repo tags
We recommend using the git tag method to get the repo tag, because the Gitlab API is limited to 100 values per request, so you can add the -all argument to return all the values.
- Create tag
|
|
- Delete tag
The upstream repo tag can only be deleted from Gitlab, but not from the local repo, so you can delete the Gitlab repo tag with the following command.
|
|
- Create a protected repo tag
Since our pipeline tasks rely on repo tags to do versioning, we need to protect each repo tag, but there are special cases where we need to overwrite repo tags, so there is no suitable method for protected repo tags yet, so we have to create them manually first and then delete them when we need to. You can use the following command to create protected repo tags in bulk.
|
|
Lint flow line
After migrating to Gitlab, I couldn’t use my old pipeline on Gitlab’s intranet, so I used Gitlab’s own CI to reduce maintenance costs. The repo I maintain only uses Gitlab CI to do a few lint checks, so the CI configuration is very simple. For example, the CI configuration for kubespray is
.gitlab-ci.yml
- Add a
.gitlab-ci.ymlfile to all branches using the gitlab CLI tool
|
|
Other
- repo migration
Since Gitlab doesn’t support importing git URLs internally, you have to manually clone your GitHub repo locally and then push it to Gitlab. If you use git clone, you will only have one master branch locally, so you have to track all the branches of the repo on GitHub and then push it to Gitlab.
|
|