In this article we will demonstrate how to use the new Gateway, GatewayClass and HTTPRoute API to route requests to the backend service Pod via Traefik.
Environment
Before we can get started we need to prepare the relevant environment.
- A running Kubernetes cluster, which this article will assume is running on localhost.
- The kubectl command line tool, and configure it to access your cluster.
The relevant configuration files covered in this article are available through the following GitHub repository.
1
|
git clone https://github.com/traefik-tech-blog/k8s-service-apis
|
Installing CRD
Since Service APIs are not currently installed by default on Kubernetes clusters, we need to first install a set of CRD resources that support them and need to ensure that they are installed before Service APIs support is enabled in Traefik.
Currently we can install them directly using version 0.10
1
|
kubectl apply -k "github.com/kubernetes-sigs/service-apis/config/crd?ref=v0.1.0"
|
Installation and Configuration Traefik
Currently, Traefik 2.4+ is required to support the Service APIs, so we need to install Traefik v2.4 (or higher) and configure it to enable the new Provider, which we can do directly using the official Helm Chart package.
1
2
3
|
helm repo add traefik https://helm.traefik.io/traefik
helm repo update
helm install traefik --set experimental.kubernetesGateway.enabled=true traefik/traefik
|
Note the -set experimental.kubernetesGateway.enabled=true parameter we set above, which will install Traefik 2.4, enable the new Service APIs Provider, and create GatewayClasses and a Gateway instance. If there are more customization needs for the installation, we can directly override the Values value of the Chart package by, for example, configuring label selector or TLS certificates, etc.
To verify that the new features are enabled, here we use port forwarding to directly expose the Traefik Dashboard.
1
|
kubectl port-forward $(kubectl get pods --selector "app.kubernetes.io/name=traefik" --output=name) 9000:9000
|
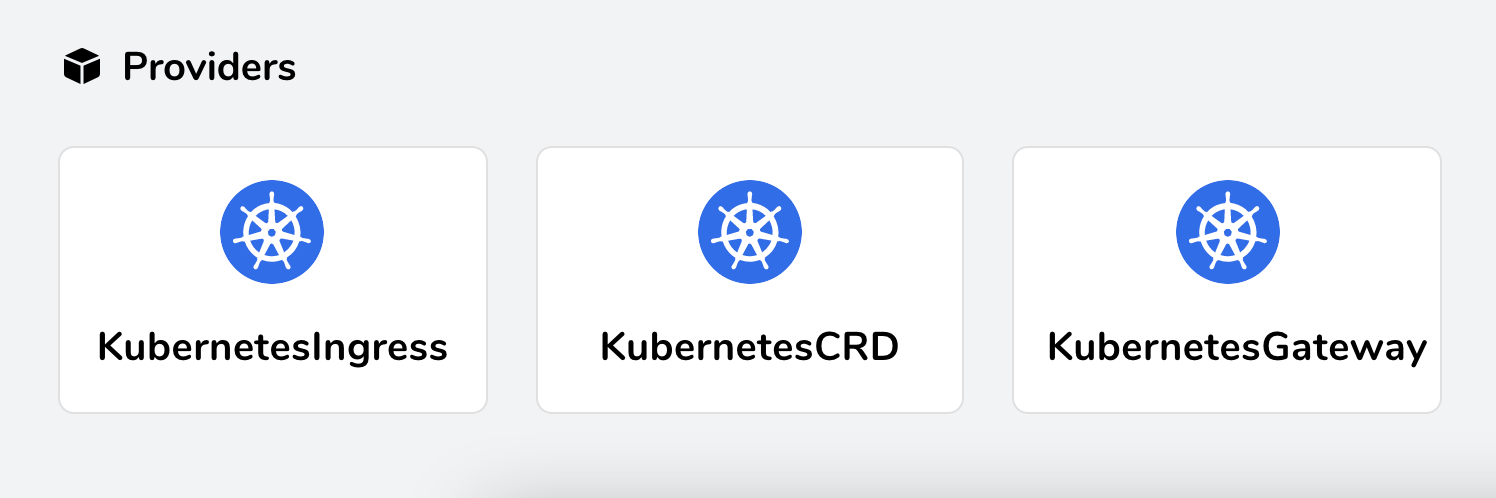
Then use your browser to access the Dashboard via http://localhost:9000/dashboard/ and you should normally see the KubernetesGateway Provider activated and ready to serve.
Testing
Let’s install the whoami service for testing, and create the corresponding service directly using the following list of resources.
 1
 2
 3
 4
 5
 6
 7
 8
 9
10
11
12
13
14
15
16
17
18
19
20
21
22
23
24
25
26
27
28
29
30
31
32
33
34
35
|
# 01-whoami.yaml
---
kind: Deployment
apiVersion: apps/v1
metadata:
  name: whoami
spec:
  replicas: 2
  selector:
    matchLabels:
      app: whoami
  template:
    metadata:
      labels:
        app: whoami
    spec:
      containers:
        - name: whoami
          image: traefik/whoami:v1.6.0
          ports:
            - containerPort: 80
              name: http

---
apiVersion: v1
kind: Service
metadata:
  name: whoami
spec:
  ports:
    - protocol: TCP
      port: 80
      targetPort: http
  selector:
    app: whoami
|
Once the test service is deployed, we can use the Service API for traffic configuration.
Deploy a simple Host host
In the previous approach we would create an Ingress or IngressRoute resource object, here we will deploy the first simple err HTTPRoute object.
 1
 2
 3
 4
 5
 6
 7
 8
 9
10
11
12
13
14
15
16
17
18
19
20
21
|
# 02-whoami-httproute.yaml
---
kind: HTTPRoute
apiVersion: networking.x-k8s.io/v1alpha1
metadata:
  name: http-app-1
  namespace: default
  labels:
    app: traefik
spec:
  hostnames:
    - "whoami"
  rules:
    - matches:
        - path:
            type: Exact
            value: /
      forwardTo:
        - serviceName: whoami
          port: 80
          weight: 1
|
This HTTPRoute resource captures requests made to the whoami hostname and forwards them to the previously deployed whoami service, and if you make a request to this hostname now, you will see the typical whoami output.
 1
 2
 3
 4
 5
 6
 7
 8
 9
10
11
12
13
14
15
16
17
18
|
curl -H "Host: whoami" http://localhost
Hostname: whoami-9cdc57b6d-pfpxs
IP: 127.0.0.1
IP: ::1
IP: 10.42.0.13
IP: fe80::9c1a:a1ff:fead:2663
RemoteAddr: 10.42.0.11:33658
GET / HTTP/1.1
Host: whoami
User-Agent: curl/7.64.1
Accept: */*
Accept-Encoding: gzip
X-Forwarded-For: 10.42.0.1
X-Forwarded-Host: whoami
X-Forwarded-Port: 80
X-Forwarded-Proto: http
X-Forwarded-Server: traefik-74d7f586dd-xxr7r
X-Real-Ip: 10.42.0.1
|
Note the app:traefik tag selector, which ensures that requests are routed to your Traefik instance, which is the default tag installed above via the Helm Chart package, and can of course be customized.
Host host with path
The above example makes it easy to restrict traffic to be routed only on a given subpath.
 1
 2
 3
 4
 5
 6
 7
 8
 9
10
11
12
13
14
15
16
17
18
19
20
21
22
23
24
|
# 03-whoami-httproute-paths.yaml
---
apiVersion: networking.x-k8s.io/v1alpha1
kind: HTTPRoute
metadata:
  labels:
    app: traefik
  name: http-app-1
  namespace: default
spec:
  hostnames:
    - whoami
  rules:
    -
      forwardTo:
        -
          port: 80
          serviceName: whoami
          weight: 1
      matches:
        -
          path:
            type: Exact
            value: /foo
|
Creating the modified HTTPRoute above, you will see that the previous request now returns a 404 error, while the request for the /foo path suffix returns success.
 1
 2
 3
 4
 5
 6
 7
 8
 9
10
11
12
13
14
15
16
17
18
|
curl -H "Host: whoami" http://localhost/foo
Hostname: whoami-9cdc57b6d-pfpxs
IP: 127.0.0.1
IP: ::1
IP: 10.42.0.13
IP: fe80::9c1a:a1ff:fead:2663
RemoteAddr: 10.42.0.11:34424
GET /foo HTTP/1.1
Host: whoami
User-Agent: curl/7.64.1
Accept: */*
Accept-Encoding: gzip
X-Forwarded-For: 10.42.0.1
X-Forwarded-Host: whoami
X-Forwarded-Port: 80
X-Forwarded-Proto: http
X-Forwarded-Server: traefik-74d7f586dd-xxr7r
X-Real-Ip: 10.42.0.1
|
More information about which parts of the request can be matched can be found in the official Service APIs documentation (https://kubernetes-sigs.github.io/service-apis/httproute/).
TLS with static certificates
So far we have created a simple HTTPRoute, next we need to secure this route via TLS, first we need to create a Kubernetes Secret with a certificate first as follows.
 1
 2
 3
 4
 5
 6
 7
 8
 9
10
11
|
# 04-tls-dummy-cert.yaml
---
apiVersion: v1
data:
  tls.crt: LS0tLS1CRUdJTiBDRVJUSUZJQ0FURS0tLS0tCk1JSUVVVENDQXJtZ0F3SUJBZ0lRV2pNZ2Q4OUxOUXIwVC9WMDdGR1pEREFOQmdrcWhraUc5dzBCQVFzRkFEQ0IKaFRFZU1Cd0dBMVVFQ2hNVmJXdGpaWEowSUdSbGRtVnNiM0J0Wlc1MElFTkJNUzB3S3dZRFZRUUxEQ1JxWW1SQQpaSEpwZW5wMElDaEtaV0Z1TFVKaGNIUnBjM1JsSUVSdmRXMWxibXB2ZFNreE5EQXlCZ05WQkFNTUsyMXJZMlZ5CmRDQnFZbVJBWkhKcGVucDBJQ2hLWldGdUxVSmhjSFJwYzNSbElFUnZkVzFsYm1wdmRTa3dIaGNOTWpBeE1qQTAKTVRReE1qQXpXaGNOTWpNd016QTBNVFF4TWpBeldqQllNU2N3SlFZRFZRUUtFeDV0YTJObGNuUWdaR1YyWld4dgpjRzFsYm5RZ1kyVnlkR2xtYVdOaGRHVXhMVEFyQmdOVkJBc01KR3BpWkVCa2NtbDZlblFnS0VwbFlXNHRRbUZ3CmRHbHpkR1VnUkc5MWJXVnVhbTkxS1RDQ0FTSXdEUVlKS29aSWh2Y05BUUVCQlFBRGdnRVBBRENDQVFvQ2dnRUIKQU12bEc5d0ZKZklRSWRreDRXUy9sNGhQTVRQcmVUdmVQOS9MZlBYK2h2ekFtVC90V1BJbGxGY2JJNnZzemp0NQpEWlZUMFFuQzhHYzg0K1lPZXZHcFpNaTg0M20zdTdFSUlmY3dETUF4WWQ0ZjJJcENLVW9jSFNtVGpOaVhDSnhwCjVNd2tlVXdEc1dvVVZza1RxeVpOcWp0RWVIbGNuQTFHaGZSa3dEUkZxd1QxeVhaUTBoZHpkQzRCeFhhaVk0VEQKaFQ1dnFXQmlnUlh0M1VwSkhEL1NXUG4wTEVQOHM3ckhjUkZPY0RhV3ZWMW1jTkxNZUpveWNYUTJ0M2Z1Q0Fsegp3UWZOSjFQSk45QWlLalFJcXJ1MGFnMC9wU0kyQ3NkbEUzUTFpM29tZGpCQkZDcmxNMTZyY0wwNDdtWXZKOEVvCjFMdDVGQkxnVURBZktIOFRsaXU0ZG9jQ0F3RUFBYU5wTUdjd0RnWURWUjBQQVFIL0JBUURBZ1dnTUJNR0ExVWQKSlFRTU1Bb0dDQ3NHQVFVRkJ3TUJNQXdHQTFVZEV3RUIvd1FDTUFBd0h3WURWUjBqQkJnd0ZvQVV5cWNiZGhDego3Nm4xZjFtR3BaemtNb2JOYnJ3d0VRWURWUjBSQkFvd0NJSUdkMmh2WVcxcE1BMEdDU3FHU0liM0RRRUJDd1VBCkE0SUJnUUFzWlBndW1EdkRmNm13bXR1TExkWlZkZjdYWk13TjVNSkk5SlpUQ1NaRFRQRjRsdG91S2RCV0gxYm0Kd003VUE0OXVWSHplNVNDMDNlQ294Zk9Ddlczby94SFZjcDZGei9qSldlYlY4SWhJRi9JbGNRRyszTVRRMVJaVApwNkZOa3kvOEk3anF1R2V2b0xsbW9KamVRV2dxWGtFL0d1MFloVCtudVBJY1pGa0hsKzFWOThEUG5WaTJ3U0hHCkIwVU9RaFdxVkhRU0RzcjJLVzlPbmhTRzdKdERBcFcwVEltYmNCaWlXOTlWNG9Ga3VNYmZQOE9FTUY2ZXUzbW0KbUVuYk1pWFFaRHJUMWllMDhwWndHZVNhcTh1Rk82djRwOVVoWHVuc3Vpc01YTHJqQzFwNmlwaDdpMTYwZzRWawpmUXlYT09KY0o2WTl2a2drYzRLYUxBZVNzVUQvRDR1bmd6emVWQ3k0ZXhhMmlBakpzVHVRS3JkOFNUTGNNbUJkCnhtcXVKZXFWSEpoZEVMNDBMVGtEY1FPM1NzOUJpbjRaOEFXeTJkdkR1a1gwa084dm9IUnN4bWVKcnVyZ09MVmIKamVvbTVQMTVsMkkwY3FKd2lNNHZ3SlBsb25wMTdjamJUb0IzQTU5RjZqekdONWtCbjZTaWVmR3VLM21hVWdKegoxWndjamFjPQotLS0tLUVORCBDRVJUSUZJQ0FURS0tLS0t
  tls.key: LS0tLS1CRUdJTiBQUklWQVRFIEtFWS0tLS0tCk1JSUV2Z0lCQURBTkJna3Foa2lHOXcwQkFRRUZBQVNDQktnd2dnU2tBZ0VBQW9JQkFRREw1UnZjQlNYeUVDSFoKTWVGa3Y1ZUlUekV6NjNrNzNqL2Z5M3oxL29iOHdKay83Vmp5SlpSWEd5T3I3TTQ3ZVEyVlU5RUp3dkJuUE9QbQpEbnJ4cVdUSXZPTjV0N3V4Q0NIM01BekFNV0hlSDlpS1FpbEtIQjBwazR6WWx3aWNhZVRNSkhsTUE3RnFGRmJKCkU2c21UYW83UkhoNVhKd05Sb1gwWk1BMFJhc0U5Y2wyVU5JWGMzUXVBY1Yyb21PRXc0VStiNmxnWW9FVjdkMUsKU1J3LzBsajU5Q3hEL0xPNngzRVJUbkEybHIxZFpuRFN6SGlhTW5GME5yZDM3Z2dKYzhFSHpTZFR5VGZRSWlvMApDS3E3dEdvTlA2VWlOZ3JIWlJOME5ZdDZKbll3UVJRcTVUTmVxM0M5T081bUx5ZkJLTlM3ZVJRUzRGQXdIeWgvCkU1WXJ1SGFIQWdNQkFBRUNnZ0VCQUl5SWpvbzQxaTJncHVQZitIMkxmTE5MK2hyU0cwNkRZajByTVNjUVZ4UVEKMzgvckZOcFp3b1BEUmZQekZUWnl1a1VKYjFRdUU2cmtraVA0S1E4MTlTeFMzT3NCRTVIeWpBNm5CTExYbHFBVwpEUmRHZ05UK3lhN2xiemU5NmdaOUNtRVdackJZLzBpaFdpdmZyYUNKK1dJK1VGYzkyS1ZoeldSa3FRR2VYMERiCnVSRXRpclJzUXVRb1hxNkhQS1FIeUVITHo2aWVVMHJsV3IyN0VyQkJ4RlRKTm51MnJ1MHV1Ly8wdG1SYjgzZWwKSUpXQnY1V1diSnl4dXNnMkhkc0tzTUh0eEVaYWh1UlpTNHU2TURQR3dSdjRaU0xpQm1FVVc3RUMwUEg3dCtGaAoxUDcrL0Yyd1pGSDAvSzl6eXUyc0lOMDJIbTBmSWtGejBxb09BSzQ5OXhrQ2dZRUE2SC9nVUJoOG9GUSt2cmZKCnQvbXdMeFBHZHhWb3FWR1hFVjhlQzNWbmxUSXJlREpNWm81b1hKZHNuQ0d2S1NaWUhXZ3o3SVpwLzRCL29vSWsKTDl4TEJSVTJwS0d1OGxBT1ZhYnpaVDk0TTZYSE1PTGQ0ZlUrS3ZqK1lLVm5laEM3TVNQL3RSOWhFMjN1MnRKZwp1eUdPRklFVlptNHZxS1hEelU3TTNnU0R5WXNDZ1lFQTRJRVFyZDl2MXp0T2k5REZ6WEdnY05LVmpuYmFTWnNXCm9JNm1WWFJZS1VNM1FyWUw4RjJTVmFFM0Y0QUZjOXRWQjhzV0cxdDk4T09Db0xrWTY2NjZqUFkwMXBWTDdXeTMKZXpwVEFaei9tRnc2czdic3N3VEtrTW5MejVaNW5nS3dhd3pRTXVoRGxLTmJiUi90enRZSEc0NDRrQ2tQS3JEbQphOG40bUt6ZlRuVUNnWUFTTWhmVERPZU1BS3ZjYnpQSlF6QkhydXVFWEZlUmtNSWE2Ty9JQThzMGdQV245WC9ICk12UDE4eC9iNUVMNkhIY2U3ZzNLUUFiQnFVUFQ2dzE3OVdpbG9EQmptQWZDRFFQaUxpdTBTOUJUY25EeFlYL3QKOUN5R1huQkNEZy9ZSE1FWnFuQ1RzejM4c0VqV05VcSt1blNOSkVFUmdDUVl0Y2hxSS9XaWxvWGQyd0tCZ1FEQworTlBYYlBqZ1h5MHoxN2d4VjhFU3VwQVFEY0E5dEdiT1FaVExHaU9Ha2sxbnJscG9BWnVZcWs0Q0pyaVZpYUlyCkJvREllWWpDcjVNK3FnR3VqU3lPUnpSVU40eWRRWkdIZjN1Zkp3NEM3L1k3SlY0amlzR3hSTSt3Rk9yQ0EydmIKVEdGMEZLcThaN0o2N3dQRVliUUNobDB4TmJkcVIvK1ZGTzdGQ1QxV0VRS0JnQThUaE9hZmNEUmdpd0IxRFdyRgozZ1lmT3I0dERENExrNjRYZlF6ajdtRXQyYlJzOFNEYXYwVGZPclVUUlpFTTkyTVFZMnlrbzhyMDJDbmpndmxCCm1aYnZCTEFYaVZLa0laai9TTkNYUnhzOFZkZ3psTkpzYVNZTUtsNloxK1Z3MnZUdDNQSnI0TXlhRWpHYUxlSmMKRGRTQjdYOU9ESk5acW10bGpoRzc5eXpQCi0tLS0tRU5EIFBSSVZBVEUgS0VZLS0tLS0=
kind: Secret
metadata:
  name: mysecret
  namespace: default
type: kubernetes.io/tls
|
With this Secret resource in place, it is time to start the security configuration. First, the Gateway must be reconfigured to create a TLS listener with a mysecret certificate, which can be updated by using Helm Chart’s upgrade option to add a certificate section to the Traefik configuration.
1
|
helm upgrade traefik -f 05-values.yaml traefik/traefik
|
where 05-values.yaml reads as follows.
 1
 2
 3
 4
 5
 6
 7
 8
 9
10
11
|
# 05-values.yaml
---
experimental:
  kubernetesGateway:
    appLabelSelector: traefik
    certificates:
      -
        group: "core"
        kind: "Secret"
        name: "mysecret"
    enabled: true
|
After Traefik restart, we can see that HTTPRoute is still valid, only now we can access it with HTTPS.
 1
 2
 3
 4
 5
 6
 7
 8
 9
10
11
12
13
14
15
16
17
18
|
curl --insecure -H "Host: whoami" https://localhost/foo
Hostname: whoami-9cdc57b6d-pfpxs
IP: 127.0.0.1
IP: ::1
IP: 10.42.0.13
IP: fe80::9c1a:a1ff:fead:2663
RemoteAddr: 10.42.0.11:53158
GET /foo HTTP/1.1
Host: whoami
User-Agent: curl/7.64.1
Accept: */*
Accept-Encoding: gzip
X-Forwarded-For: 10.42.0.1
X-Forwarded-Host: whoami
X-Forwarded-Port: 443
X-Forwarded-Proto: https
X-Forwarded-Server: traefik-74d7f586dd-xxr7r
X-Real-Ip: 10.42.0.1
|
Canary Release
Another feature that Traefik 2.4 can support through the Service APIs specification is canary publishing. Suppose you want to run two different services (or two versions of the same service) on a single endpoint and route a portion of the requests to each endpoint, you can do this by modifying your HTTPRoute.
First, we need to run the second service, and here we quickly generate an instance of Nginx to test it.
 1
 2
 3
 4
 5
 6
 7
 8
 9
10
11
12
13
14
15
16
17
18
19
20
21
22
23
24
25
26
27
28
29
30
31
32
33
34
35
|
# 06-nginx.yaml
---
kind: Deployment
apiVersion: apps/v1
metadata:
  name: nginx
spec:
  replicas: 2
  selector:
    matchLabels:
      app: whoami
  template:
    metadata:
      labels:
        app: nginx
    spec:
      containers:
        - name: whoami
          image: nginx
          ports:
            - containerPort: 80
              name: http

---
apiVersion: v1
kind: Service
metadata:
  name: whoami
spec:
  ports:
    - protocol: TCP
      port: 80
      targetPort: http
  selector:
    app: nginx
|
The HTTPRoute resource has a weight option that assigns different values to each of the two services.
 1
 2
 3
 4
 5
 6
 7
 8
 9
10
11
12
13
14
15
16
17
18
19
20
|
# 07-whoami-nginx-canary.yaml
---
apiVersion: networking.x-k8s.io/v1alpha1
kind: HTTPRoute
metadata:
  labels:
    app: traefik
  name: http-app-1
  namespace: default
spec:
  hostnames:
    - whoami
  rules:
    - forwardTo:
        - port: 80
          serviceName: whoami
          weight: 3
        - port: 80
          serviceName: nginx
          weight: 1
|
After creating the HTTPRoute above, we can now access the whoami service again http://localhost (without thefoo/ path suffix) and normally we can see that about 25% of the time we will see a response from Nginx instead of a response from whoami.
Currently, Traefik’s implementation of Service APIs is focused only on HTTP and HTTPS. However, the specification also has TCP capabilities and may support UDP in the future, which will need to be implemented later. Of course you can start using Kubernetes Service APIs with Traefik 2.4 now.
Summary
Here we have used Traefik 2.4 to test the use of the Kubernetes Service APIs. Currently, Traefik’s implementation of Service APIs is only focused on HTTP and HTTPS, however, the specification also has TCP functionality and may support UDP in the future, which are features that need to be implemented in the future.