Apache Kafka is the most popular distributed messaging publish-subscribe system available today. While Kafka is very powerful, it is equally complex and requires a highly available and robust platform to run. In a world where microservices are prevalent and most companies are adopting distributed computing, it is still very advantageous to use Kafka as a core messaging system.
If you run your microservices in a Kubernetes cluster, it makes sense to run a Kafka cluster in Kubernetes to take advantage of its built-in resiliency and high availability, and we can easily interact with Kafka Pods within the cluster using the built-in Kubernetes service discovery.
Here we will introduce how to build a distributed Kafka cluster on Kubernetes, here we will use Helm Chart and StatefulSet for deployment, of course if you want to dynamically generate persistent data volumes, you also need to configure a StorageClass resource in advance, for example based on Ceph RBD, if you don’t have dynamic volumes configured in your cluster, you need to create 3 unbound PVs for data persistence in advance.
The current Kafka deployment on Kubernetes based on Helm’s official repository chartincubator/kafka, using the image confluentinc/cp-kafka:5.0.1, that is, the deployment is the Kafka version provided by Confluent, Confluent Platform Kafka (CP Kafka for short) provides some advanced features that Apache Kafka does not, such as cross-data center backup, Schema registry, and cluster monitoring tools.
Installation
Installing with Helm Chart requires Helm to be installed, of course, and can be done directly with the latest version of Helm v3 as follows.
1
2
3
4
|
> wget https://get.helm.sh/helm-v3.4.0-linux-amd64.tar.gz
> tar -zxvf helm-v3.4.0-linux-amd64.tar.gz
> sudo cp -a linux-amd64/helm /usr/local/bin/helm
> chmod +x /usr/local/bin/helm
|
Then add Kafka’s Chart repository.
1
2
3
4
5
6
|
> helm repo add incubator http://mirror.azure.cn/kubernetes/charts-incubator/
> helm repo update
Hang tight while we grab the latest from your chart repositories...
...Successfully got an update from the "incubator" chart repository
...Successfully got an update from the "stable" chart repository
Update Complete. ⎈Happy Helming!⎈
|
Next we can configure the Values file to be installed, either directly using the default values.yaml file, which can then be used to customize it, for example by specifying our own StorageClass.
1
|
> curl https://raw.githubusercontent.com/helm/charts/master/incubator/kafka/values.yaml > kfk-values.yaml
|
Here I have used the default directly for installation.
 1
 2
 3
 4
 5
 6
 7
 8
 9
10
11
12
13
14
15
16
17
18
19
20
21
22
23
24
25
26
27
28
29
30
31
32
33
34
35
36
37
38
39
40
41
42
43
44
45
46
47
|
> helm install kafka incubator/kafka -f kfk-values.yaml
NAME: kafka
LAST DEPLOYED: Sun Nov  1 09:36:44 2020
NAMESPACE: default
STATUS: deployed
REVISION: 1
NOTES:
### Connecting to Kafka from inside Kubernetes

You can connect to Kafka by running a simple pod in the K8s cluster like this with a configuration like this:

  apiVersion: v1
  kind: Pod
  metadata:
    name: testclient
    namespace: default
  spec:
    containers:
    - name: kafka
      image: confluentinc/cp-kafka:5.0.1
      command:
        - sh
        - -c
        - "exec tail -f /dev/null"

Once you have the testclient pod above running, you can list all kafka
topics with:

  kubectl -n default exec testclient -- ./bin/kafka-topics.sh --zookeeper kafka-zookeeper:2181 --list

To create a new topic:

  kubectl -n default exec testclient -- ./bin/kafka-topics.sh --zookeeper kafka-zookeeper:2181 --topic test1 --create --partitions 1 --replication-factor 1

To listen for messages on a topic:

  kubectl -n default exec -ti testclient -- ./bin/kafka-console-consumer.sh --bootstrap-server kafka:9092 --topic test1 --from-beginning

To stop the listener session above press: Ctrl+C

To start an interactive message producer session:
  kubectl -n default exec -ti testclient -- ./bin/kafka-console-producer.sh --broker-list kafka-headless:9092 --topic test1

To create a message in the above session, simply type the message and press "enter"
To end the producer session try: Ctrl+C

If you specify "zookeeper.connect" in configurationOverrides, please replace "kafka-zookeeper:2181" with the value of "zookeeper.connect", or you will get error.
|
If you don’t configure StorageClass or available PVs, kafka’s Pod will be in Pending state when you install it, so be sure to configure the data volumes in advance.
Normally, Kafka will be installed successfully in a few moments.
1
2
3
4
5
6
7
8
|
> kubectl get pods
NAME                READY   STATUS    RESTARTS   AGE
kafka-0             1/1     Running   0          25m
kafka-1             1/1     Running   0          11m
kafka-2             1/1     Running   0          2m
kafka-zookeeper-0   1/1     Running   0          25m
kafka-zookeeper-1   1/1     Running   0          22m
kafka-zookeeper-2   1/1     Running   0          18m
|
By default, 3 ZK Pods and 3 Kafka Pods are installed, which ensures high availability of the application, or you can see the information about the persistent volumes I configured.
 1
 2
 3
 4
 5
 6
 7
 8
 9
10
|
> kubectl get pvc
NAME              STATUS   VOLUME   CAPACITY   ACCESS MODES   STORAGECLASS   AGE
datadir-kafka-0   Bound    kfk0     1Gi        RWO                           28m
datadir-kafka-1   Bound    kfk1     1Gi        RWO                           13m
datadir-kafka-2   Bound    kfk2     1Gi        RWO                           4m9s
> kubectl get pv
NAME   CAPACITY   ACCESS MODES   RECLAIM POLICY   STATUS   CLAIM                     STORAGECLASS   REASON   AGE
kfk0   1Gi        RWO            Retain           Bound    default/datadir-kafka-0                           23m
kfk1   1Gi        RWO            Retain           Bound    default/datadir-kafka-1                           22m
kfk2   1Gi        RWO            Retain           Bound    default/datadir-kafka-2                           10m
|
If we configure a default StorageClass, it will dynamically request persistent volumes. If your cluster does not have dynamic volumes enabled, you can modify values.yaml to use static volumes.
Then look at the corresponding Service object.
1
2
3
4
5
6
7
|
> kubectl get svc
NAME                       TYPE        CLUSTER-IP       EXTERNAL-IP   PORT(S)                      AGE
kafka                      ClusterIP   10.100.205.187   <none>        9092/TCP                     31m
kafka-headless             ClusterIP   None             <none>        9092/TCP                     31m
kafka-zookeeper            ClusterIP   10.100.230.255   <none>        2181/TCP                     31m
kafka-zookeeper-headless   ClusterIP   None             <none>        2181/TCP,3888/TCP,2888/TCP   31m
kubernetes                 ClusterIP   10.96.0.1        <none>        443/TCP                      14d
|
You can see that there is a zookeeper service called kafka-zookeeper and a Kafka service called kafka. For the management of the Kafka cluster, we will interact with the kafka-zookeeper service, and for the sending and receiving of cluster messages, we will use the kafka service.
Client testing
Now that the Kafka cluster is set up, let’s install a Kafka client that will help us generate and retrieve topics messages.
Create the client directly with the following command.
 1
 2
 3
 4
 5
 6
 7
 8
 9
10
11
12
13
14
15
16
17
18
|
> cat <<EOF | kubectl apply -f -
apiVersion: v1
kind: Pod
metadata:
  name: testclient
  namespace: default
spec:
  containers:
  - name: kafka
    image: confluentinc/cp-kafka:5.0.1
    command:
      - sh
      - -c
      - "exec tail -f /dev/null"
EOF
> kubectl get pod testclient
NAME         READY   STATUS    RESTARTS   AGE
testclient   1/1     Running   0          23s
|
Once the client pod is created successfully we can start doing some simple tests. First let’s create a topic named test1 with a partition and replication factor '1'.
1
2
|
> kubectl exec -it testclient -- /usr/bin/kafka-topics --zookeeper kafka-zookeeper:2181 --topic test1 --create --partitions 1 --replication-factor 1
Created topic "test1".
|
Then create a producer that will post messages to this topic.
1
2
|
> kubectl  exec -ti testclient -- /usr/bin/kafka-console-producer --broker-list kafka:9092 --topic test1
>
|
Then retype a terminal page that allows us to open a consumer session so we can see the message we sent.
1
|
> kubectl exec -ti testclient -- /usr/bin/kafka-console-consumer --bootstrap-server kafka:9092 --topic test1
|
Now we send the message in the producer’s window and see the corresponding message in the consumer session window above:
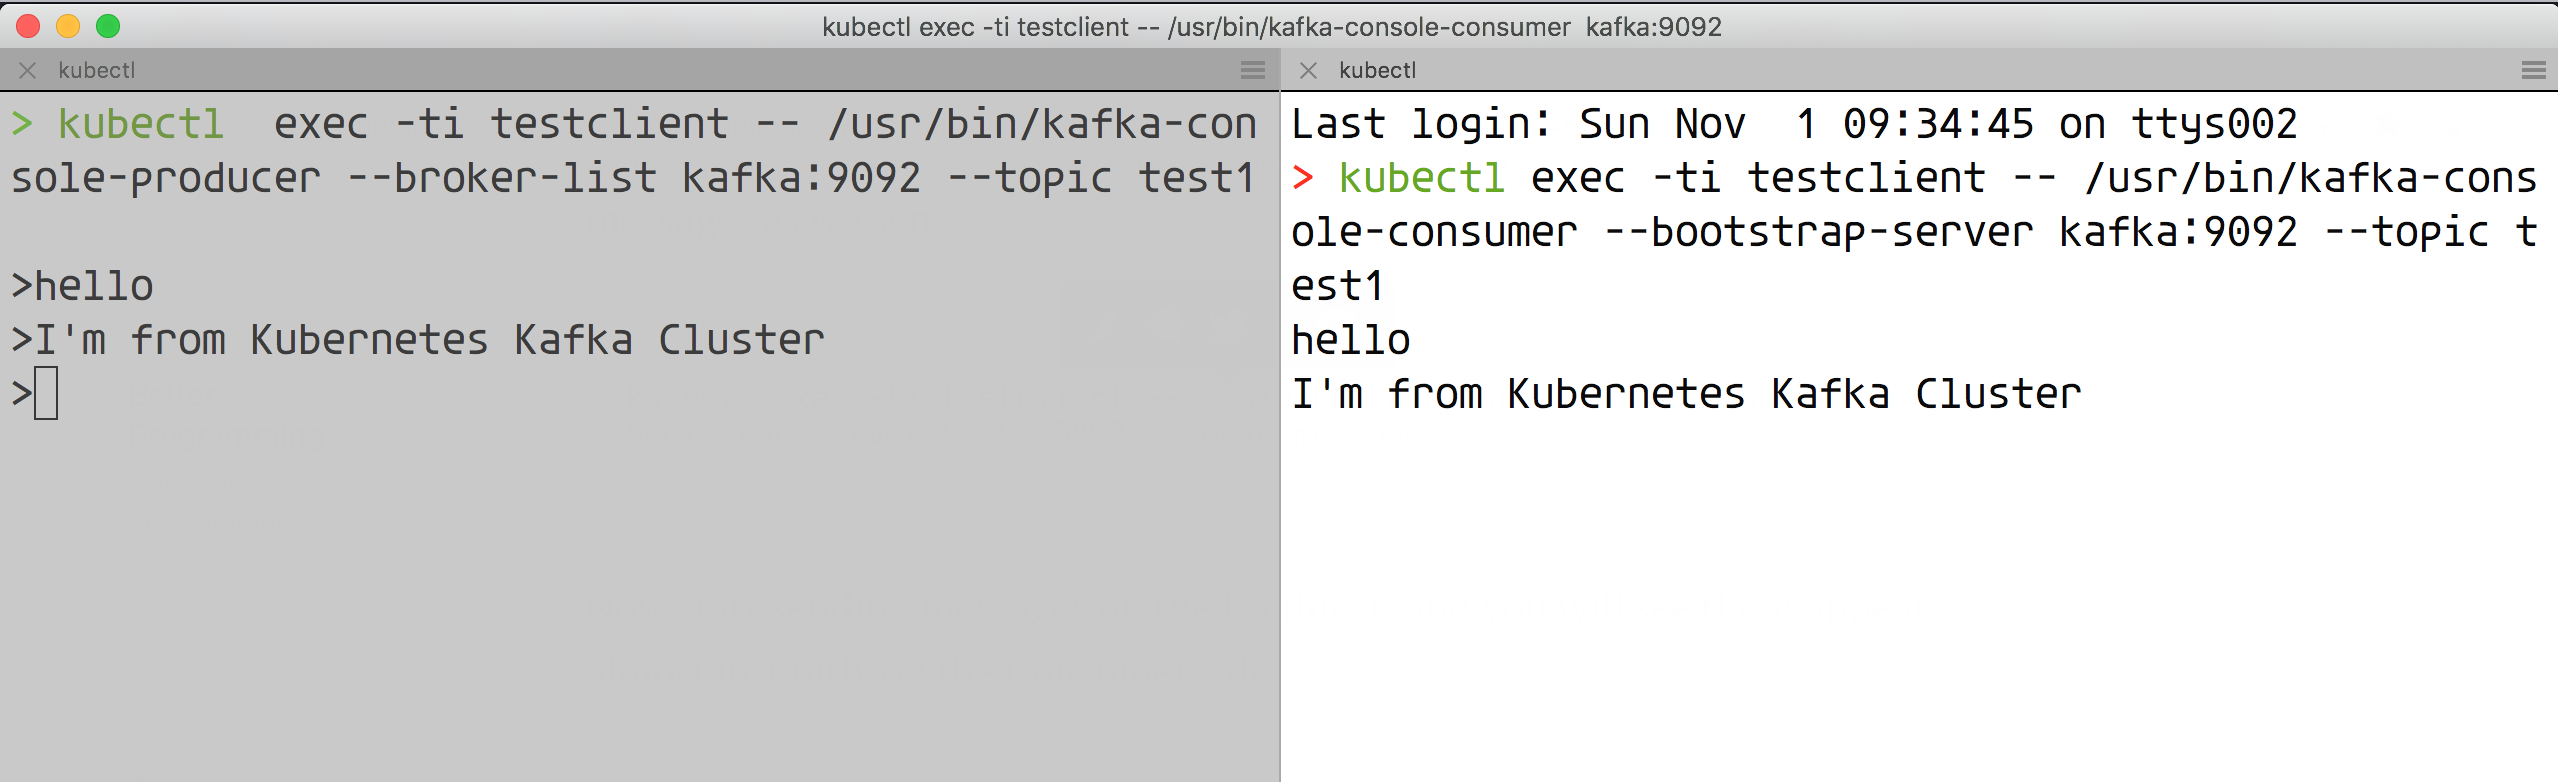
Here the Kafka cluster is proven to work properly. For example, it should be noted that we did not persist the zk cluster, so if it is a production environment, you must remember to do the data persistence and customize it according to your needs in the values.yaml file, but of course for production environments it is recommended to use an Operator to build Kafka clusters, such as strimzi-kafka-operator.