In the past, we have built technology platforms using microservices, containerization, and service orchestration. To improve the efficiency of our development teams, we also provide the CICD platform for rapid deployment of code to Openshift (an enterprise-class Kubernetes) clusters.
The first step of deployment is to containerize the application, and the continuous integration deliverables have changed from jar packages, webpack, etc. to container images. Containerization packages the software code and all the required components (libraries, frameworks, runtime environments) together so that it can run consistently on any infrastructure in any environment and be “isolated” from other applications.
Our code needs to go from source to compile to final runnable image and even deployment, all in the CICD pipeline. Initially, we added three files to each code repository, which we also injected into new projects via a project builder (similar to Spring Initializer).
- Jenkinsfile.groovy: used to define the Jenkins pipeline, and there will be multiple versions for different languages
- Manifest YAML: used to define Kubernetes resources, i.e. descriptions of workloads and their operation
- Dockerfile: used to build objects
These three files also need to evolve as we work. Initially, when there were fewer projects (a dozen or so), our basic team could go to various code repositories to maintain and upgrade them. As projects grew exponentially, the cost of maintenance became higher and higher. We iterated on the CICD platform, moving “Jenkinsfile.groovy” and “manifest YAML” out of the project and keeping the less-changed Dockerfile.
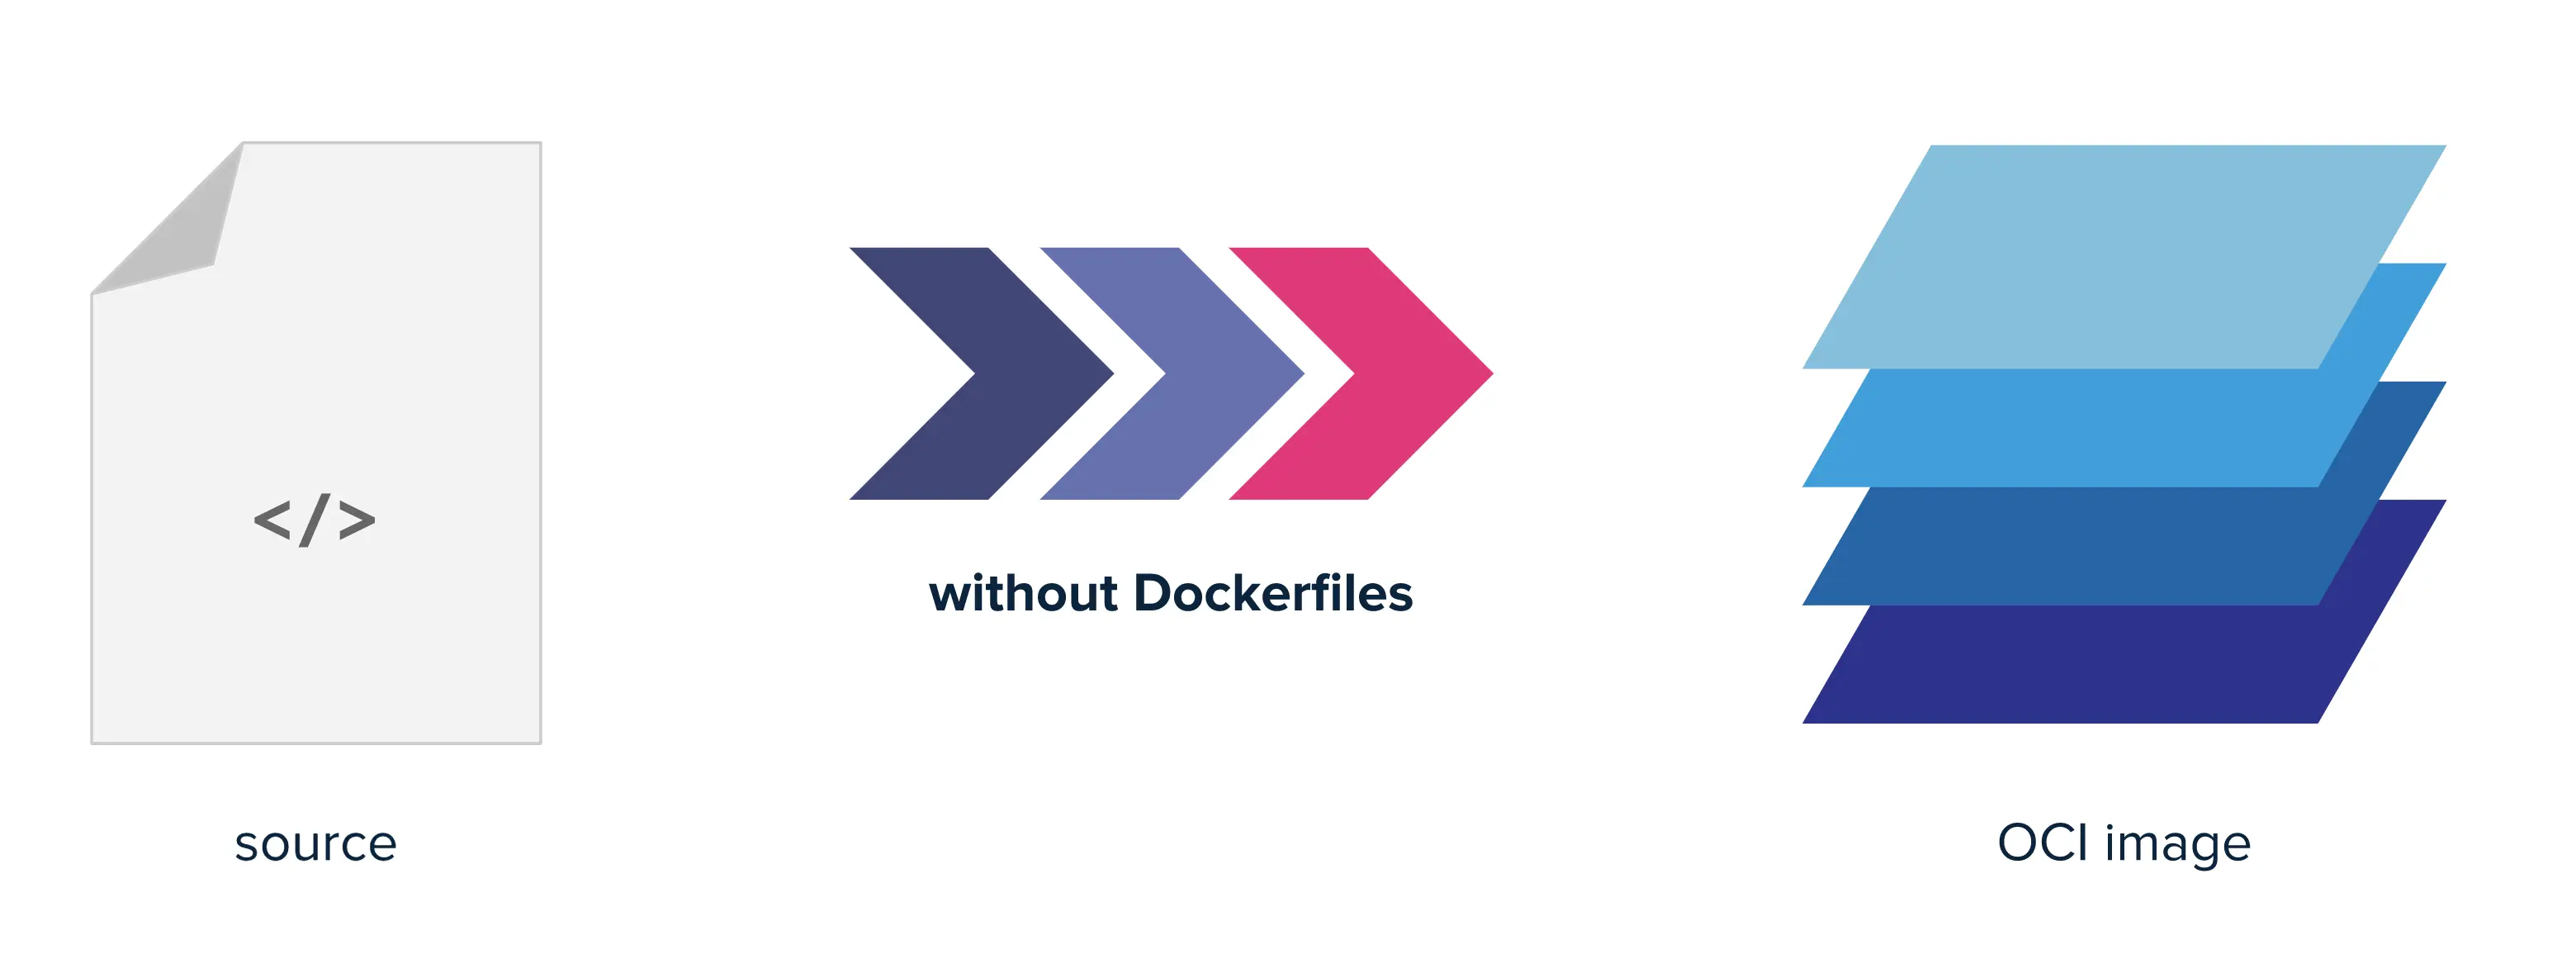
As the platform evolves, we need to consider decoupling the only “nail households”, Dockerfile, from the code, and upgrading it if necessary. So we researched buildpacks and came up with this article today.
What is Dockerfile
Docker automatically builds images by reading the instructions in a Dockerfile, which is a text file containing instructions that can be executed by Docker to build images. Let’s take the Dockerfile used to test Tekton’s Java project as an example.
Mirror layering
You may have heard that Docker images contain multiple layers. Each layer corresponds to each command in the Dockerfile, such as RUN, COPY, and ADD. Some specific commands will create a new layer, and if some layers do not change during the image build, they will be fetched from the cache.
In the Buildpack below, the image is also layered and cached to speed up the image build.
What is Buildpack
BuildPack is a program that converts source code into a container image that can be run in any cloud environment. Typically buildpack encapsulates an ecological toolchain for a single language. Works with Java, Ruby, Go, NodeJs, Python, etc.
What is Builder?
A number of buildpacks are combined in order to form builder, and in addition to buildpacks, the builder also adds lifecycle and stack container image.
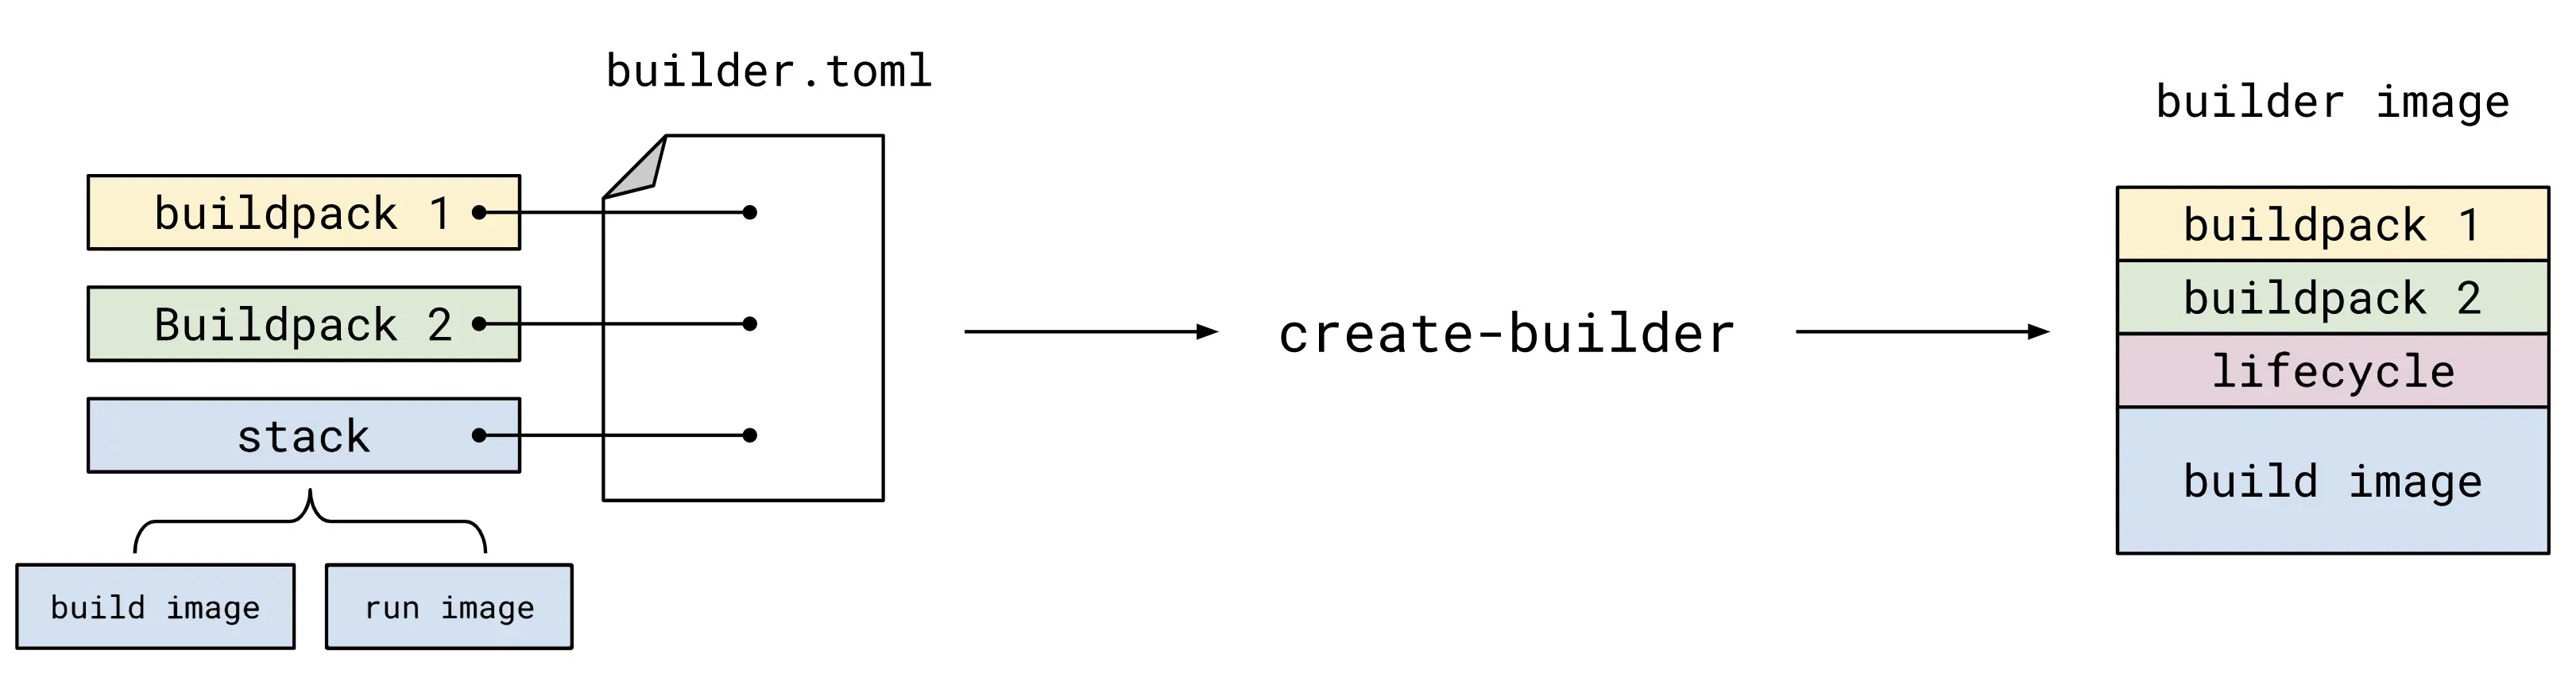
The stack container image consists of two images: the build image, which is used to run the buildpack, and the run image, which is the base image for building the application image.
How Buildpack works
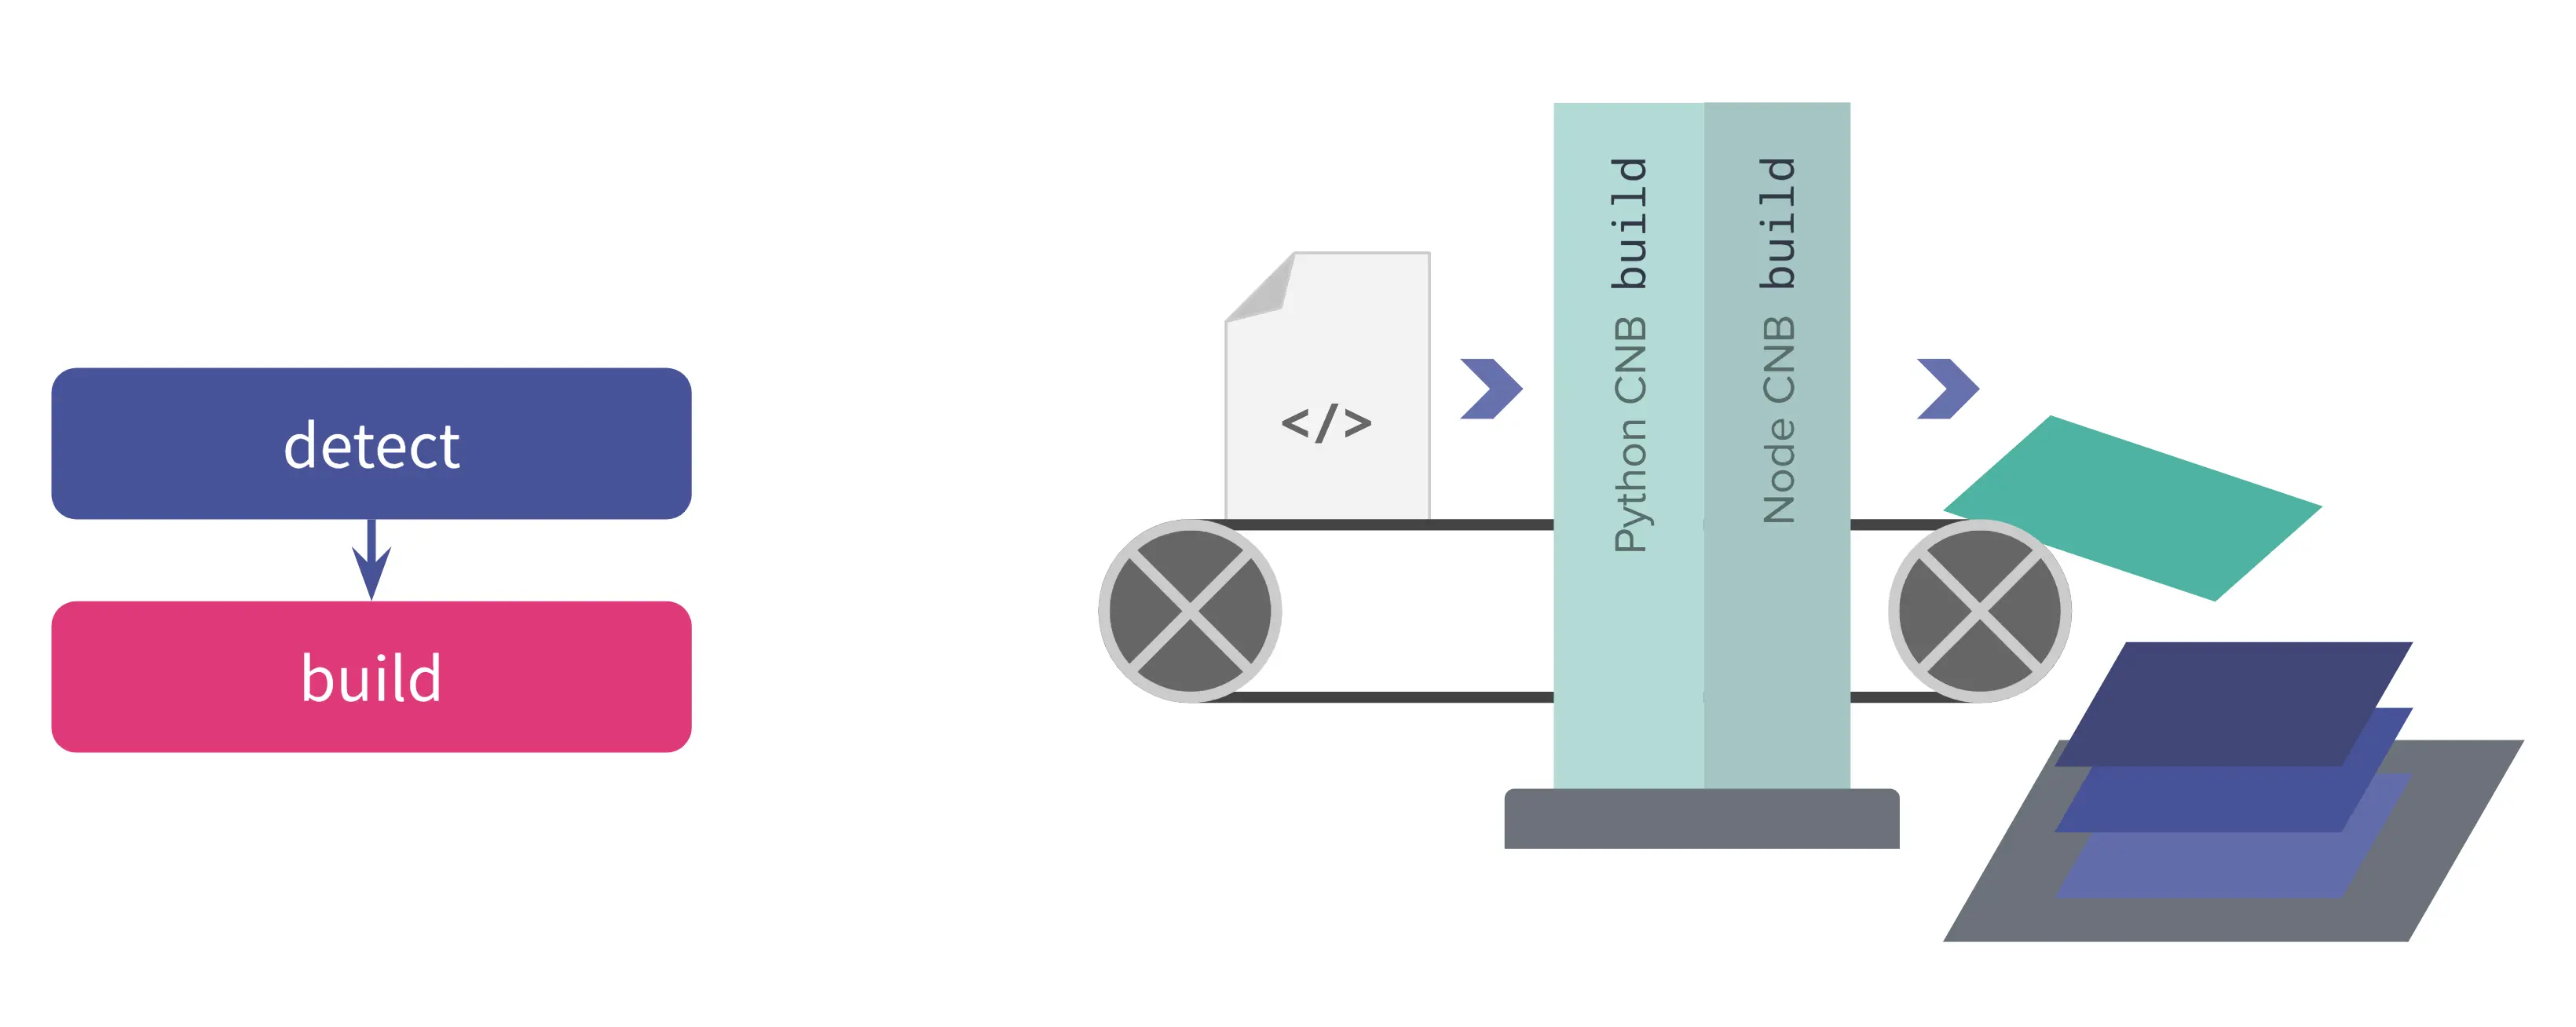
Each buildpack runtime consists of two phases.
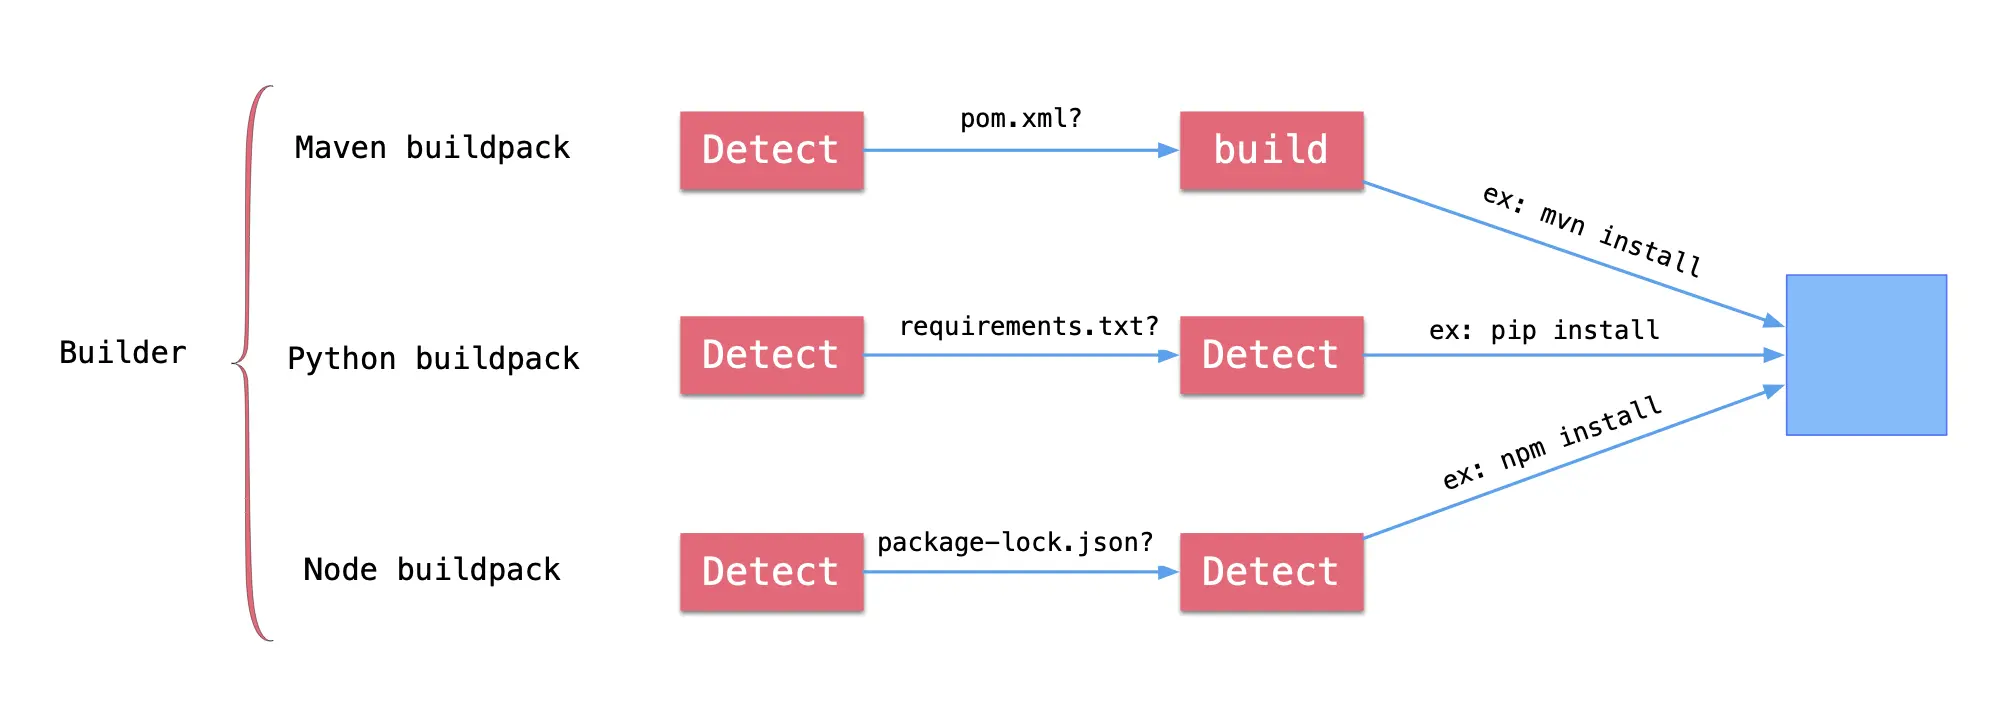
1. Detection phase
Determines if the current buildpack is applicable by checking some specific files/data in the source code. If applicable, it will enter the build phase; otherwise, it will exit. For example.
- Java maven’s buildpack checks if
pom.xmlis present in the source code - Python’s buildpack checks for
requirements.txtorsetup.pyfiles in the source code. - Node buildpack looks for the
package-lock.jsonfile.
2. Build phase
The following operations are performed during the build phase.
- set up the build and runtime environments
- download the dependencies and compile the source code (if required)
- set up the correct entrypoint and startup scripts.
For example.
- Java maven buildpack checks for a
pom.xmlfile and then executesmvn clean install -DskipTests. - Python buildpack checks for
requrements.txtand then executespip install -r requrements.txt. - Node build pack checks for
package-lock.jsonand then executesnpm install
BuildPack Hands-On
How do you build an image with builderpack without a Dockerfile? After reading the above, you can basically understand that the core of this is in the writing and use of buildpack.
In fact, there are many open source buildpacks that you can use now, so you don’t have to write them manually without a specific customization. For example, here are a few buildpacks that are open source and maintained by major manufacturers.
But before we go into detail about open source buildpacks, let’s take a deeper look into how Buildpacks work by creating our own buildpack. For testing the project, we’ll use Testing Tekton’s Java Project.
Everything below is committed to Github and can be accessed at: https://github.com/addozhang/buildpacks-sample for the code.
The final directory buildpacks-sample is structured as follows.
Create buildpack
Look at the resulting buildpack-maven directory.
The default preliminary test data in each file is not very useful. Something needs to be added.
bin/detect :
bin/build:
|
|
buildpack.toml :
Create stack
To build a Maven project, the preferred environment is Java and Maven, so we use maven:3.5.4-jdk-8-slim as the base image for the build image. The runtime of the application requires a Java environment, so we use openjdk:8-jdk-slim as the base image for the run image.
Create build and run directories in the stacks directory, respectively.
build/Dockerfile
|
|
run/Dockerfile
Then build out two images using the following command.
Create Builder
After you have the buildpack and stack, you create the Builder. First, create the builder.toml file and add the following content.
|
|
Then execute the command, Note that we use the -pull-policy if-not-present parameter here, so we don’t need to push the two images of the stack to the mirror repository:
|
|
Testing
Once we have the builder, we can use the created builder to build the image.
The same -pull-policy if-not-present parameter is added here to use the local builder image: -pull-policy if-not-present parameter is added here to use the local builder image.
If you see something like the following, it means that the image was built successfully (the first time to build the image due to the need to download maven dependencies may take longer, the subsequent will be faster, you can perform twice to verify the next).
|
|
Start the container and you will see that the spring boot application starts normally:
|
|
Summary
In fact, there are many open source buildpacks available that you can use without having to write them manually for specific customizations. For example, the following buildpacks are open-sourced and maintained by major manufacturers.
The buildpacks libraries above are more comprehensive and may differ slightly in their implementation. For example, Heroku uses shell scripts for its execution phase, while Paketo uses Golang, which is more scalable, supported by the Cloud Foundry Foundation, and has a full-time core development team sponsored by VMware. These small, modular buildpacks can be extended to use different scenarios by combining them.
Of course, it’s easier to understand how a buildpack works by writing one yourself.