In my previous blog on how Docker (containers) works, I described how Docker image works. In simple terms, it uses Linux’s overlayfs, overlay file system, to merge two file systems together, with the lower file system being read-only and the upper file system being writable. If you read, you find the upper layer and read the upper layer, otherwise you find the lower layer and read it to you. Then if you write, you write to the upper layer. In this way, for the end user, you can think that there is only one file system after merge, and there is no difference between it and a normal file system.
With this feature, when Docker runs, it starts from the bottom filesystem, merges two layers, gets a new fs, then merges the top layer, then merges the top layer, and finally gets the final directory, then uses chroot to change the root directory of the process and starts the container.
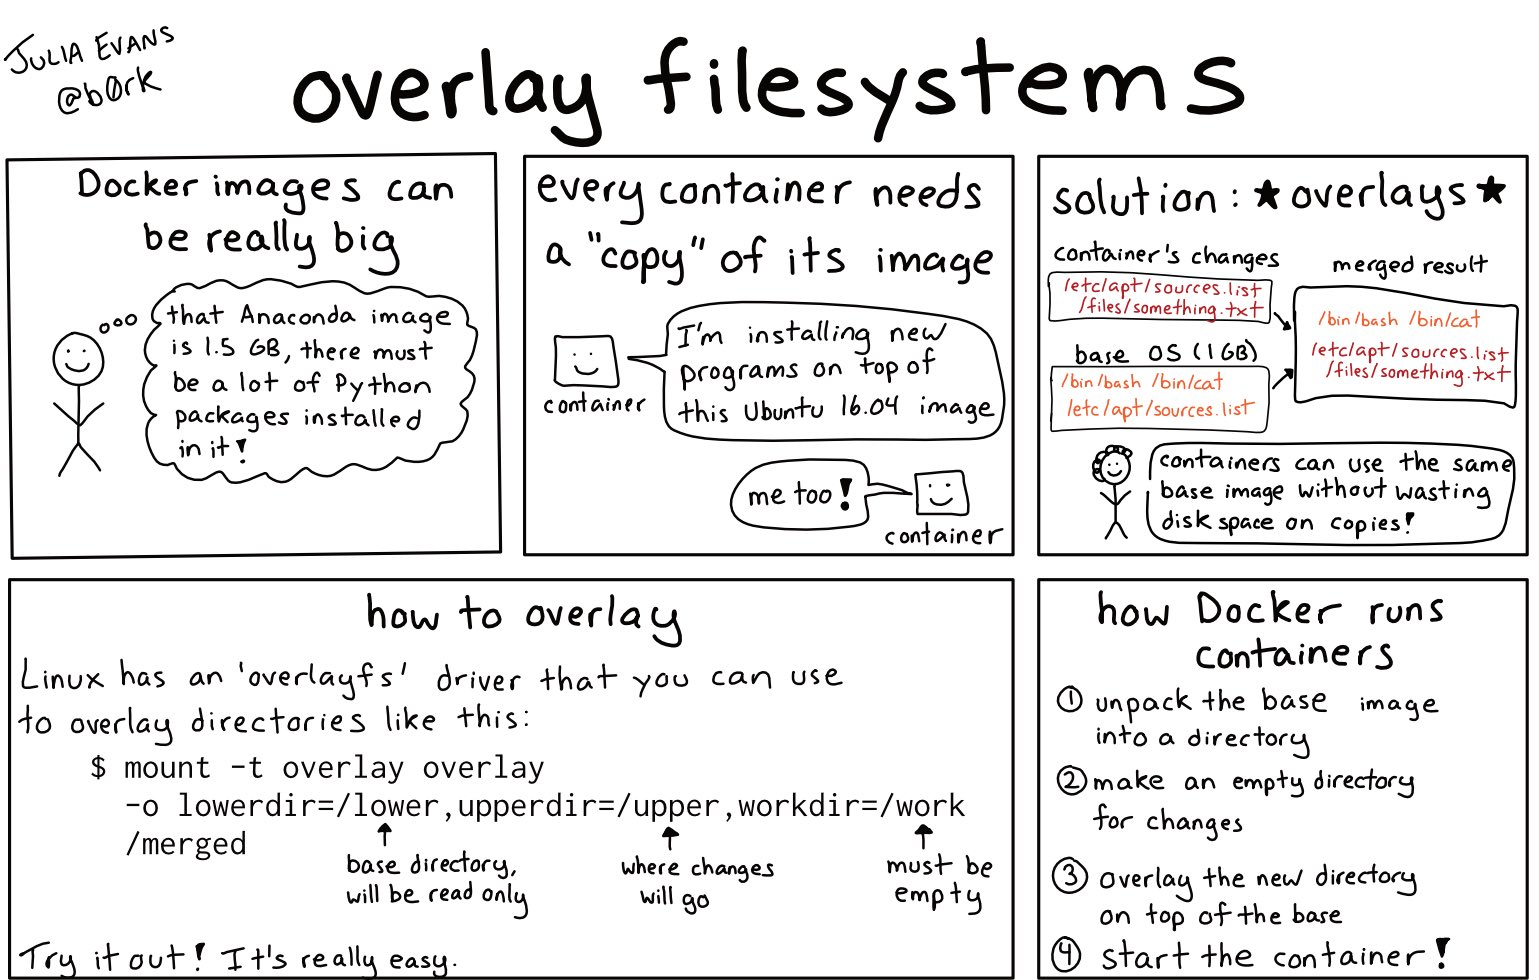
Once you understand the principle, you will find that this design is very suitable for Docker:
- if both images are based on Ubuntu, then both images can share the Ubuntu base image and only need to store one copy.
- if you pull a new image, you don’t need to pull the content of the previous layer if it already exists.
The later tips for building images are actually based on these two points.
Another thing I want to mention is that a Docker image is actually a tarball. Generally speaking, we build it with the docker built command via Dockerfile, but you can also build it with other tools, as long as the built image meets Docker’s specifications.
Tip 1: Delete the cache
Normal package managers, such as apt , pip and so on, will download the cache when they download a package, so that the next time you install the same package, you don’t have to download it from the network, but just use the cache.
But in Docker Image, we don’t need these caches. So we download things in Dockerfile with this command.
After the package has been installed, go ahead and delete the cache.
A common mistake is that someone will write this.
Each RUN in a Dockerfile creates a new layer, as described above, so that 3 layers are created, the first 2 layers bring in the cache, and the third layer removes the cache. As with git, if you delete the previous files in a new commit, the files are still in the git history, and the final docker image is not actually reduced.
But Docker has a new feature, docker build --squash. squash compresses all the layers into a single layer after Docker finishes building, which means that the final Docker image is built with only one layer. So, writing clean commands in multiple RUNs as above is actually fine. I don’t really like this approach, because as mentioned before, multiple images sharing base images and accelerated pull features are not really used.
Some common methods for package managers to remove cache.
| Package Manager | How to delete the cache |
|---|---|
| yum | yum clean all |
| dnf | dnf clean all |
| rvm | rvm cleanup all |
| gem | gem cleanup |
| cpan | rm -rf ~/.cpan/{build,sources}/* |
| pip | rm -rf ~/.cache/pip/* |
| apt-get | apt-get clean |
Also, the above command actually has a disadvantage. Because we write multiple lines in the same RUN, it is not easy to see what exactly is installed in this dnf. Moreover, the first line and the last line are not the same, so if we modify them, diff will see two lines, which is very unfriendly and error-prone.
It can be written in this form, which is clearer.
Tip 2: Put the infrequently changed content forward
Through the principle introduced in the previous article, we can know that for a Docker image has four layers ABCD, B modified, then BCD will change.
According to this principle, we can write system dependencies forward when we build, because things like apt , dnf that are installed are rarely modified. Then write the library dependencies for the application, like pip install, and finally copy the application.
The following Dockerfile, for example, will re-build most of the layers every time the code changes, even if only the title of a page is changed.
|
|
Instead, we can install Nginx first, then copy requirements.txt separately, then install the pip dependency, and finally copy the application code.
|
|
Tip 3: Separate build and run Image
We need a lot of build tools like gcc, golang, etc. when we compile the application. But we don’t need them at runtime. After the build is done, it’s a pain to remove those build tools.
We can do this: use a Docker as the builder, install all the build dependencies, do the build, select a new base image after the build is done, and copy the build products to the new base image, so that the final image contains only the things needed to run.
For example, here is the code to install a golang application pup.
We use golang, a 1G image, to install it, and copy the binary to alpine after the installation is done, the final product is only about 10M. This approach is particularly suitable for statically compiled programming languages such as golang and rust.
Tip 4: Check the build product
This is one of the most useful tips out there.
dive is a TUI, command-line interactive app that lets you see what’s inside each layer of docker.
The dive ubuntu:latest command allows you to see what files are inside the ubuntu image. The contents are displayed on both sides, with information about each layer on the left and the contents of the current layer (which will include all previous layers) on the right, with new files added to this layer shown in yellow. The tab key allows you to switch between left and right operations.
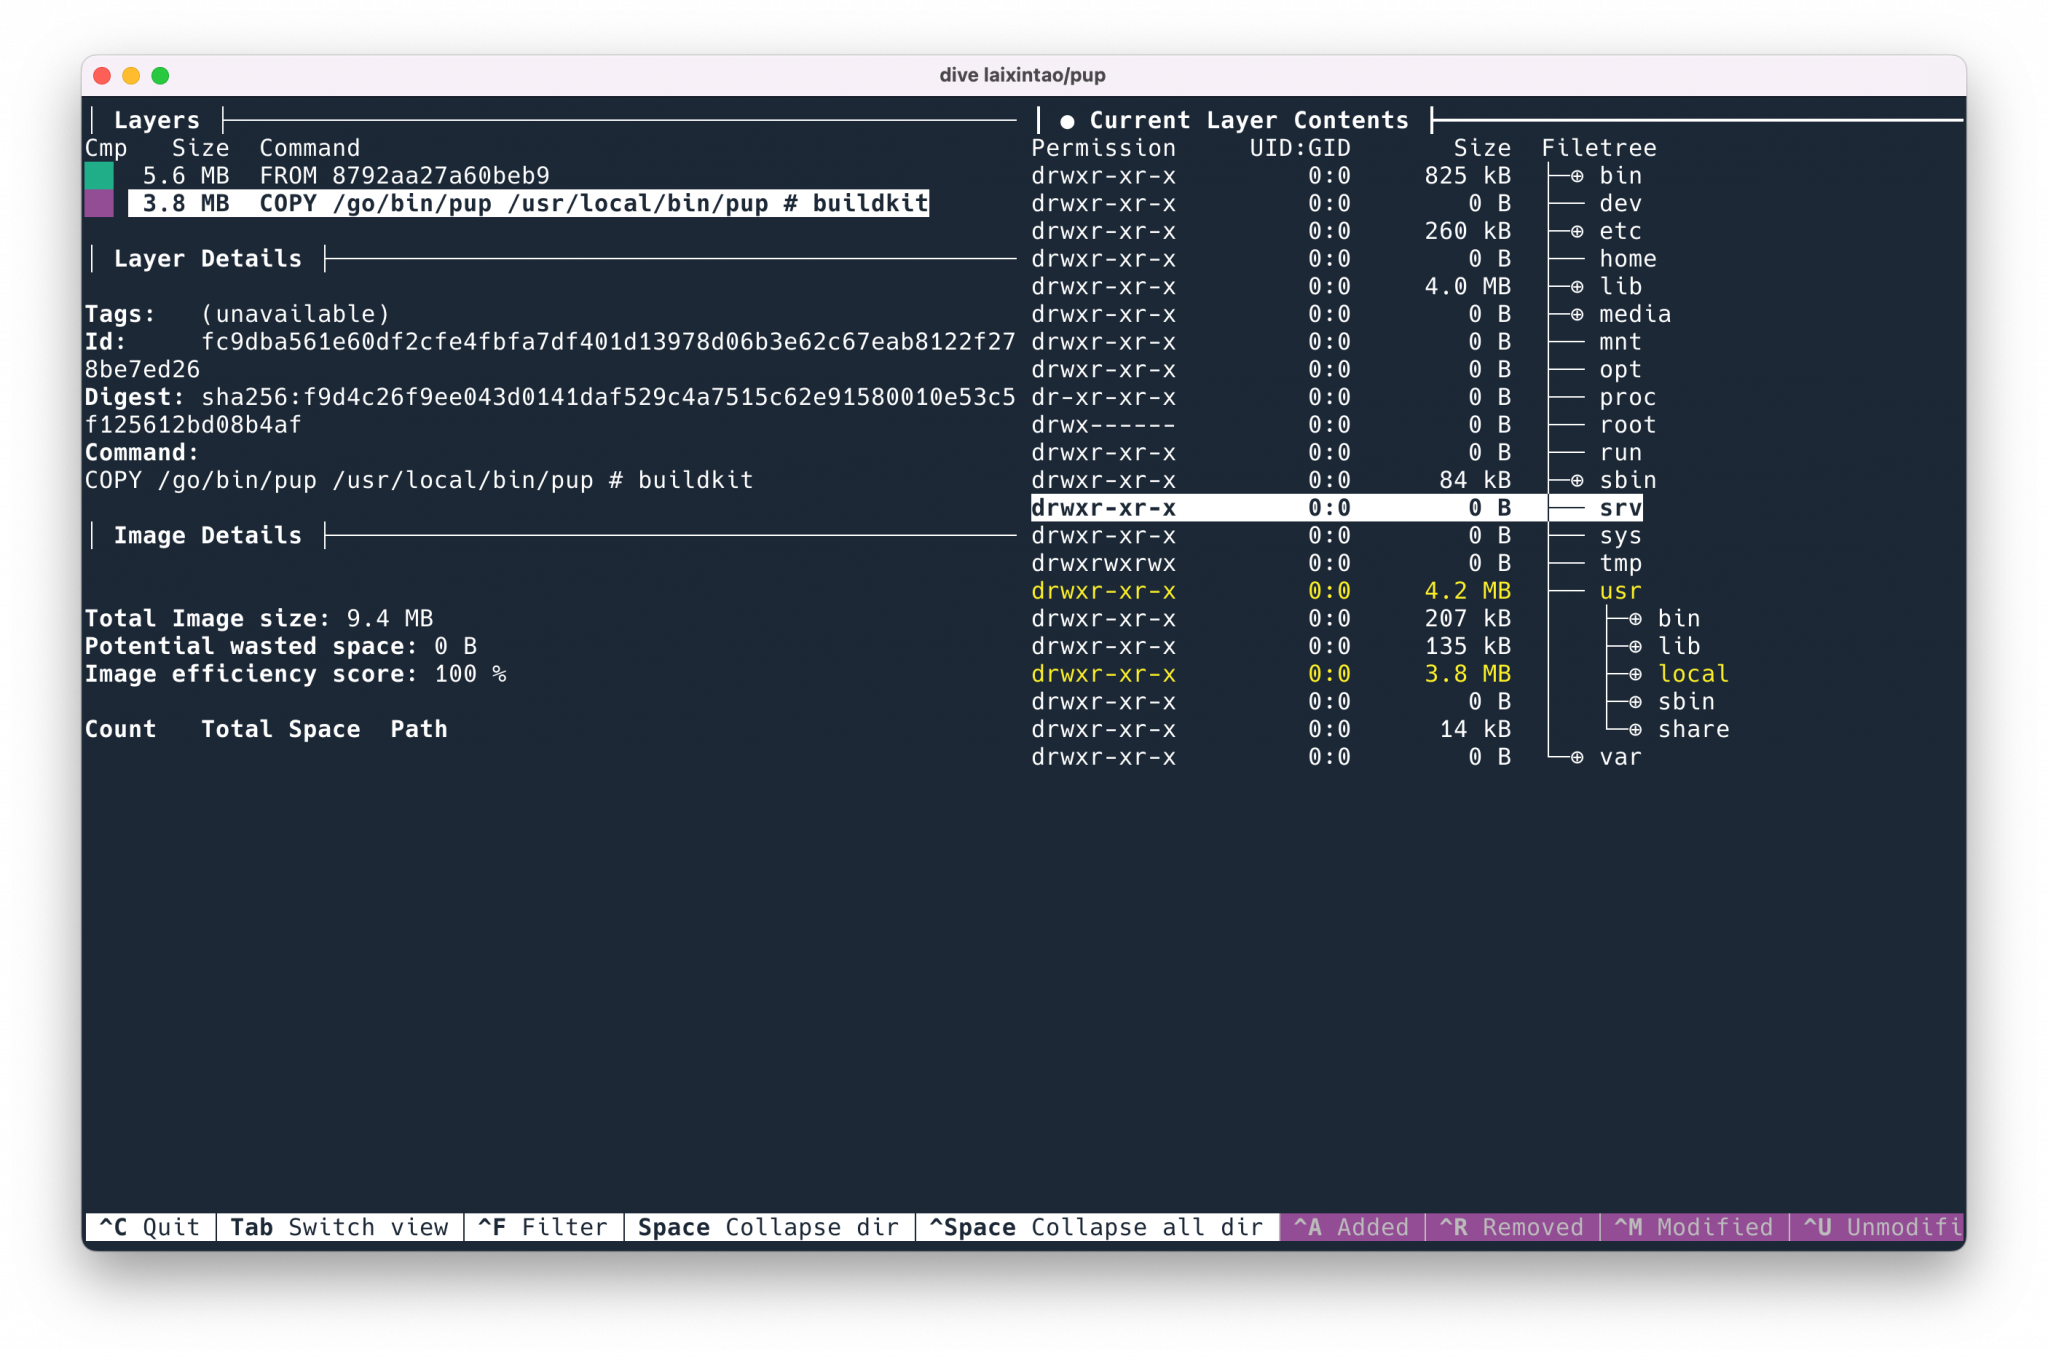
A very useful feature is to press ctrl + U to show only what has been added to the current layer compared to the previous one, so that you can see if the added files are what is expected.
Pressing ctrl + Space collapses all the directories and then opens them interactively to see them, like ncdu in Docker.