Umami is a simple, easy-to-use, self-hosted web analytics solution with the goal of providing you with a more user-friendly, privacy-focused alternative to Google Analytics and a free, open-source alternative to paid solutions. Umami collects only the metrics you care about, all on one page.
Features
- Simple Analytics Umami measures only the important metrics you care about: page views, devices used, and where visitors are coming from. This data is presented on an easy-to-navigate page.
- Unlimited number of sites Umami can track an unlimited number of sites with a single installation, even subdomains and individual URLs.
- Bypass ad blockers Umami is deployed by you in your own hosting, so you can effectively avoid the different ad blockers of Google Analytics.
- Lightweight The tracking script is small (only 2KB) and supports older browsers like IE.
- Multiple accounts Umami can be used to host data for friends or clients, just create a separate account and they can start tracking their website on their own dashboard.
- Share data If you want to share your statistics publicly, then you can do so using a uniquely generated URL.
- Mobile friendly The Umami interface is optimized for mobile devices, so you can view your statistics from anywhere.
- Data ownership Since Umami is self-hosted, you own all your data. There is no need to give your data to a third party for exploitation.
- Privacy focused Umami does not collect any personally identifiable information and anonymizes all data collected.
- Open Source Umami is open source and uses MIT’s open source protocol.
Installation
Build from source
If you want to build and install from source, the following conditions need to be met.
- Node.js version 12 and above
- A MySQL or Postgresql database
Then get the source code directly to install the dependency packages.
Next create the database table structure. Umami supports MySQL and Postgresql, first you need to create a database for your Umami installation and install the tables using the included script.
For MySQL.
|
|
For Postgresql.
|
|
This will also create a login account with the username admin and the password umami.
Next create a .env file using the following.
The connection url format is as follows.
where HASH_SALT is used to generate a unique value for your installation.
After the configuration is complete build the application using the following command.
|
|
Once the build is complete, you can launch the application.
|
|
By default, this will start the application on http://localhost:3000.
Using Docker
A simpler way is to use Docker one-click start, there is a configuration for docker-compose under the root of the source code. To build the umami container and start the Postgres database, just execute the following command directly under the project root.
|
|
Or, to get only the Umami Docker image with PostgreSQL support.
|
|
Or MySQL.
|
|
Usage
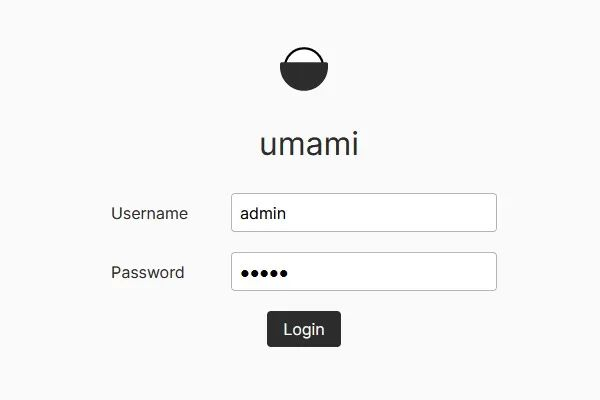
After installation, Umami will create a default administrator account with the username admin and password umami.
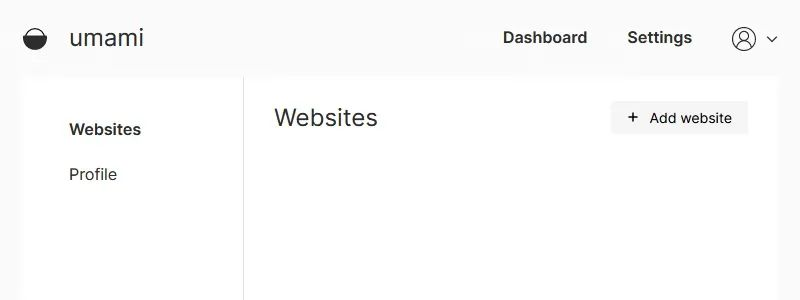
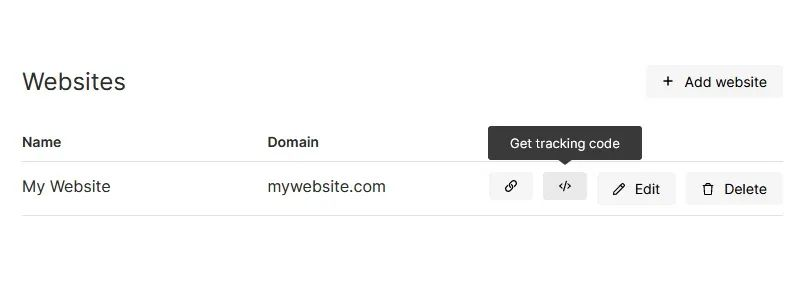
After logging in to Umami, click Settings at the top to navigate to Websites and click the + Add website button on the right to start creating your website analysis.
Fill in the form details and click the “Save” button to save it.
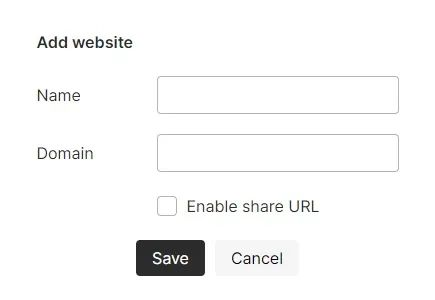
Where the Name field can be anything, usually it is the same as the domain name. The Domain field is the actual domain name of your website. The Enable share URL indicates that you want to share your site’s statistics via a unique URL.
After adding your website. Click the Get tracking code button to get the tracking code.
From the popup form, copy the code and insert it into the <head> section of your site.
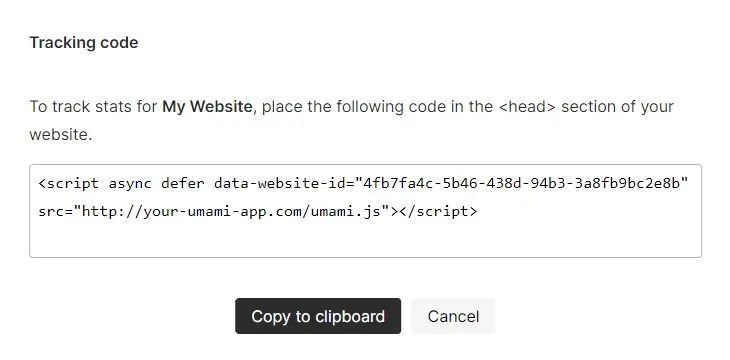
Then after visiting your website, the data will normally appear in your Umami dashboard.
In addition to site browsing related data, Umami can also track events that occur on your site. There are two ways to record events in Umami, using CSS classes or using Javascript.
Using CSS classes
To enable event tracking, simply add a special CSS class to the element to be tracked. For example, you might have a button with the following code.
|
|
Then add a class class using the following format.
|
|
Your code for this button element might look like this.
|
|
When the user clicks the button, Umami logs an event named signup-button with the event type click. This event can be any Javascript event that can be applied to the element.
Note: Do not attach to any sequentially triggered events such as
scrollanddrag.
Using Javascript
We can also manually log events using the window.umami object, and to do the same thing as the CSS method above, you can do the following.
In this case, Umami will log an event named Signup button click with the event type custom.
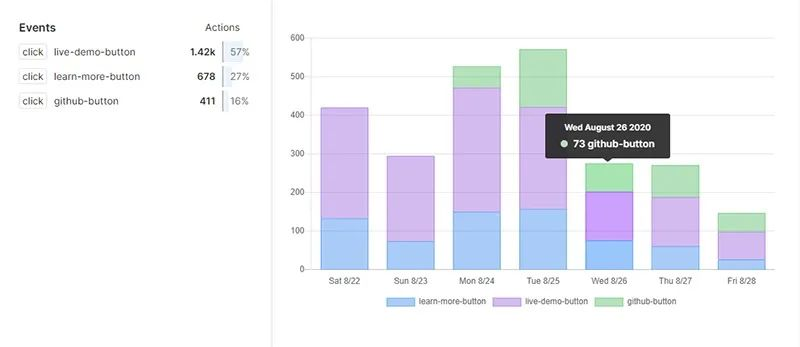
Viewing events
After recording the events, they will be visible on your site details page.
In addition, Umami has many advanced features, such as trace configuration, trace functions, environment variables, APIs, etc. For more advanced usage, please refer to the official documentation at https://umami.is/docs for more information.
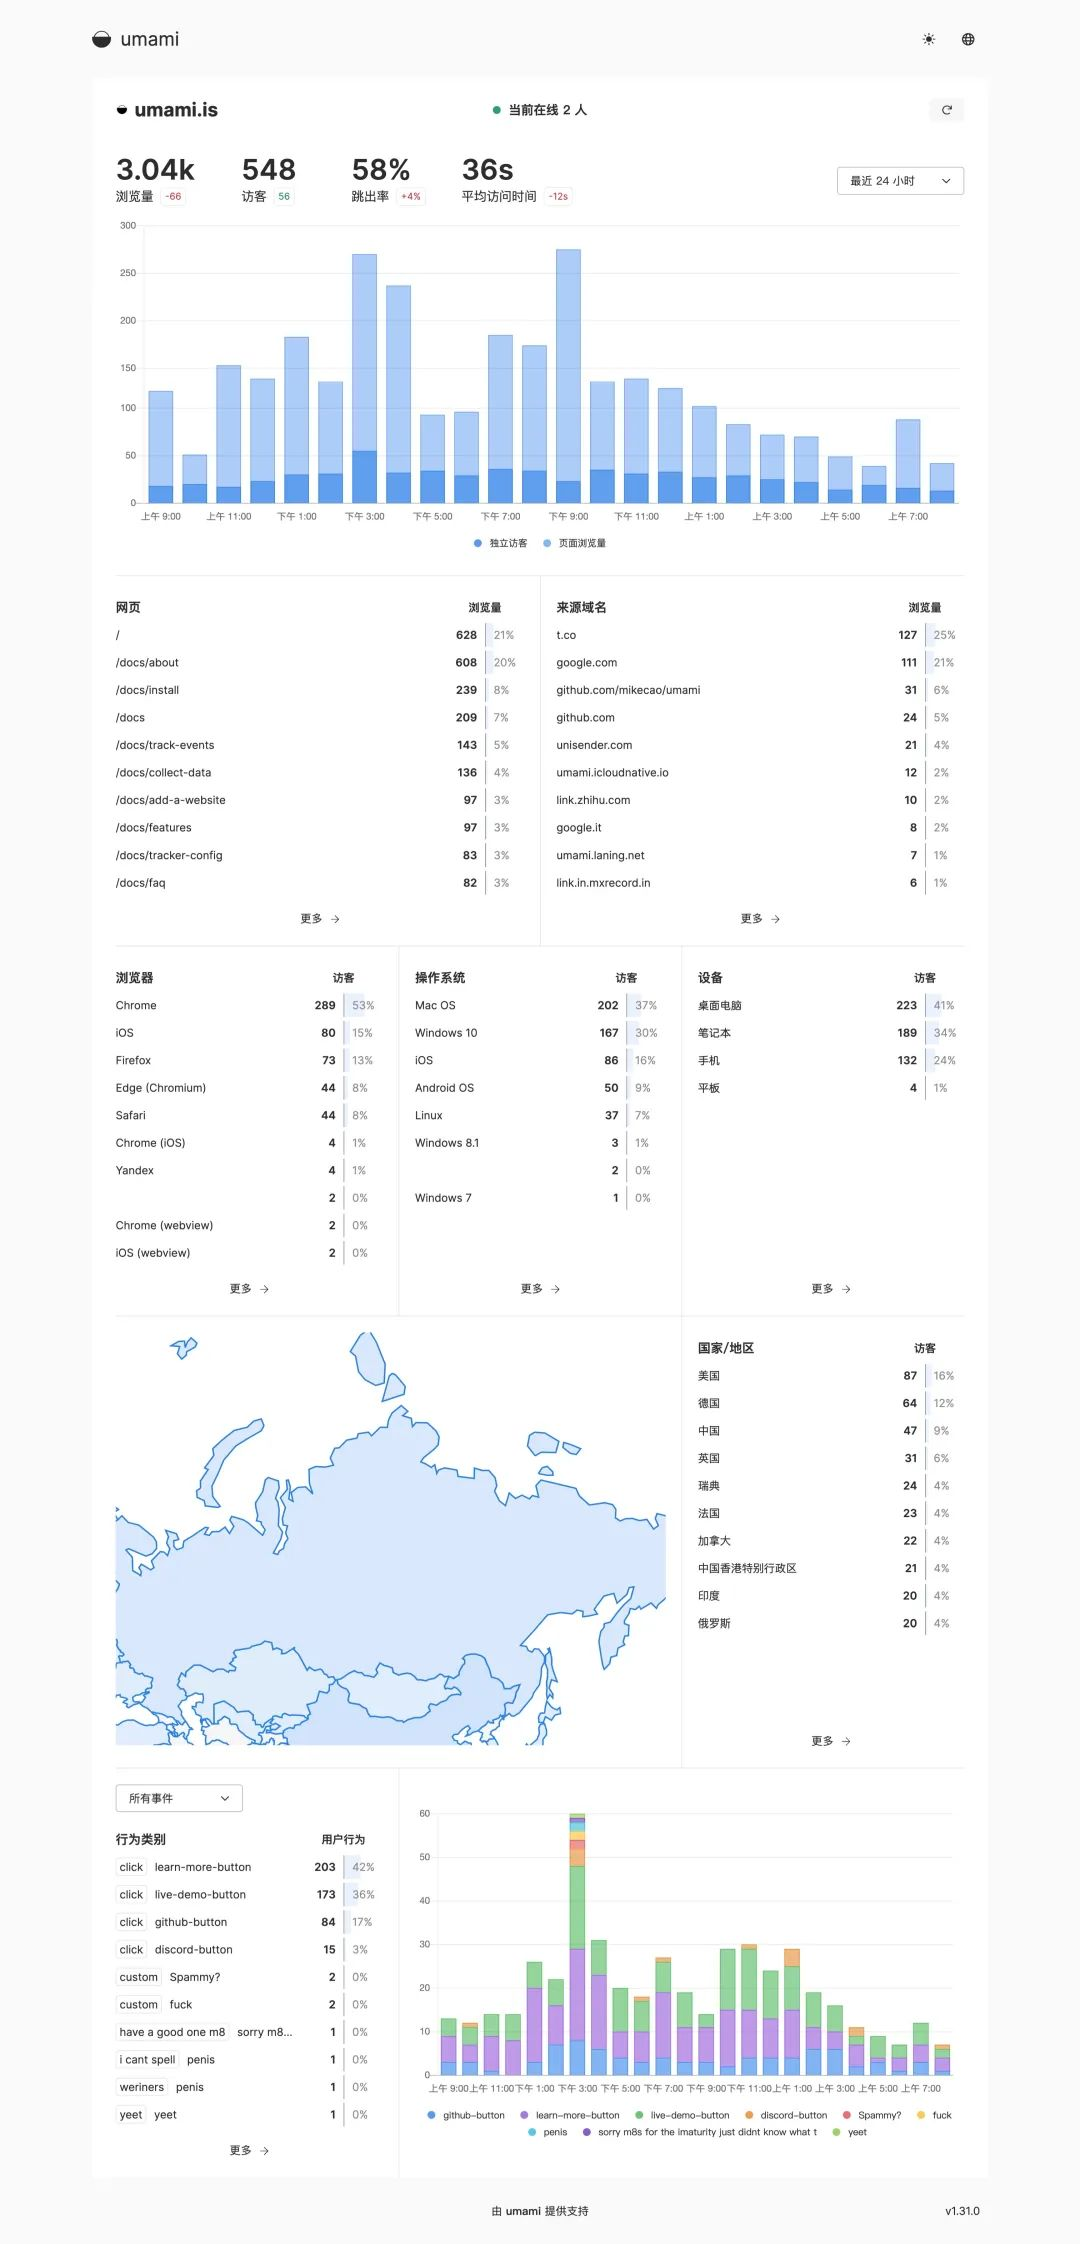
Finally, let’s take a look at a sample Dashboard diagram using Umami.