The main components of Selenium testing are: Test Code, WebDriver, Grid (Selenium Server, not required), Browser Driver and Browser.
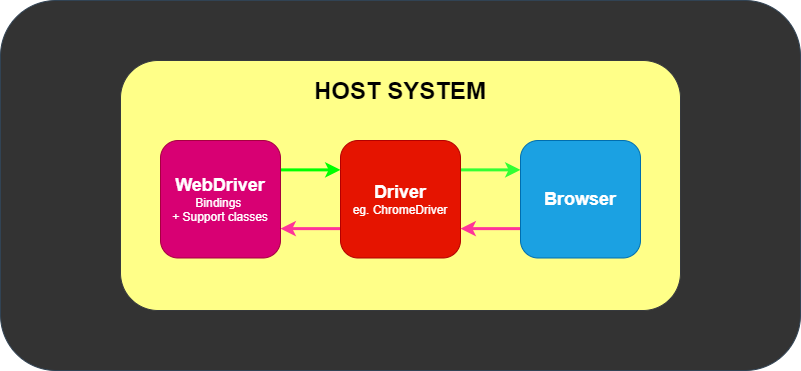
When we finish writing Selenium test cases for local debugging, the WebDriver interacts directly with the browser through the browser driver. At this point, the WebDriver, the browser driver, and the browser are located on the same host. This most basic interaction is shown in the figure below.
When the local debugging is completed and the test cases are executed using the automation pipeline, the WebDriver will not use the direct interaction with the browser (driver) as described above, but will choose the remote interaction method.
Remote interaction means that the WebDriver interacts with the browser (driver) remotely through the Grid (Selenium Server). In this case, the Grid may not be located on the same host as the browser and its driver, and the test code and WebDriver may not be located on the same host as the Grid or the browser. This type of remote interaction is shown in the following figure.
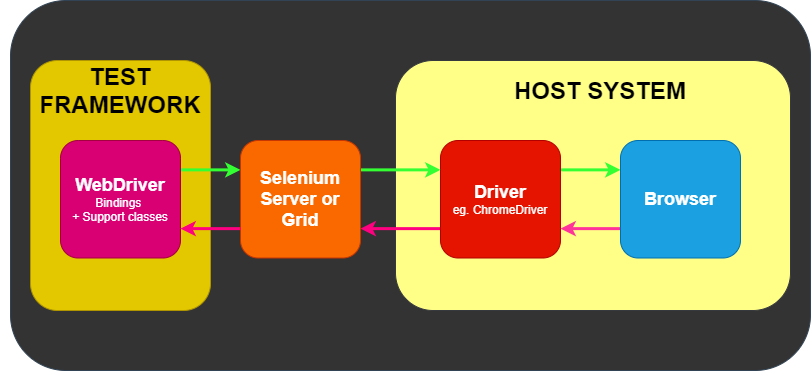
As you can see, after using the Grid, the test cases only need to know the address of the Grid, no need to install the browser and driver, which makes the execution of the test cases very easy.
This article focuses on the construction and use of Grid. Next, there are several parts as follows.
- Introduce a piece of test code and execute it using direct local interaction.
- Build the Grid environment using the original
jarfile and execute the test code. - Build the Grid environment using a Docker image.
- Build the Grid environment using Kubernetes description files.
1 Test Code
The following is a piece of Selenium test code written in Python. It is a simple test scenario for the Github search function.
There are several steps.
- Open the GitHub home page.
- Type the keyword
Seleniumin the search box and enter. - click on the first search result and wait for the repository home page to open.
- Assert that the title of the repository home page contains the keyword
Selenium.
|
|
The above test code uses WebDriver to interact directly with the browser (driver).
To run the code, you need to have Chrome and ChromeDriver installed locally. Download the Chrome driver from chromium.org, extract it to the specified directory, and add the installation directory to the system environment variable. The test code will drive the local browser to print a success message after performing the specified steps.
2 Build the Grid using jar files
The Grid jar file depends on Java version 11 or higher.
Standalone mode is the easiest and fastest way to use Grid.
You can download the latest selenium-server-<version>.jar file from the github.com/SeleniumHQ/selenium distribution page. ’ file, and then start it with the following command.
|
|
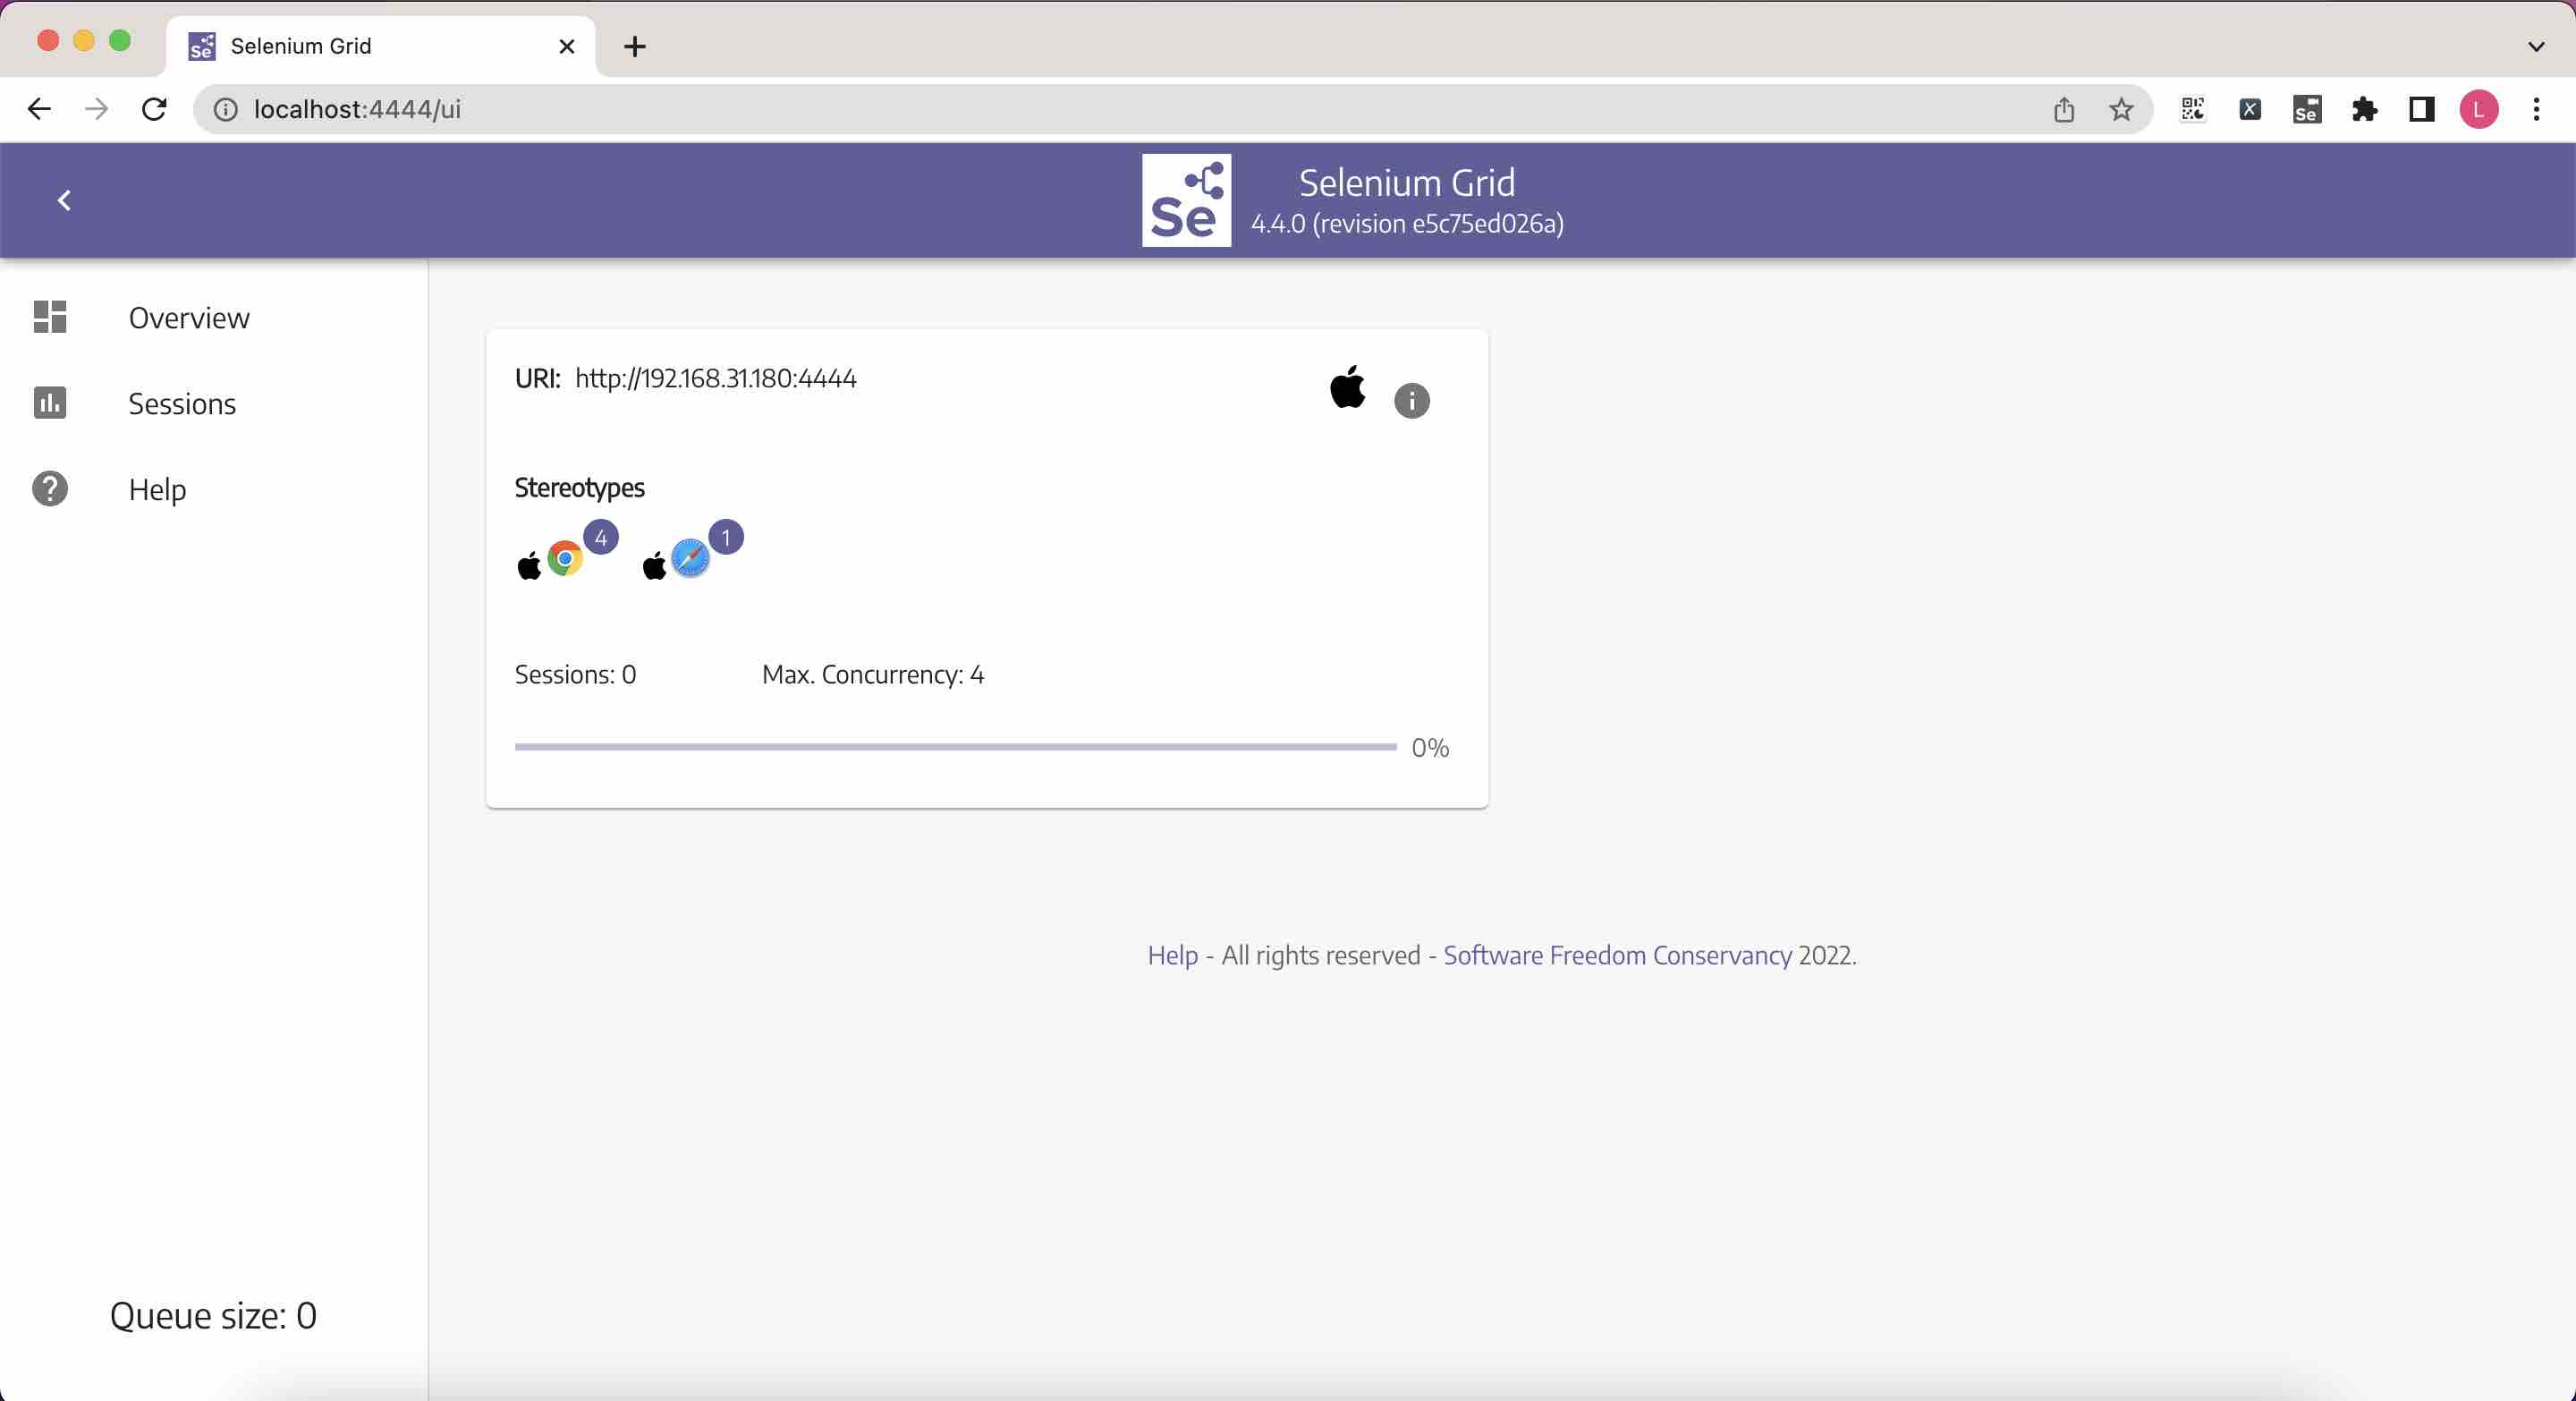
Once the Grid is started, open the URL http://localhost:4444 to see all browser types available and the status of the session.
Next, the test code is modified slightly (replace the way you get browser with the following) to run successfully.
To make better use of Grid, you need to understand several roles inside it.
- Hub: Responsible for distributing the browser operation instructions received from WebDriver to the corresponding Node and returning the result received from Node to WebDriver.
- Node: Responsible for receiving instructions from the Hub and calling the browser driver to complete page operations.
Hub and Node can be located on different hosts and communicate via HTTP protocol.
The commands to start the Grid using the division of labor between Hub and Node are as follows.
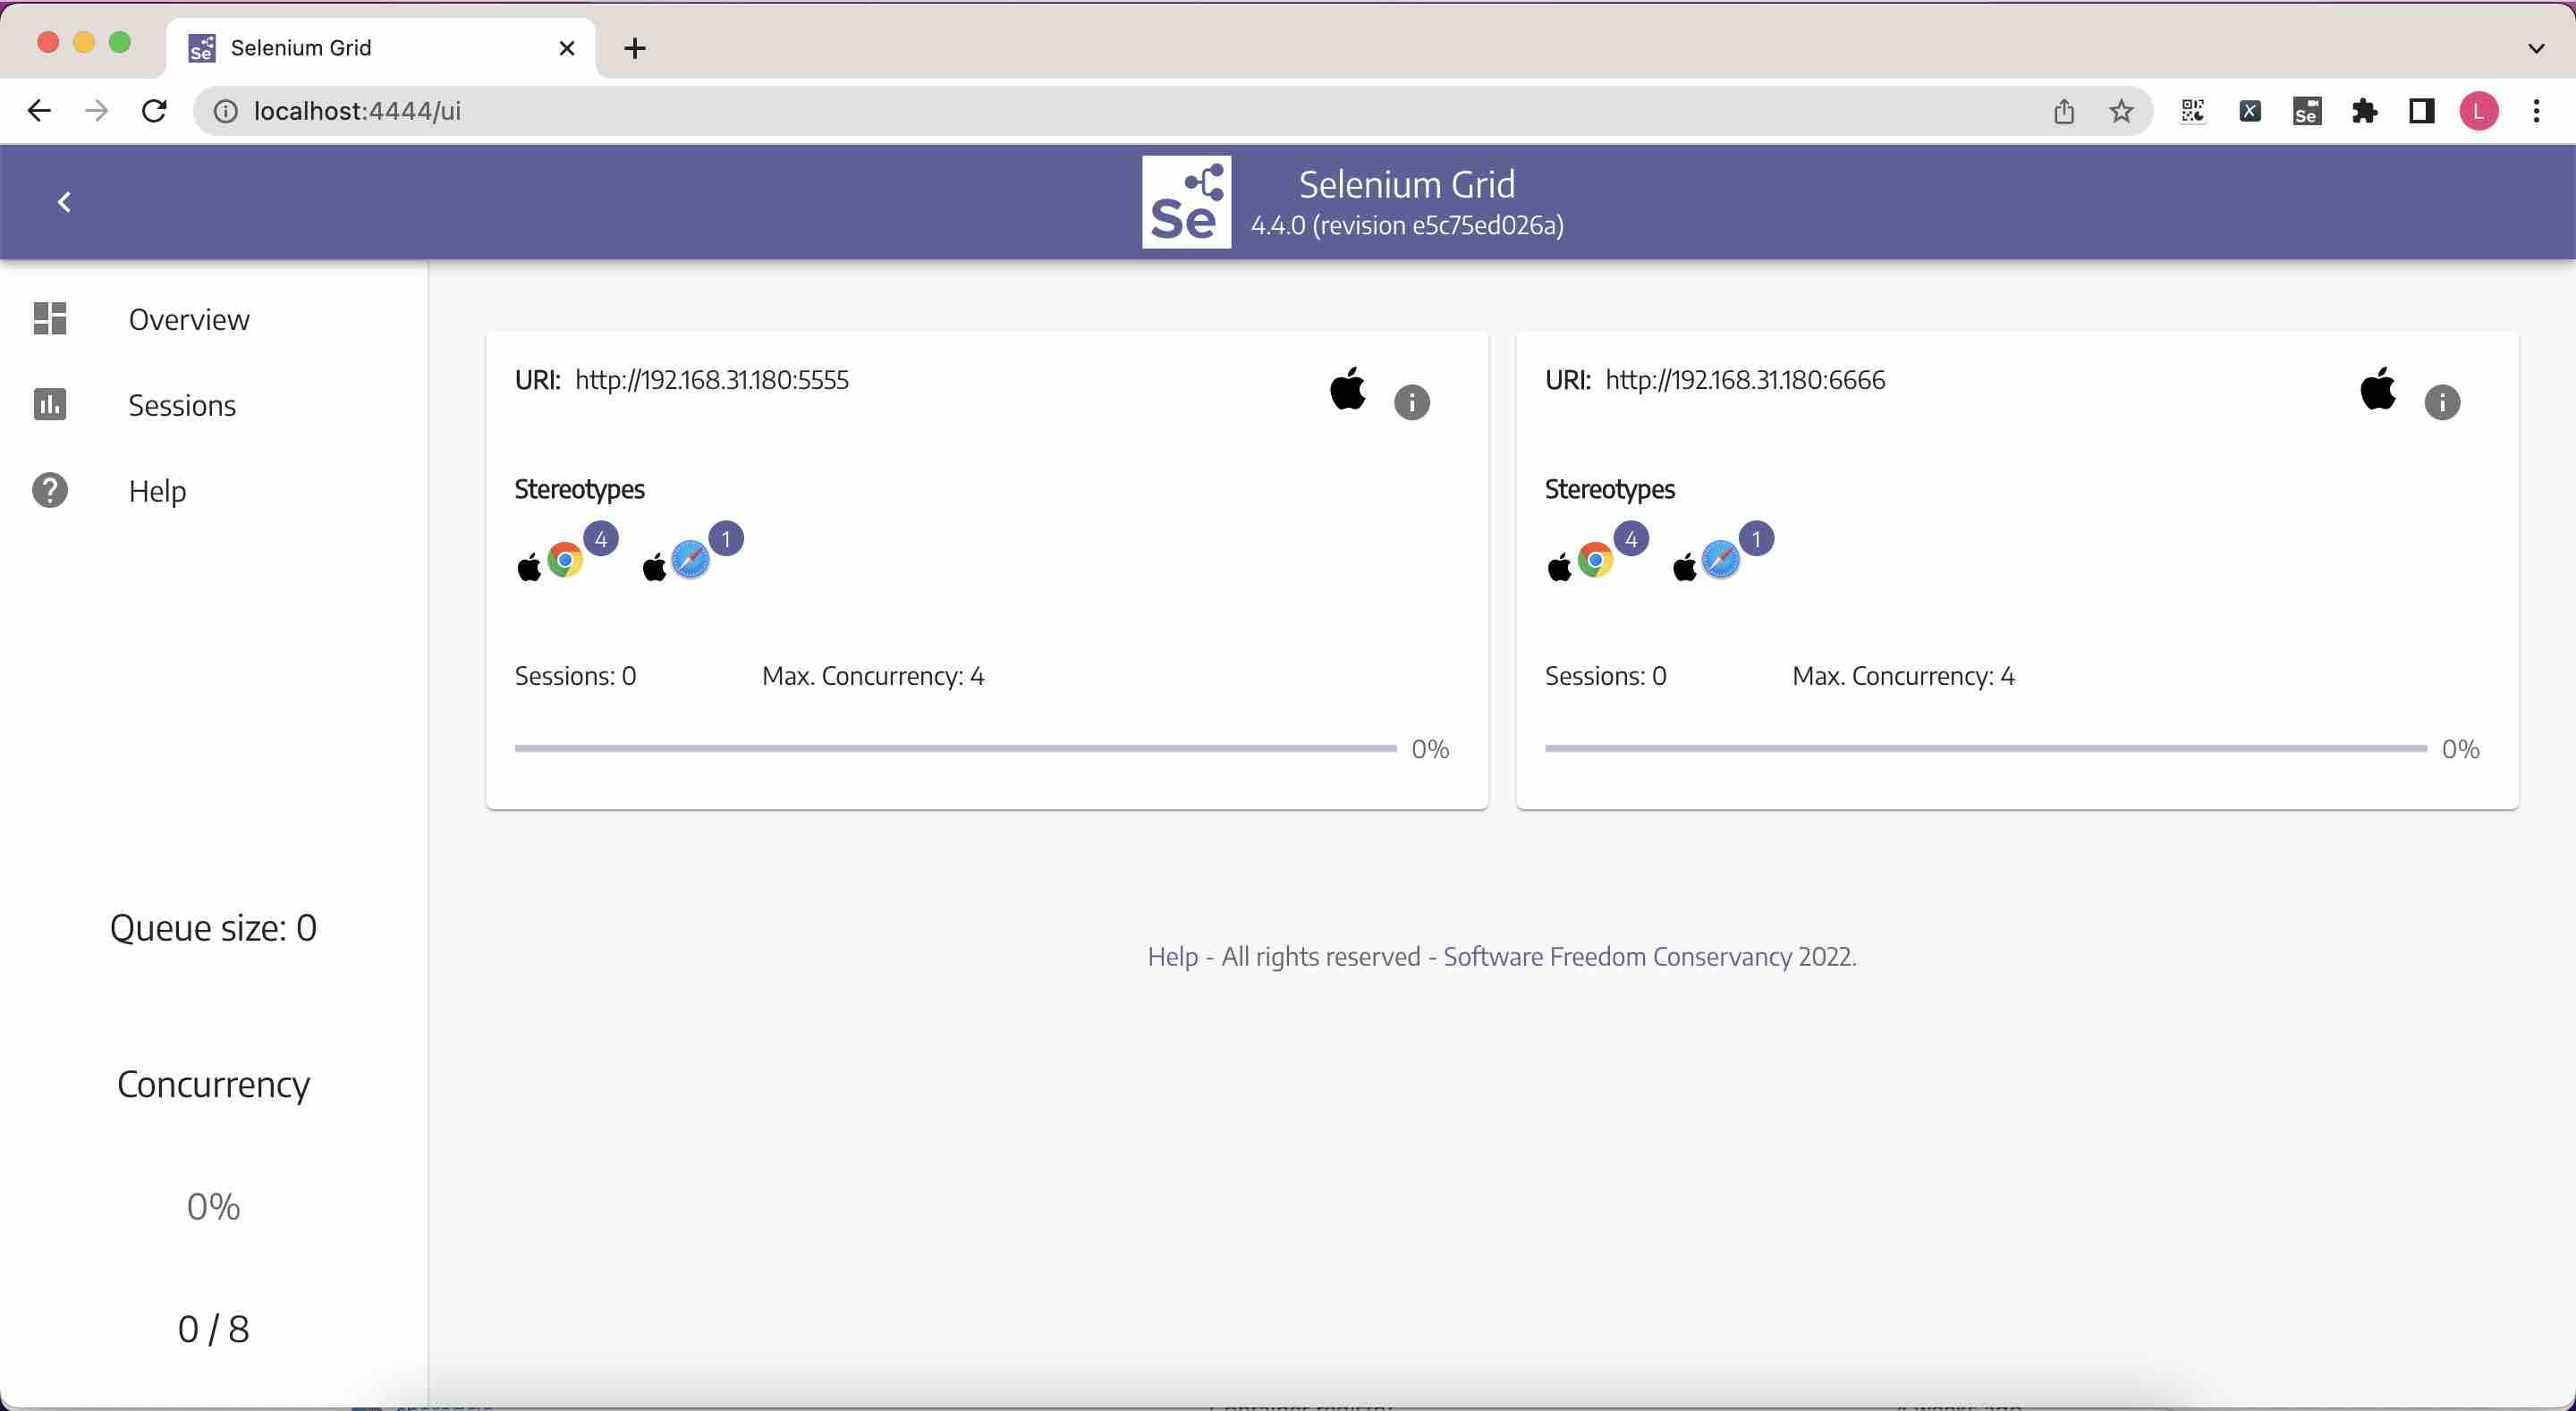
Once started, you can see two available Nodes from the URL http://localhost:4444.
The way the test code uses Grid will not change, it will still point to http://localhost:4444.
3 Building a Grid using a Docker image
The command to quickly start a Standalone mode Grid using Docker is as follows.
Open http://localhost:4444 to see the console page as well.
Another very convenient feature of the new Grid is to open http://localhost:7900 (with the password secret) directly in the browser to see the desktop where the test is running.

The test code can also be run by simply pointing the RemoteWebDriver address to http://localhost:4444.
The Docker command to start the Grid using the Hub and Node division of labor is as follows.
|
|
You can also add additional browser Nodes on demand, the following command adds Edge and Firefox Nodes.
|
|
This is where the power of Grid comes in. It provides a pool of browsers, and test projects can simply point to the Grid address to use the desired browser, which is very convenient.
To see the desktop when the browser is running, just visit http://localhost:7900 (Chrome), http://localhost:7901 (Edge) or http://localhost:7902 (Firefox) directly.
Another traditional way to view the browser’s runtime desktop is VNC, a remote desktop display technology that has both server and client components.
Grid’s Node image opens port 5900 to provide VNC services. To view the desktop inside Node in this way, we need to download a VNC Client.
The VNC Client used in this article is VNC Viewer. Download and install VNC Viewer from the VNC Viewer download page.
Use the following command to start another Chrome Node and open the 5900 port.
Open VNC Viewer, type localhost:5900 and enter, enter the password (secret) and you will see the desktop of Chrome Node.

4 Building a Grid using Kubernetes description files
If you have a Kubernetes environment, it becomes very practical to build the Grid in Kubernetes. This way, the URL of the Grid is exposed from Kubernetes Ingress and can be used by any test project within the team. The testing phase of the automation pipeline is also made easy by not having to prepare a test case runtime environment and just pointing to the URL of the Grid.
This article is based on the Kubernetes environment that comes with Docker Desktop, based on the official Kubernetes description file with a few modifications to Build a Selenium Hub/Node environment (the modified K8s Yaml files have been organized in my personal GitHub repository), and then open the Grid Hub URL for test projects, and a Chrome Node desktop URL for testers to view.
Apply Selenium Hub/Node Deployment and Service description files.
Exposing the Selenium Hub.
|
|
Expose Selenium Chrome Node.
|
|
This allows local access to http://localhost:4444 and http://localhost:7900 to see the Selenium console and Chrome Node desktop, respectively.
You can also use VNC to access the desktop of the Chrome Node inside Kubernetes.
Use the following command to forward the Chrome Pod’s 5900 port locally.
This way, you can access localhost:5900 using VNC Viewer to see the desktop where Chrome Node is located.
In summary, we have introduced a piece of Selenium test code, built the Selenium Grid using the jar file approach, the Docker image approach and the Kubenetes description file approach, and described how to use them.
It also explains how to view the browser’s runtime desktop in various environments, providing reference experience for those who use Selenium in local debugging or preparing the environment for actual testing scenarios.