GitHub Actions is GitHub’s continuous integration service, launched in October 2018.
These days, I’ve been trying it out and find it very powerful, creative, and more playful than Travis CI.
This article is a simple tutorial that demonstrates how to use GitHub Actions to automatically publish a React app to GitHub Pages.

What are GitHub Actions?
As you know, continuous integration consists of many actions, such as grabbing code, running tests, logging into remote servers, publishing to third-party services, etc. GitHub refers to these actions as actions.
GitHub noticed this and came up with the brilliant idea of allowing developers to write each action as a separate script file and store it in the code repository so that other developers can refer to it.
If you need an action, you don’t have to write your own complex script, you can just reference someone else’s written action. This is what makes GitHub Actions so special.
GitHub has an official marketplace where you can search for actions submitted by others, and a repository of awesome actions where you can find a lot of actions.
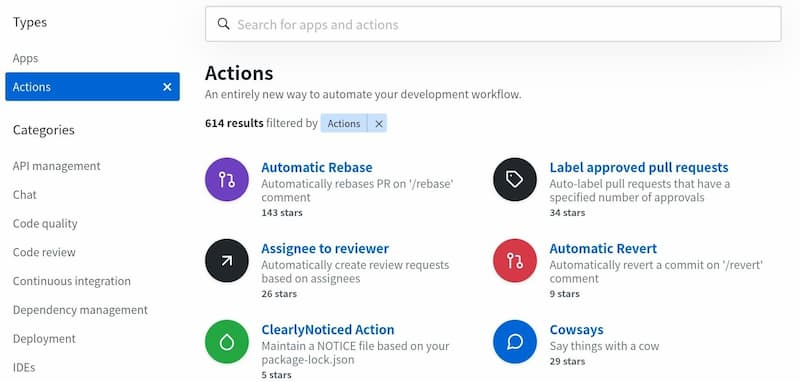
As mentioned above, each action is a standalone script, so it can be made into a code repository, using the userName/repoName syntax to reference the action. for example, actions/setup-node represents the github.com/actions/setup-node repository, which represents an action that installs Node.js. In fact, GitHub’s official actions are placed at github.com/actions.
Since actions are code repositories, they have a versioning concept, and users can refer to a specific version of an action; the following are legitimate references to actions, using Git’s pointer concept, see the official documentation.
Basic Concept
- workflow: The process of continuous integration in one run is a workflow.
- job: A workflow consists of one or more jobs, meaning a single run of continuous integration, which can complete multiple tasks.
- step: Each job consists of multiple steps, which are completed step by step.
- action: Each step can execute one or more commands (action) in sequence.
workflow files
The GitHub Actions configuration file is called a workflow file and is stored in the .github/workflows directory of the code repository.
A workflow file is in YAML format, and can be named anything you want, but has a common .yml suffix, such as foo.yml. A repository can have multiple workflow files, and GitHub will automatically run the .yml file whenever it finds it in the .github/workflows directory.
The workflow file has a lot of configuration fields, see the official documentation for details. Here are some basic fields.
name
The name field is the name of the workflow. If this field is omitted, it defaults to the current workflow’s filename.
|
|
on
The on field specifies the condition that triggers the workflow, usually some event.
|
|
The above code specifies that the push event triggers the workflow.
The on field can also be an array of events.
|
|
The above code specifies that either the push event or the pull_request event can trigger workflow.
For a full list of events, see the official documentation. In addition to codebase events, GitHub Actions also supports external events that trigger, or are timed to run.
on.<push|pull_request>.<tags|branches>
When specifying a trigger event, you can limit the branch or label.
The above code specifies that the workflow will be triggered only when the master branch fires a push event.
jobs.<job_id>.name
The body of the workflow file is the jobs field, which represents one or more tasks to be performed.
Inside the jobs field, you need to write the job_id of each task, with a custom name. The name field inside the job_id is the description of the task.
The jobs field of the above code contains two jobs, job_id is my_first_job and my_second_job respectively.
jobs.<job_id>.needs
The needs field specifies the dependencies of the current task, i.e. the running order.
In the above code, job1 must finish before job2, while job3 waits for job1 and job2 to finish before it can run. Therefore, this workflow runs in the following order: job1, job2, and job3.
jobs.<job_id>.runs-on
The runs-on field specifies the virtual machine environment required to run. It is a required field. The following virtual machines are currently available.
- ubuntu-latest, ubuntu-18.04 or ubuntu-16.04
- windows-latest, windows-2019 or windows-2016
- macOS-latest or macOS-10.14
The following code specifies the virtual machine environment as ubuntu-18.04.
|
|
jobs.<job_id>.steps
The steps field specifies the steps for each Job to run and can contain one or more steps. Each step can specify the following three fields.
jobs.<job_id>.steps.name: The name of the step.jobs.<job_id>.steps.run: The command or action to run for this step.jobs.<job_id>.steps.env: The environment variable required for the step.
Below is an example of a complete workflow file.
|
|
In the above code, the steps field contains only one step. This step first injects four environment variables and then executes a Bash command.
Example: Publishing React Projects to GitHub Pages
Here is an example of building a React project with GitHub Actions and publishing it to GitHub Pages. The final code is inside this repository and the reference URL after publishing is ruanyf. github.io/github-actions-demo.
As a first step, GitHub Actions is currently in beta, and you need to apply for beta status at this URL. After applying, it may take a few days to go through. It is said that it will be released in November 2019.
It is now officially released and no application is required.
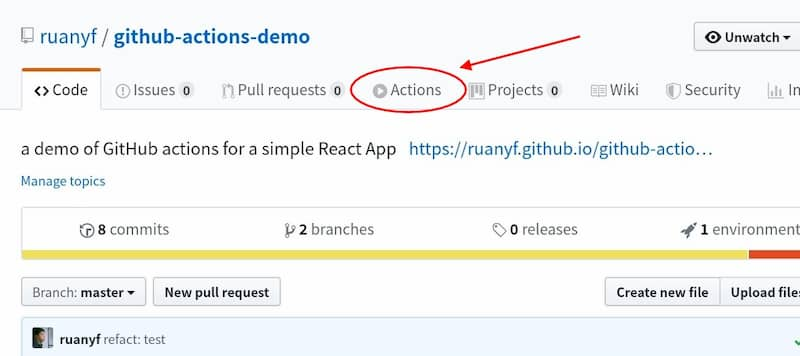
Once you qualify, an Actions entry will appear in the menu at the top of the repository.
In the second step, this example needs to send the build to a GitHub repository, so you need a GitHub key. Follow the official documentation and generate a key. Then, store this key in the Settings/Secrets of your current repository.
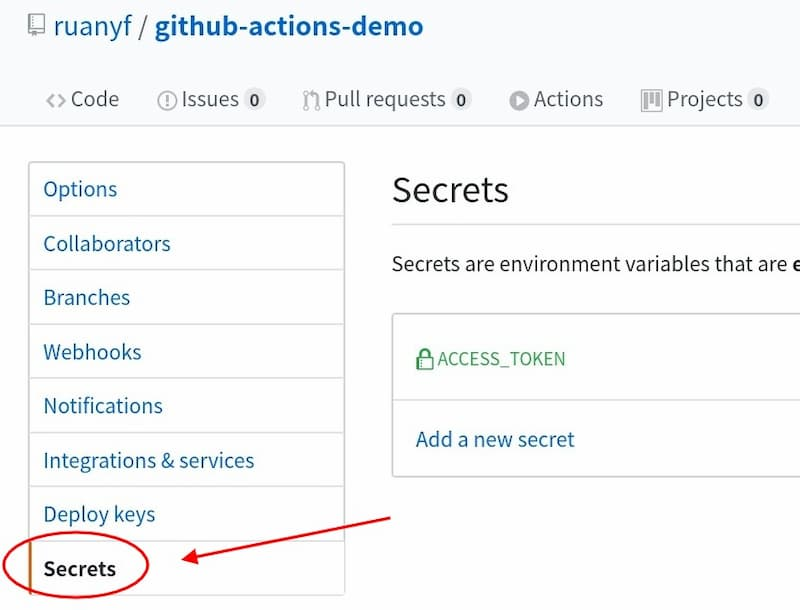
The image above shows where the secret environment variables are stored. You can name the environment variables as you like, here we use ACCESS_TOKEN. If you don’t use this name, the variable names in the script will have to be changed as well.
The third step is to generate a standard React application on your local computer using create-react-app.
Then, open the package.json file and add a homepage field indicating the root directory of the app after it is published (see official documentation).
In the code above, replace [username] with your GitHub username, see example.
Step 4: In the .github/workflows directory of this repository, generate a workflow file with any name you want, for this example ci.yml.
We use an action that someone else has already written: JamesIves/github-pages-deploy-action, which provides workflow example file, just copy it directly (see source).
|
|
The main points of the above workflow file are as follows.
- the entire process is triggered when a
pushevent occurs on themasterbranch. - there is only one
job, running in the virtual machine environmentubuntu-latest. - The first step is to get the source code, using the action
actions/checkout. - The second step is to build and deploy, using the action
JamesIves/github-pages-deploy-action. - The second step requires four environment variables: the GitHub key, the release branch, the directory where the builds are located, and the build script. Of these, only the GitHub key is a secret variable that needs to be written inside double brackets, while the other three can be written directly in the file.
Step 5: Save the above file and push the entire repository to GitHub.
Once GitHub finds the workflow file, it will automatically run. You can see the run log in real time on the website, and the log is saved for 30 days by default.
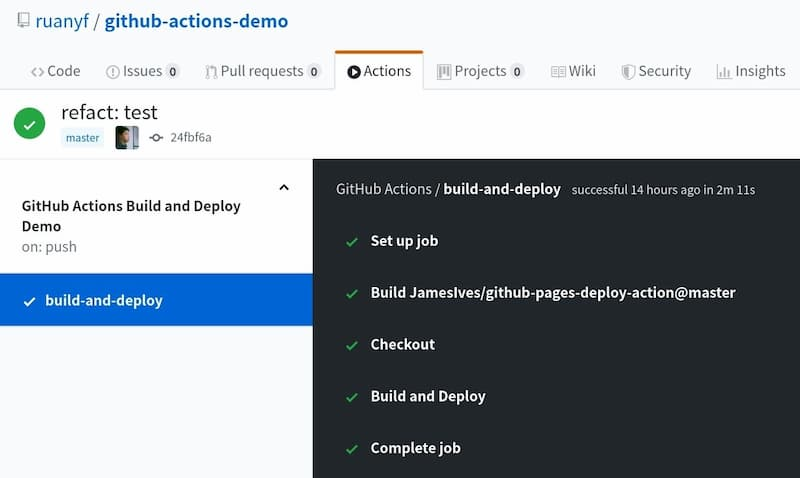
When the workflow has finished running, visit the GitHub Page and you will see that the build has been posted online.
In the future, GitHub Actions will automatically run every time the source is pushed after a change, posting the build product to the web.
Reference Links
- GitHub Pages
- Github Actions for web apps, Luke Boyle
- My First Week With GitHub Actions, Adam Zolyak
Reference https://www.ruanyifeng.com/blog/2019/09/getting-started-with-github-actions.html