In this article we’ll cover how to build a Kubernetes cluster using WSL2 and KinD under Windows 10. Over the past few years, Kubernetes has become the de facto standard in container orchestration. While there are now a variety of Kubernetes distributions and installers to deploy Kubernetes environments, we still need to deploy and run Kubernetes clusters locally, especially for developers, except in cloud or bare-metal environments.
However, Kubernetes was originally designed to be deployed and used in a Linux environment, but there are still many users who usually work with Windows operating systems. This tool is equivalent to a Linux subsystem running under Windows, which makes the environment boundary between Windows and Linux become less obvious, especially after the launch of WSL2 version, it has the ability to run Docker in WSL2, so now we can almost seamlessly run Kubernetes on WSL2. so now we can run Kubernetes on WSL2 almost seamlessly.
Here’s a brief overview of how to install and configure WSL2 and Kubernetes clusters under Windows 10.
Install WSL2
First we need to enable the “Windows Subsystem for Linux” feature before we can install the Linux distribution on Windows. Open PowerShell as administrator and run the following command.
|
|
If we only install WSL1, we can restart the computer after executing the above command and install the corresponding Linux distribution, but if we need to install WSL2, we need to do the following additional actions.
Environment preparation
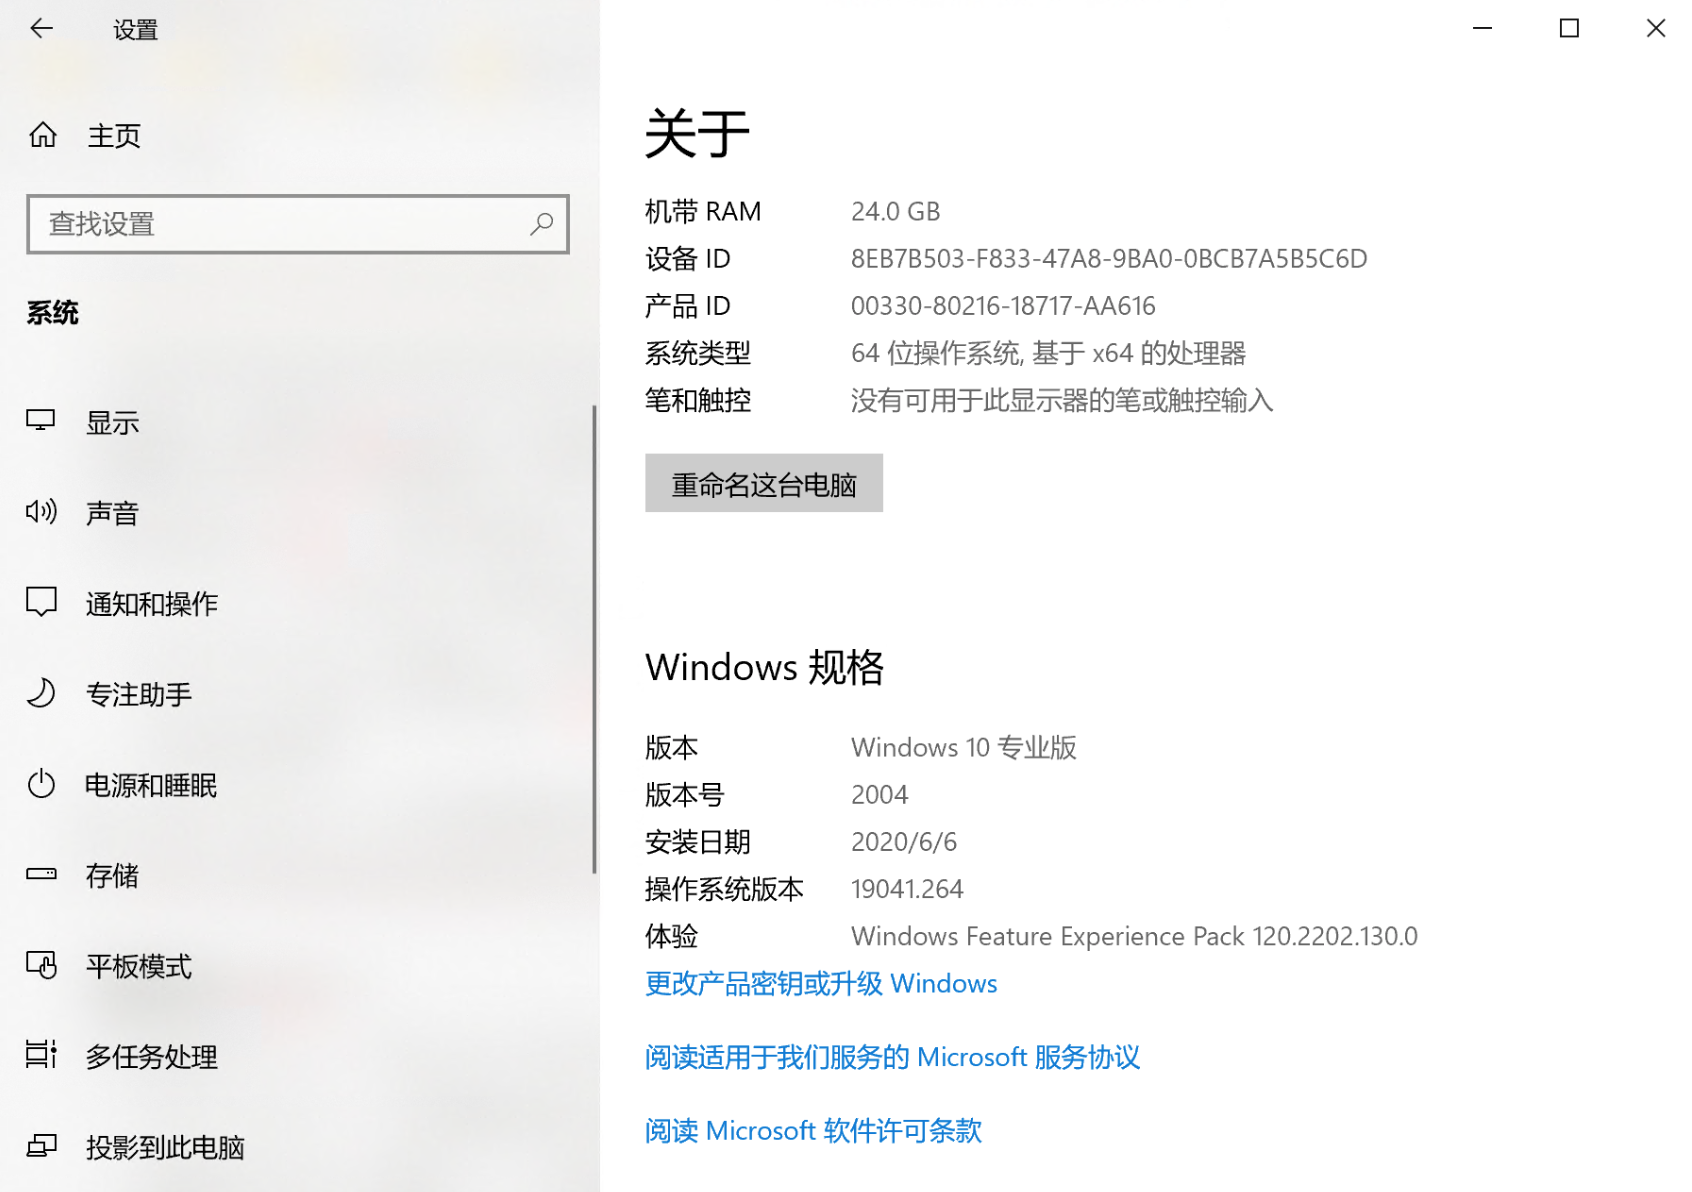
Operating system version
To update to WSL2, you first need to meet the following conditions.
- Windows 10 operating system (updated to version 2004 of internal version 19041 or later)
- Check your Windows version by pressing Windows logo + R, then type winver and select “OK”. (or type the command
verat the Windows command prompt). If the internal version is lower than 19041, please update to the latest Windows version.
To upgrade Windows, you can use the official Update Assistant, which is very convenient: https://www.microsoft.com/zh-cn/software-download/windows10
Enabling the “Virtual Machine Platform” optional component
Before installing WSL 2, you must also enable the “Virtual Machine Platform” optional feature. Open PowerShell as an administrator and run the command shown below.
|
|
Reboot the computer to complete the WSL installation and update to WSL2.
There is also a prerequisite to enable virtualization at the hardware level, which can be enabled via BIOS access.
Setting WSL2 as the default version
When installing a new Linux distribution, run the following command in Powershell to set WSL 2 as the default version.
|
|
Install and configure the Linux distribution
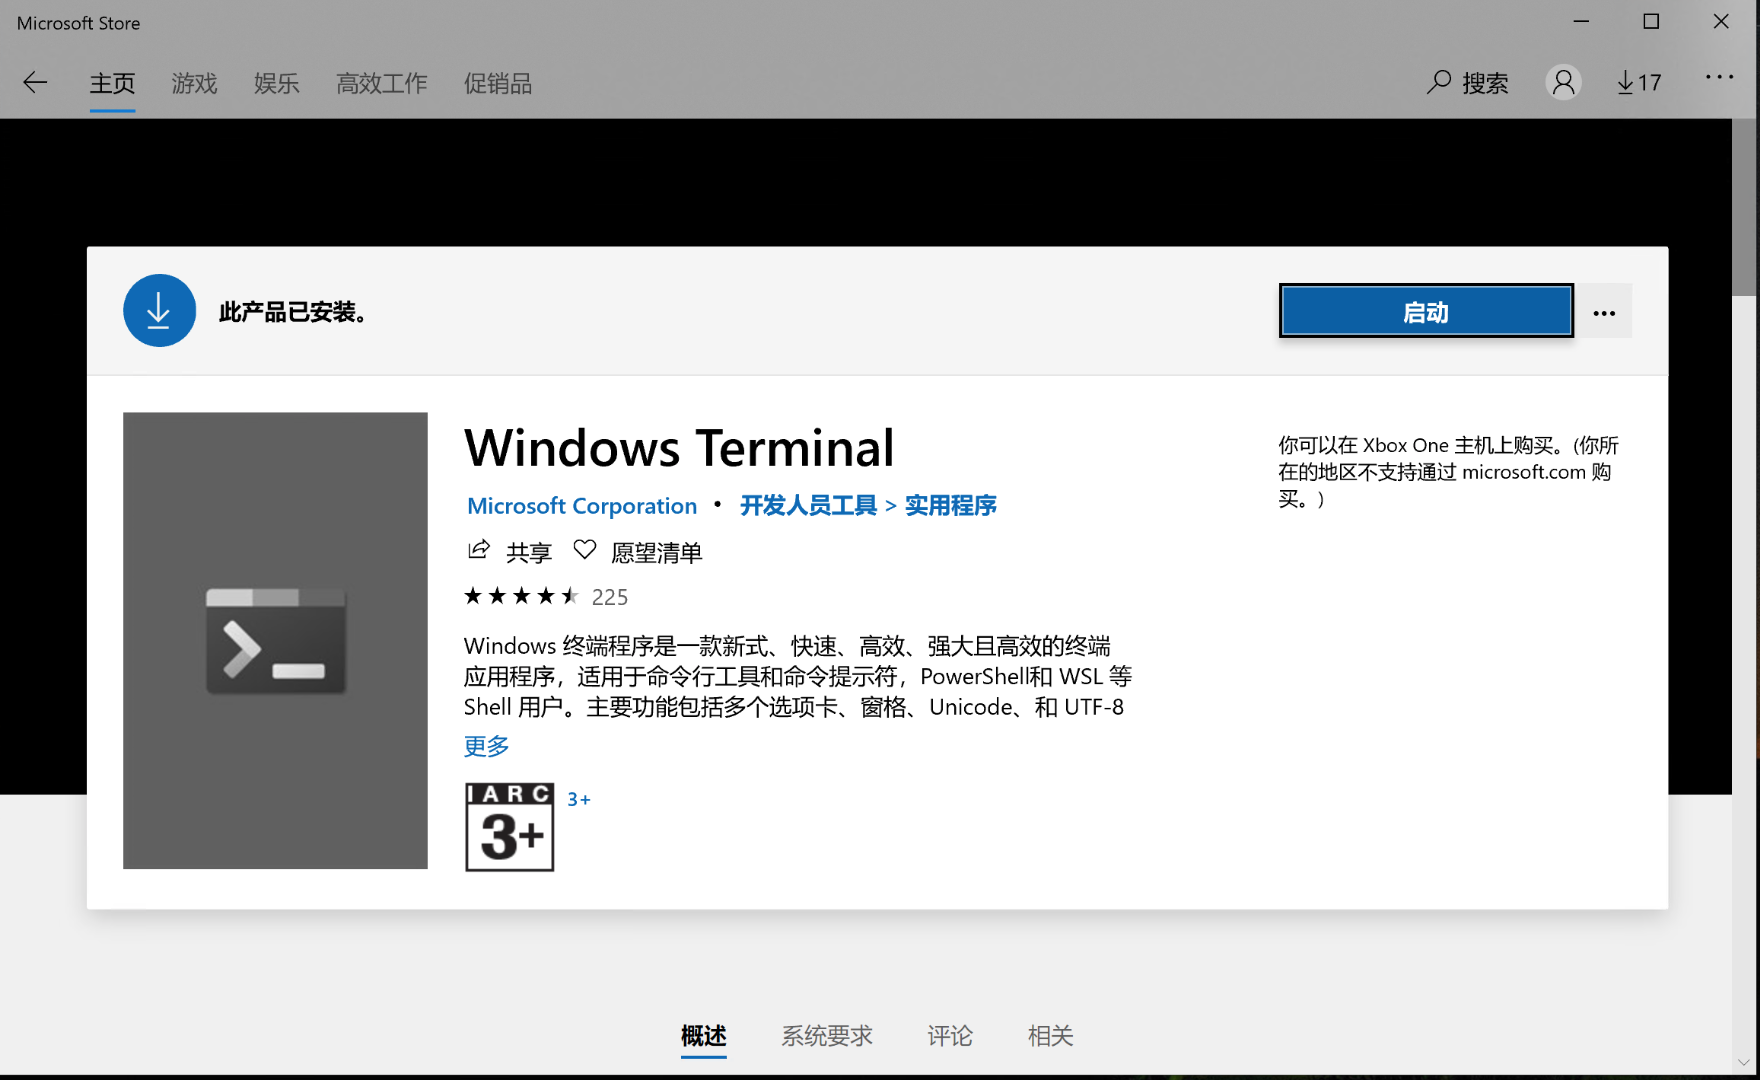
- Open Microsoft Store, search for Terminal, and install Windows Terminal for later interaction with the WSL subsystem.
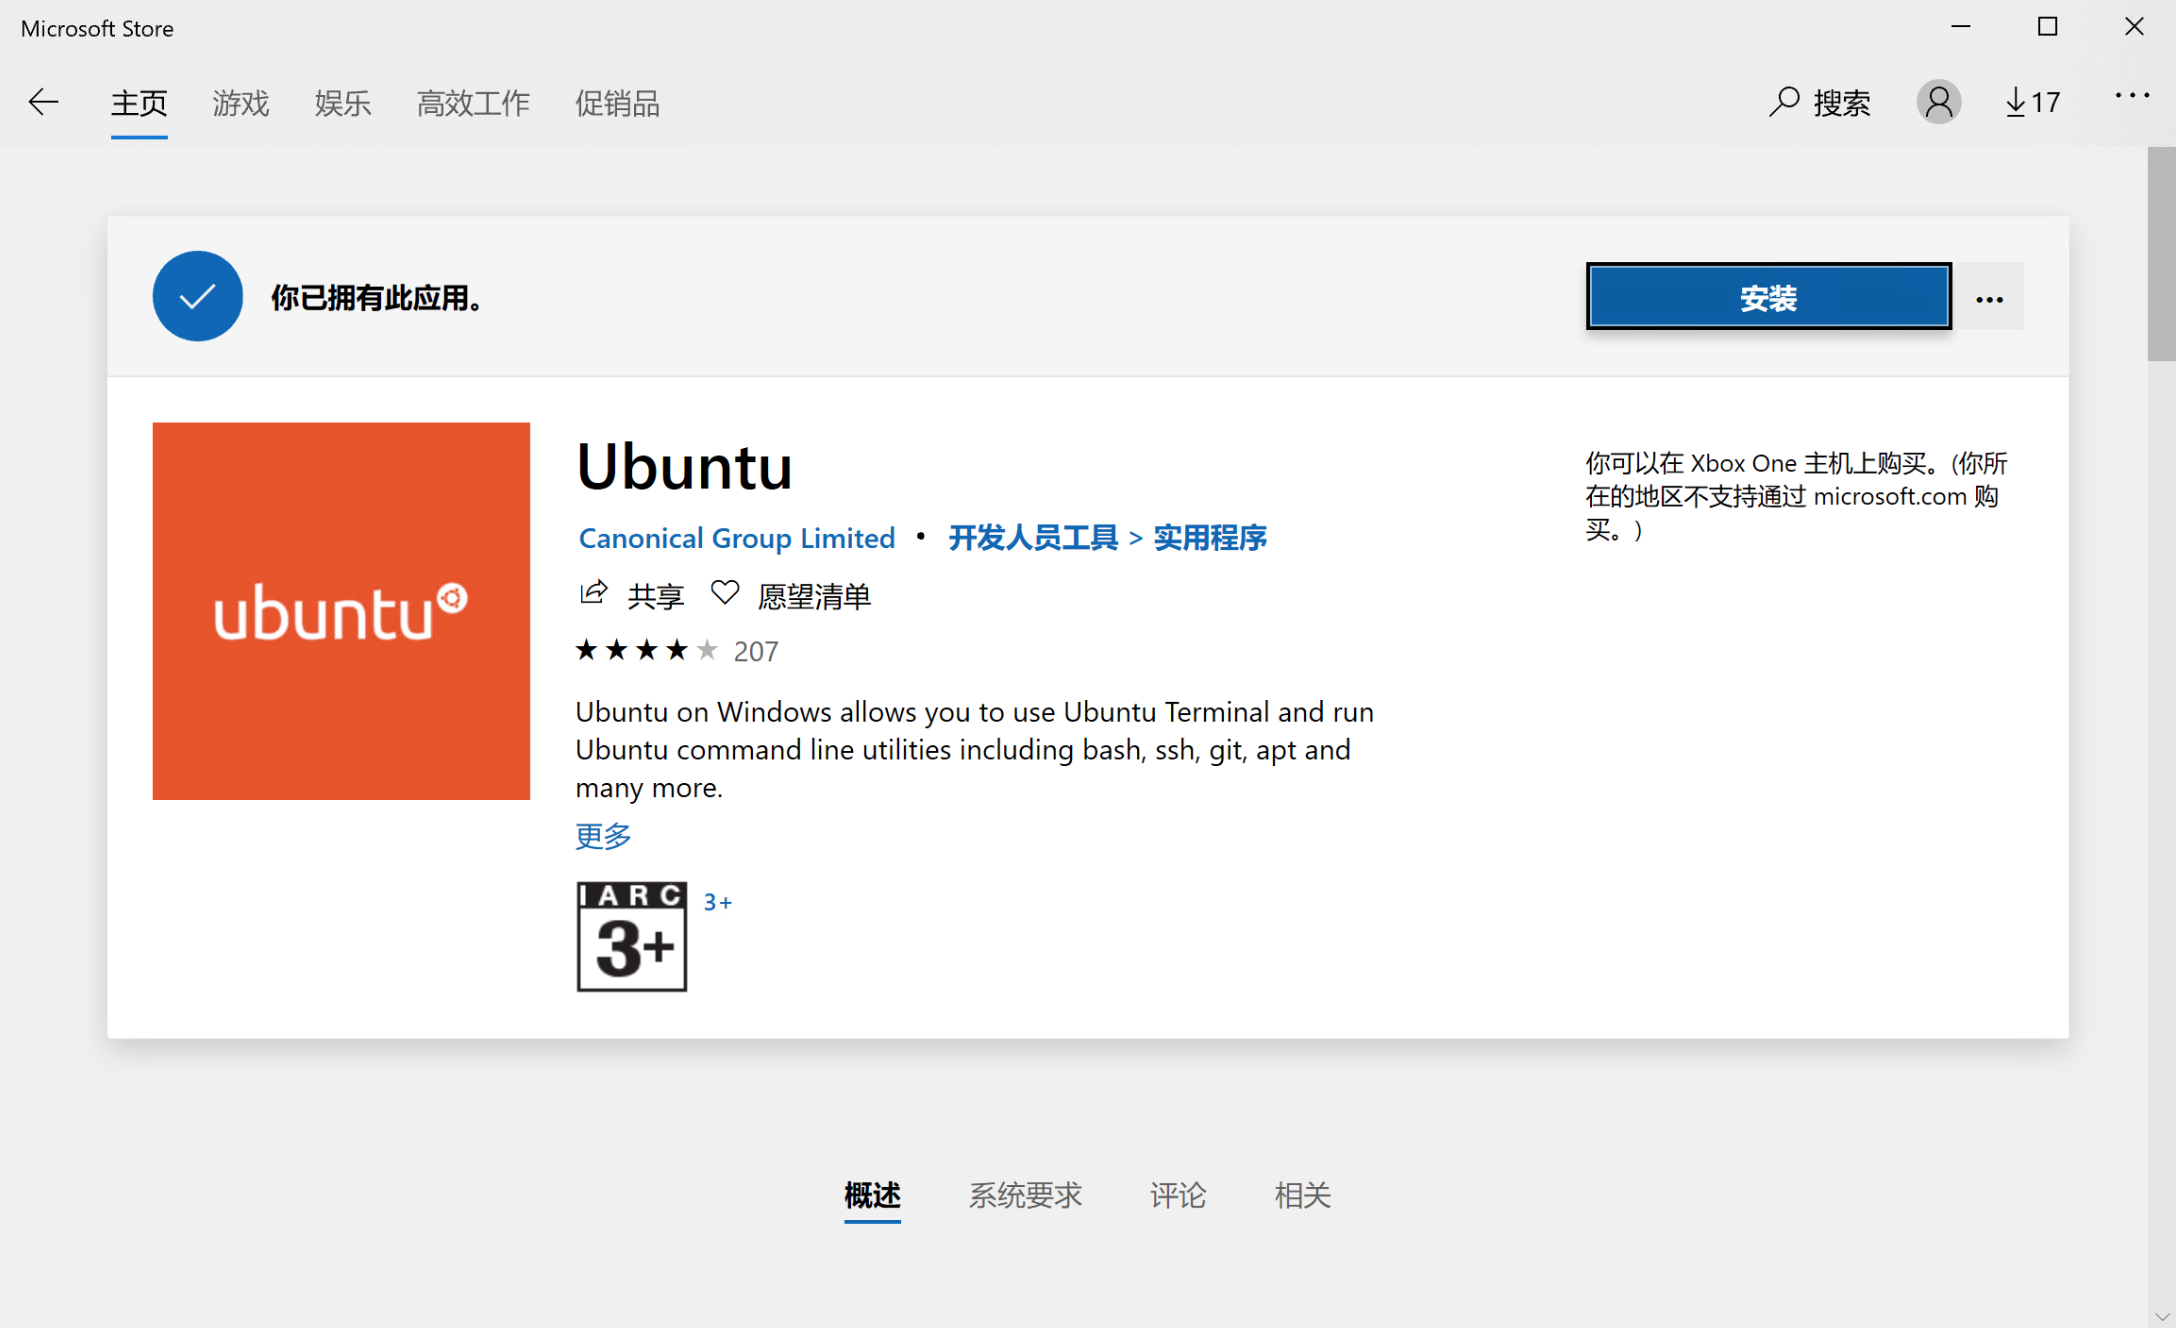
- Search for Ubuntu and select Install.
After the installation is complete, the first time you open Ubuntu, a console window will open and you will wait a few minutes to configure it.
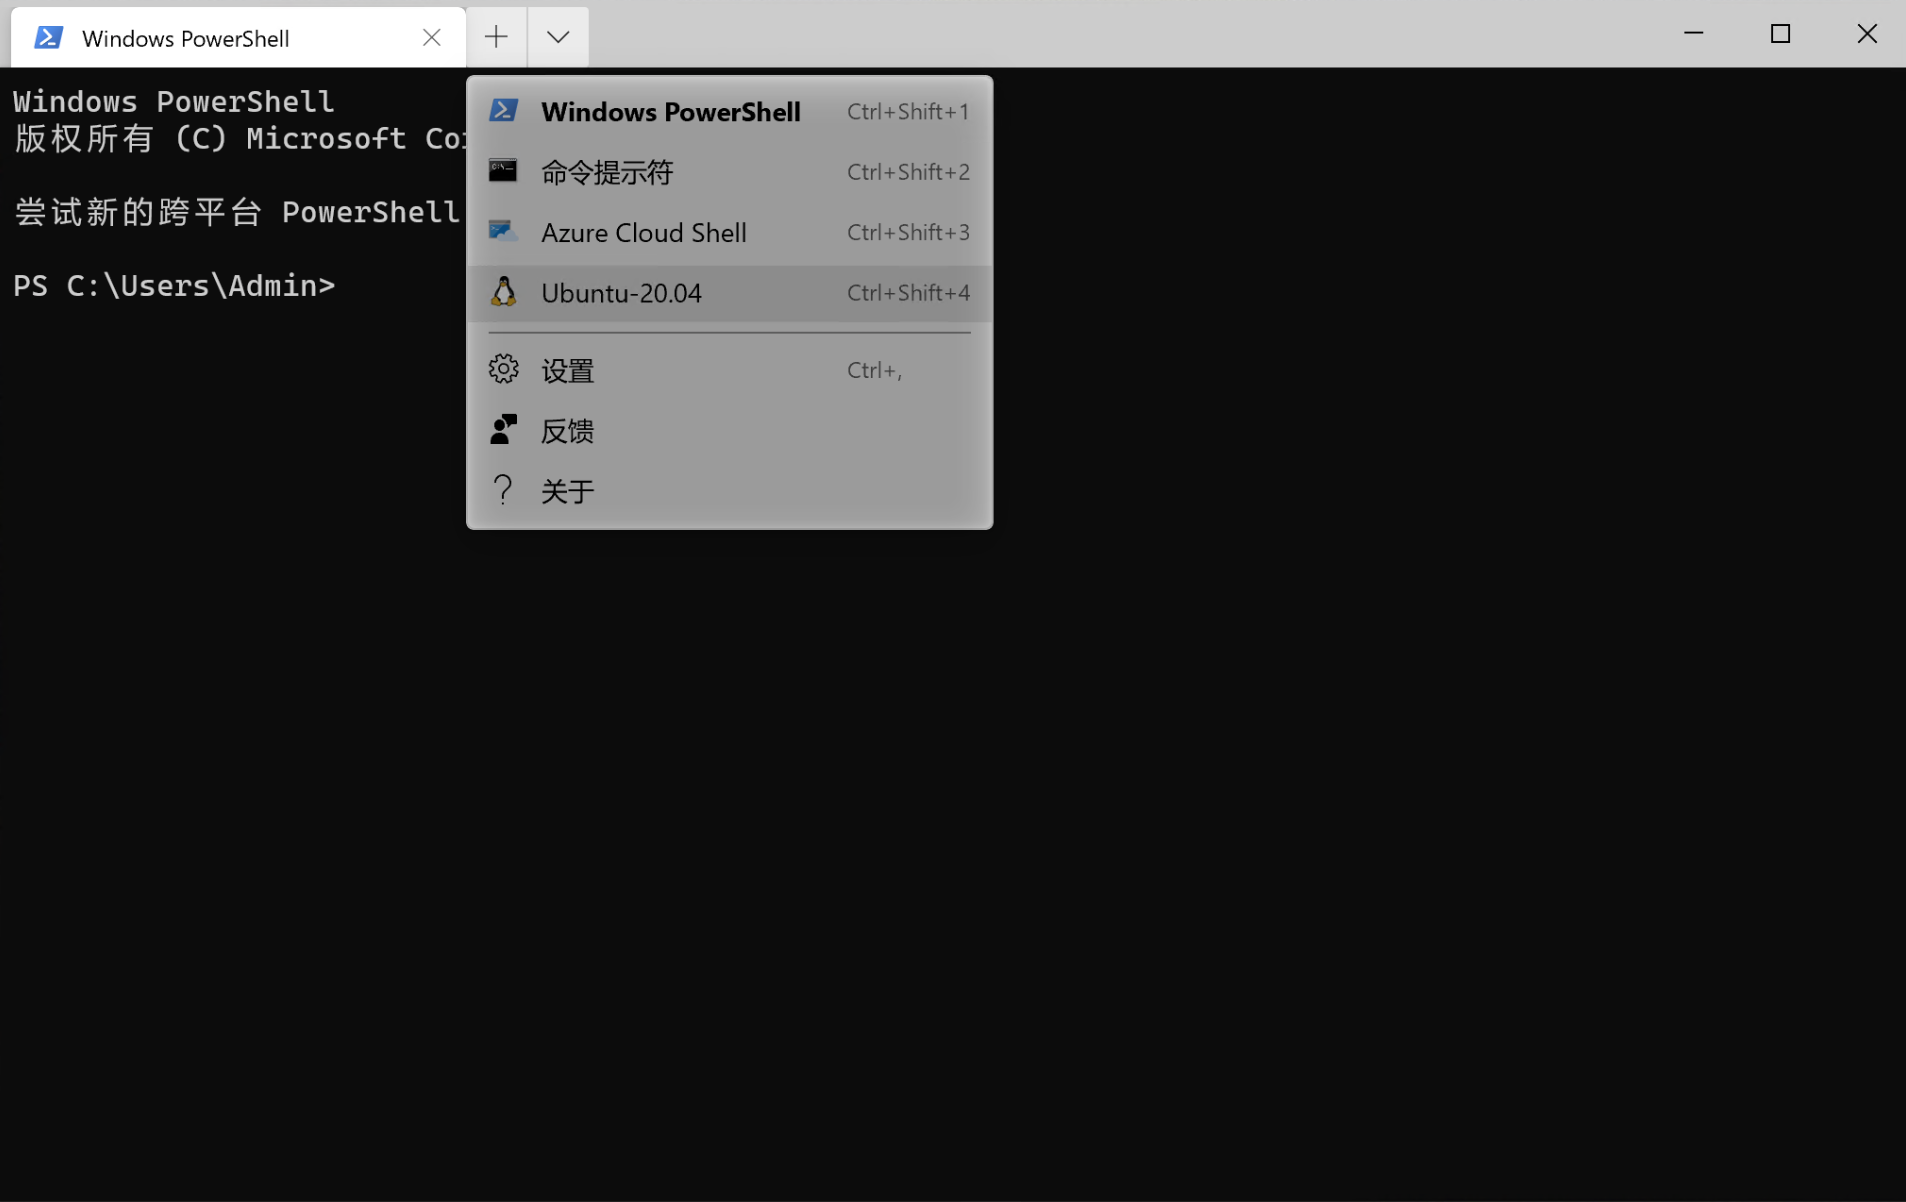
Then we can use Windows Terminal to operate the Ubuntu system. Select the Ubuntu distribution in Windows Terminal to jump to the Ubuntu terminal and log in with the username and password we configured above.
Since by default we don’t know the password for the root user, we can use the passwd command to set a new password for the root user if we want to use it.
Configuring Linux
Then you can replace the Ubuntu repositories with Aliyun repositories:
|
|
Then simply execute the update at
|
|
In addition, we can configure the terminal, for example by replacing it with zsh.
oh-my-zsh can be used to quickly configure zsh, go to official website or Github to learn about its basic usage and its rich theme usage, and install it by simply executing the following code.
|
|
Install the zsh-syntax-higlighting syntax highlighting plugin.
|
|
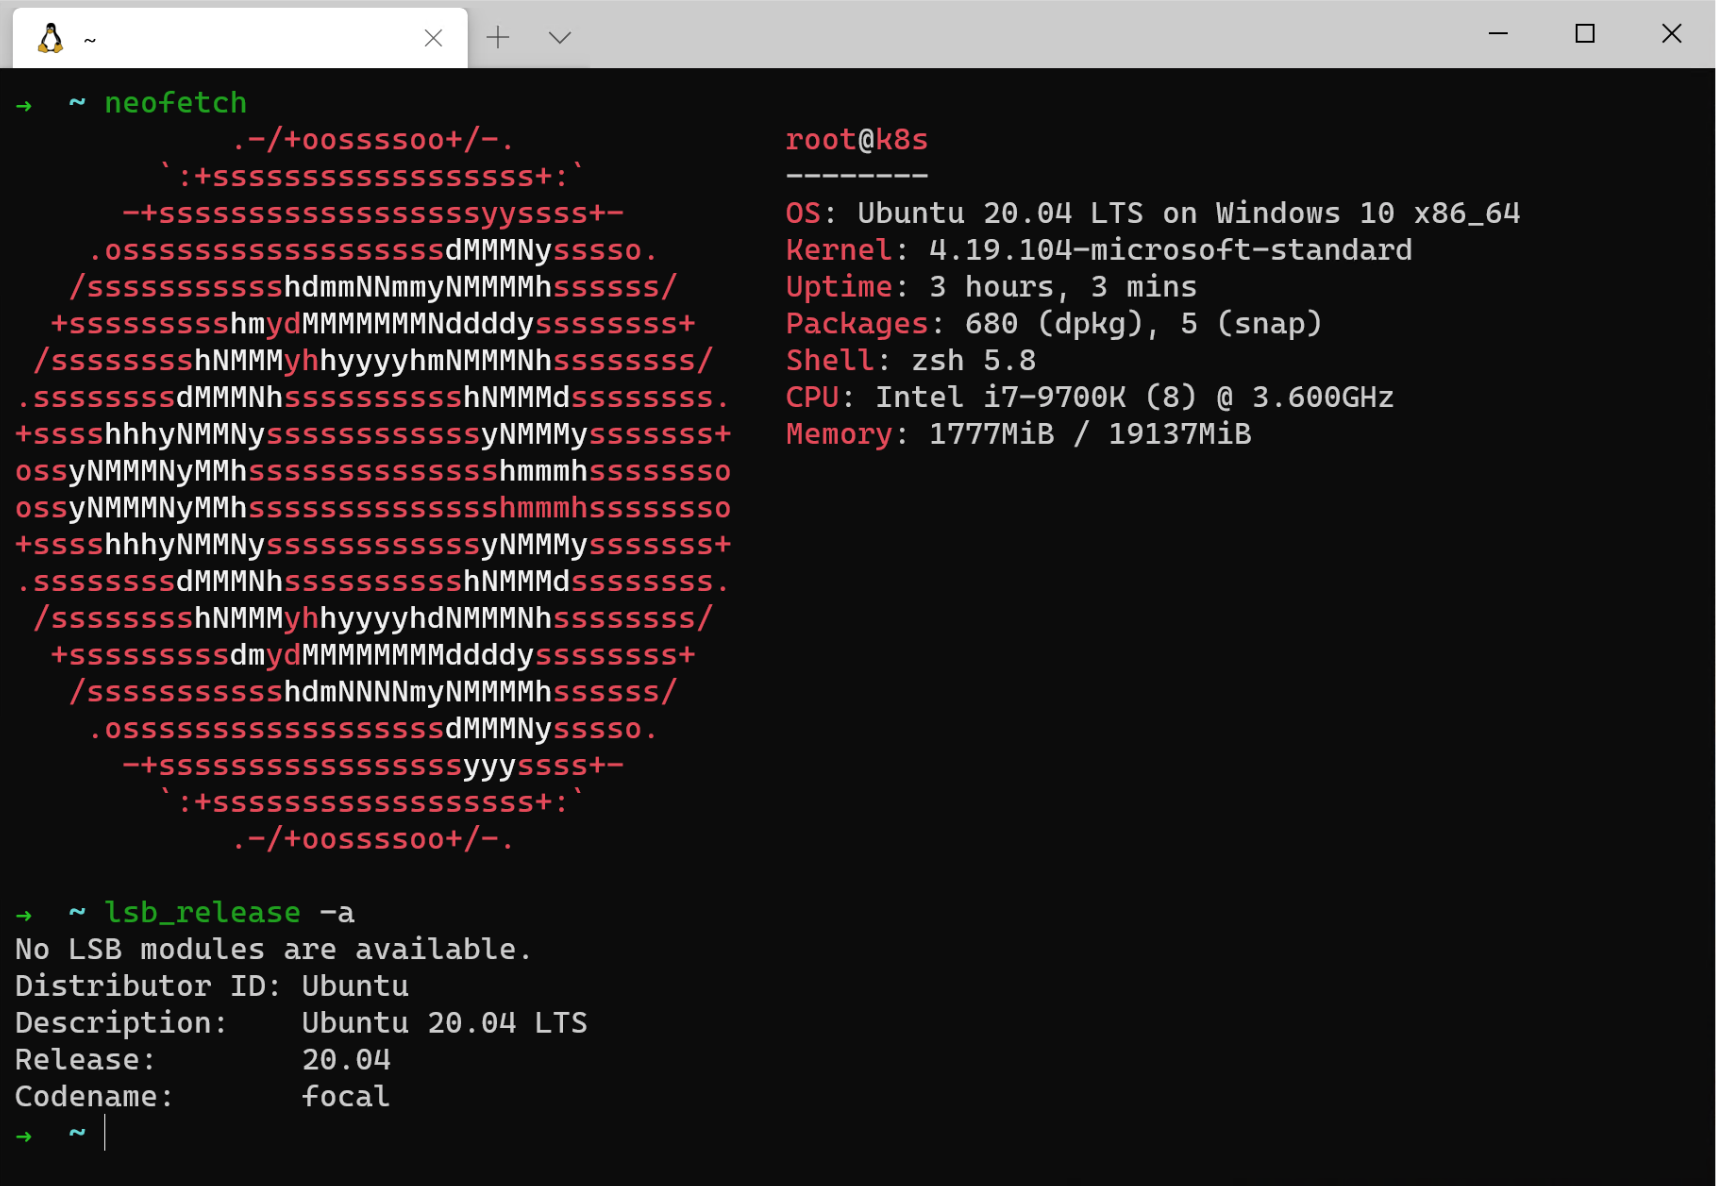
After the configuration is complete, the final result of Terminal is shown in the following figure.
Configuring Systemd
Since systemd cannot be used in WSL by default, many applications cannot be started, but some gods have solved this problem. We can find the way to start SystemD under the link https://forum.snapcraft.io/t/running-snaps-on-wsl2-insiders-only-for-now/13033.
First install the Systemd-related dependencies at
|
|
Then create a script file as shown below.
|
|
The above script is placed in the /etc/profile.d directory, so to make the script work, we need to exit the current session and re-enter it.
Here we are done with the installation and configuration of WSL2.
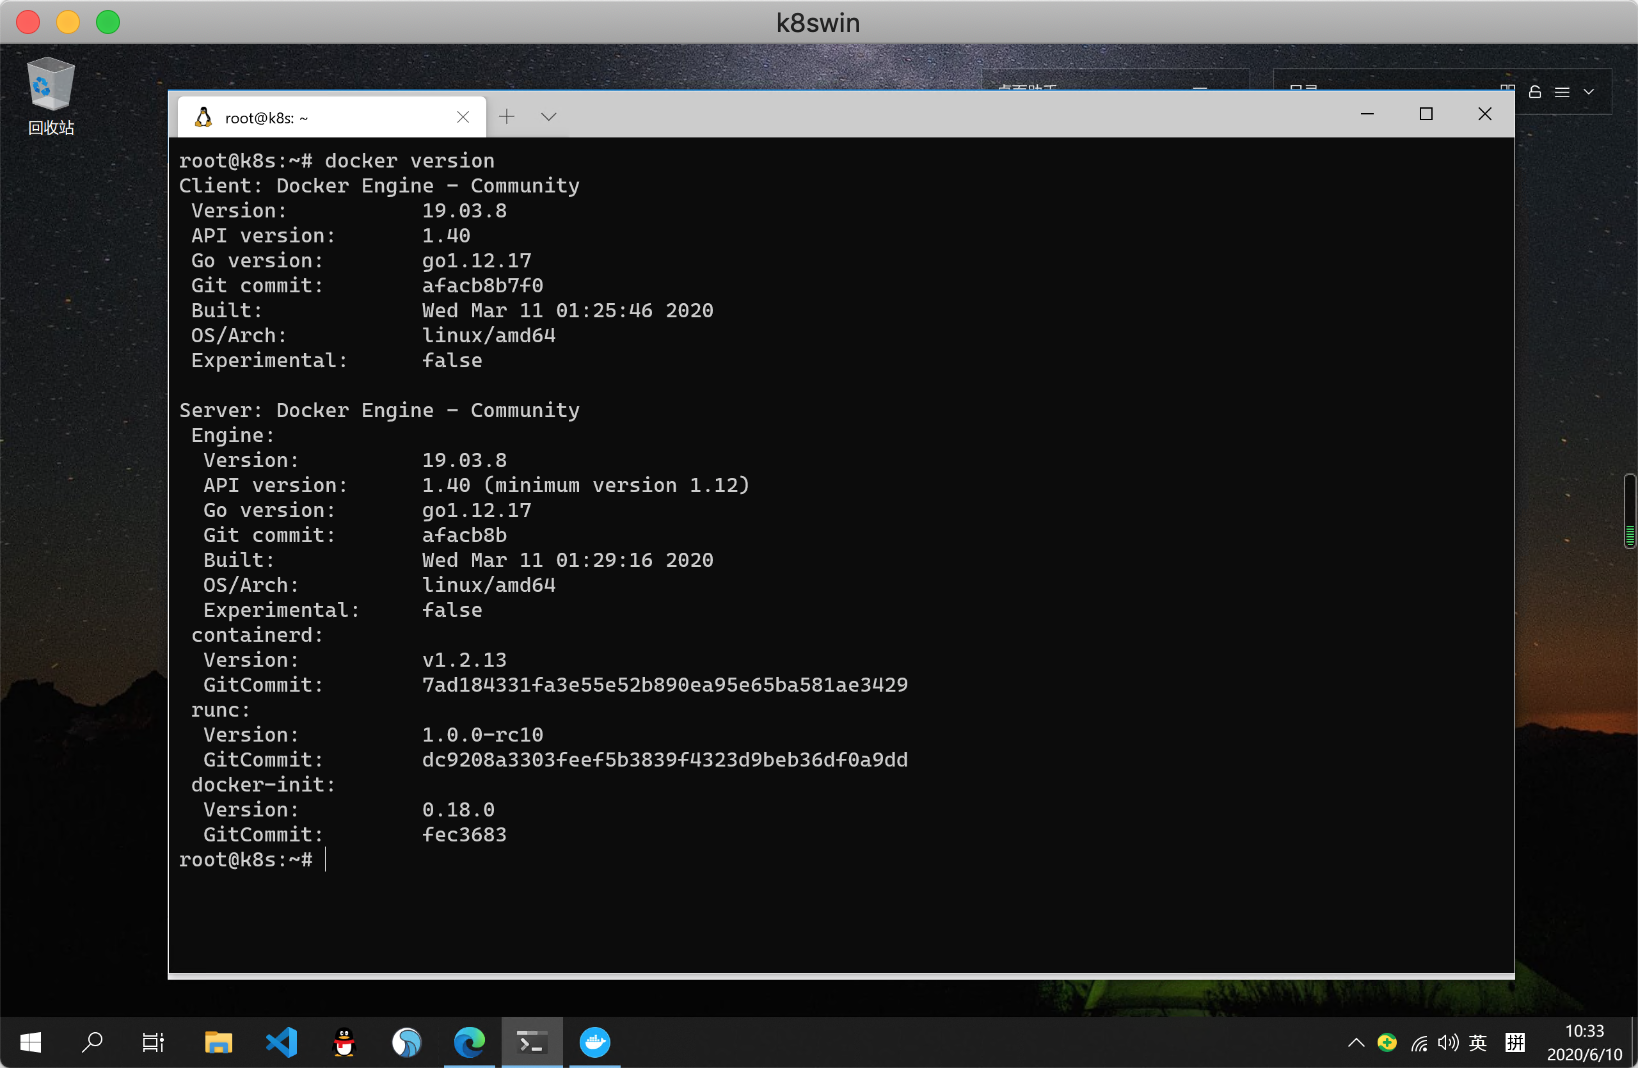
Install Docker
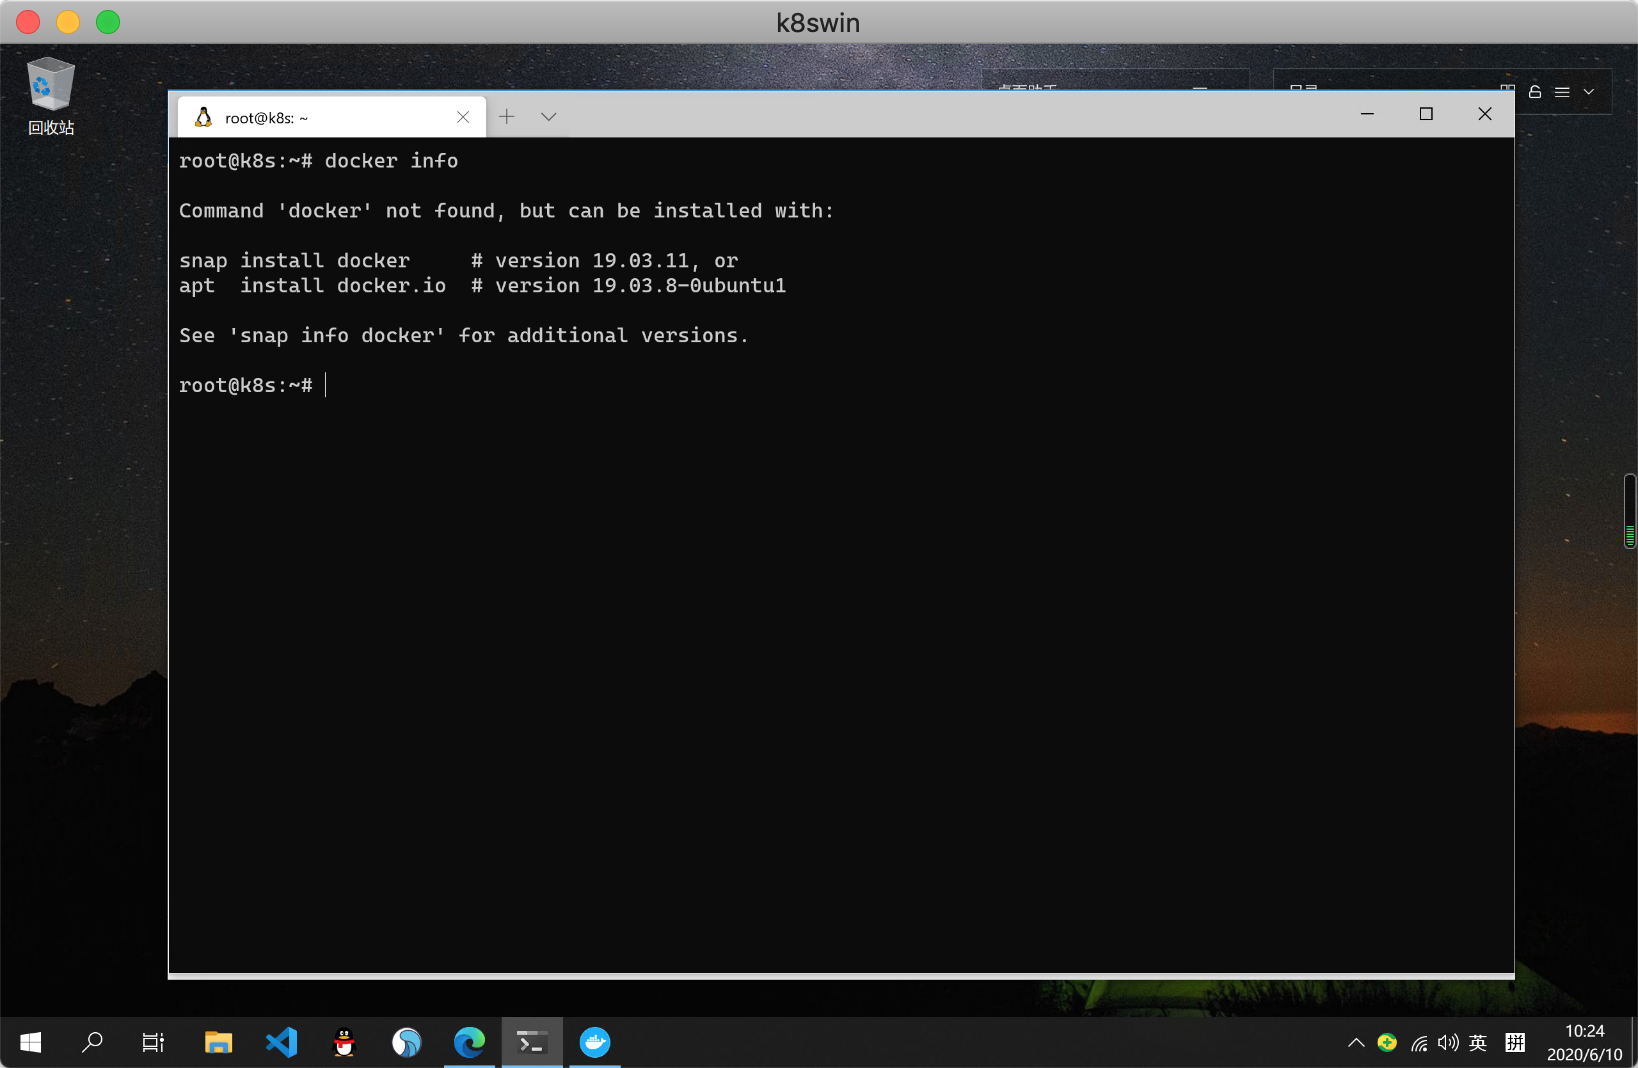
Now we can install Docker directly in WSL, the same way we usually do in Linux. However, Docker has also developed a desktop manager that can use the Docker daemon in WSL2, open the [Docker Desktop WSL2 backend](https://docs.docker.com/docker-for-windows/wsl-tech- preview/) page, download the latest Docker Desktop for Windows program, install it, and open it with the following settings
Enable the Use the WSL 2 based engine checkbox

At this time, the docker command is still not found in WSL.
We also need to set in Resources which WSL2 distribution we want to access Docker from, as shown below using Ubuntu-20.04.
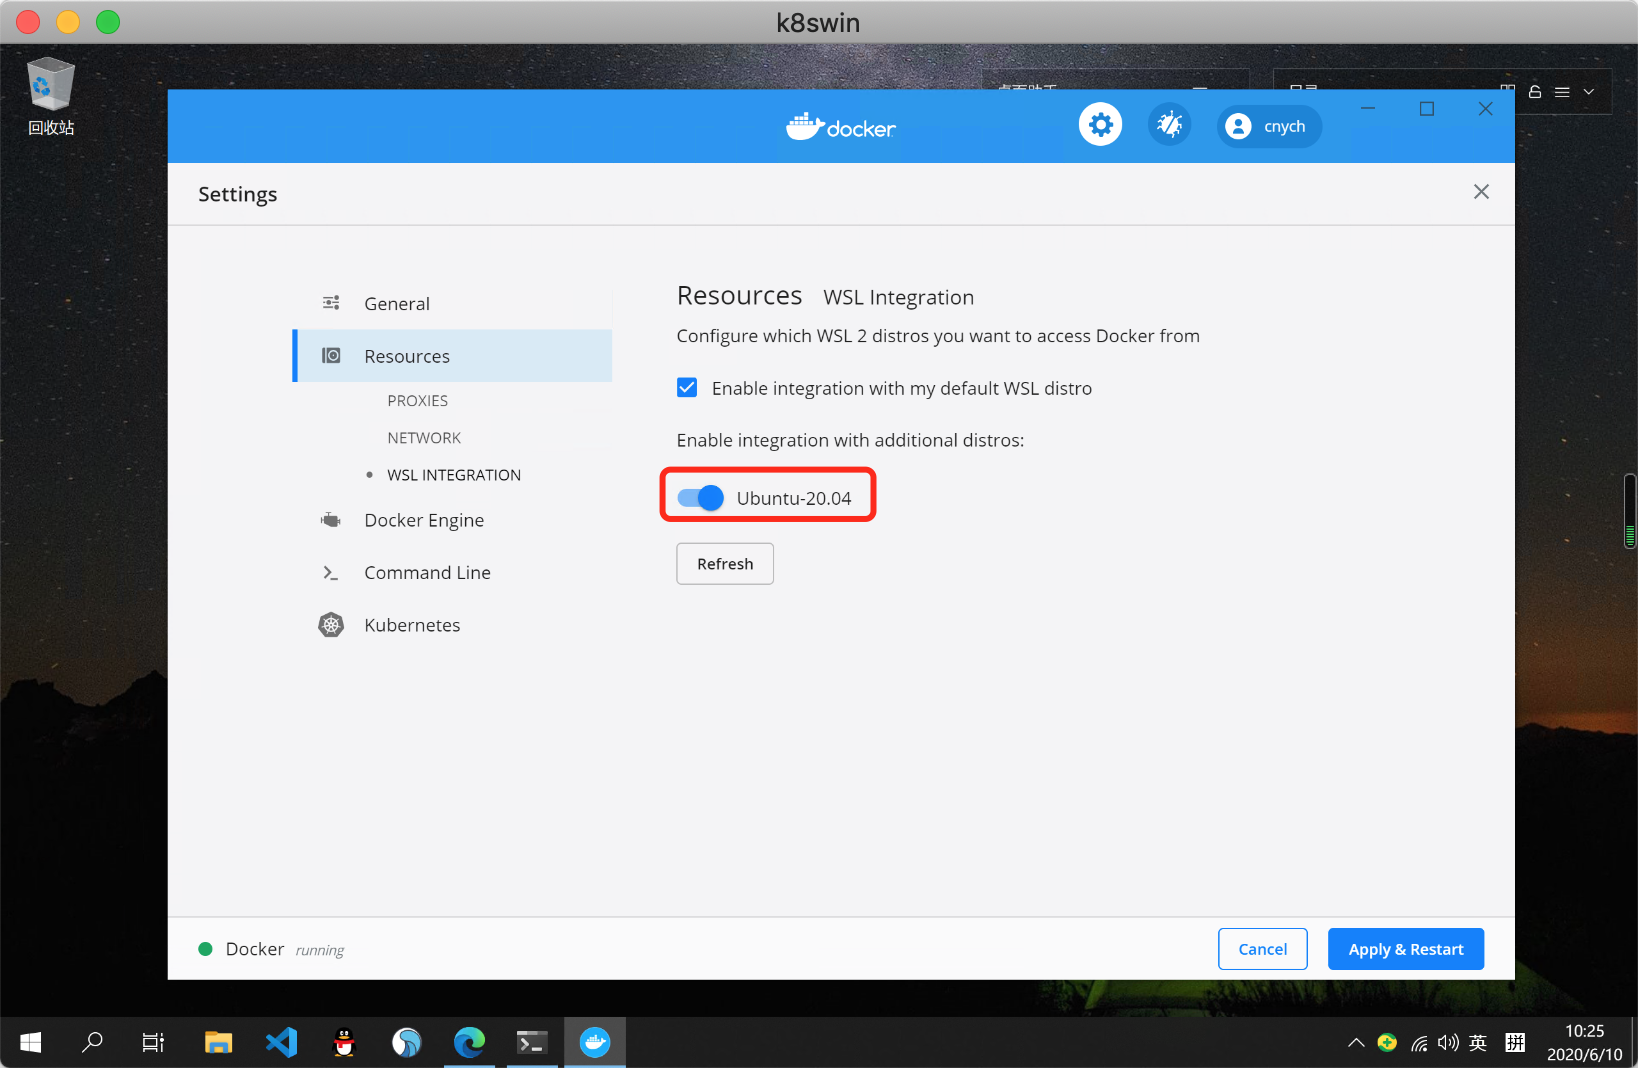
Then remember to restart Docker for Windows, and once the restart is complete we can use the docker command from within WSL:
The basic configuration of Docker and WSL2 is done here, so let’s install the Kubernetes cluster.
Install Kubernetes
There are many mature solutions for installing Kubernetes clusters, and there are minikube, microk8s, etc. to build them locally. We choose to use KinD here: a simple way to run Kubernetes in a container. Here we will install the instructions from the official KinD website (https://kind.sigs.k8s.io/docs/user/quick-start/) to do so.
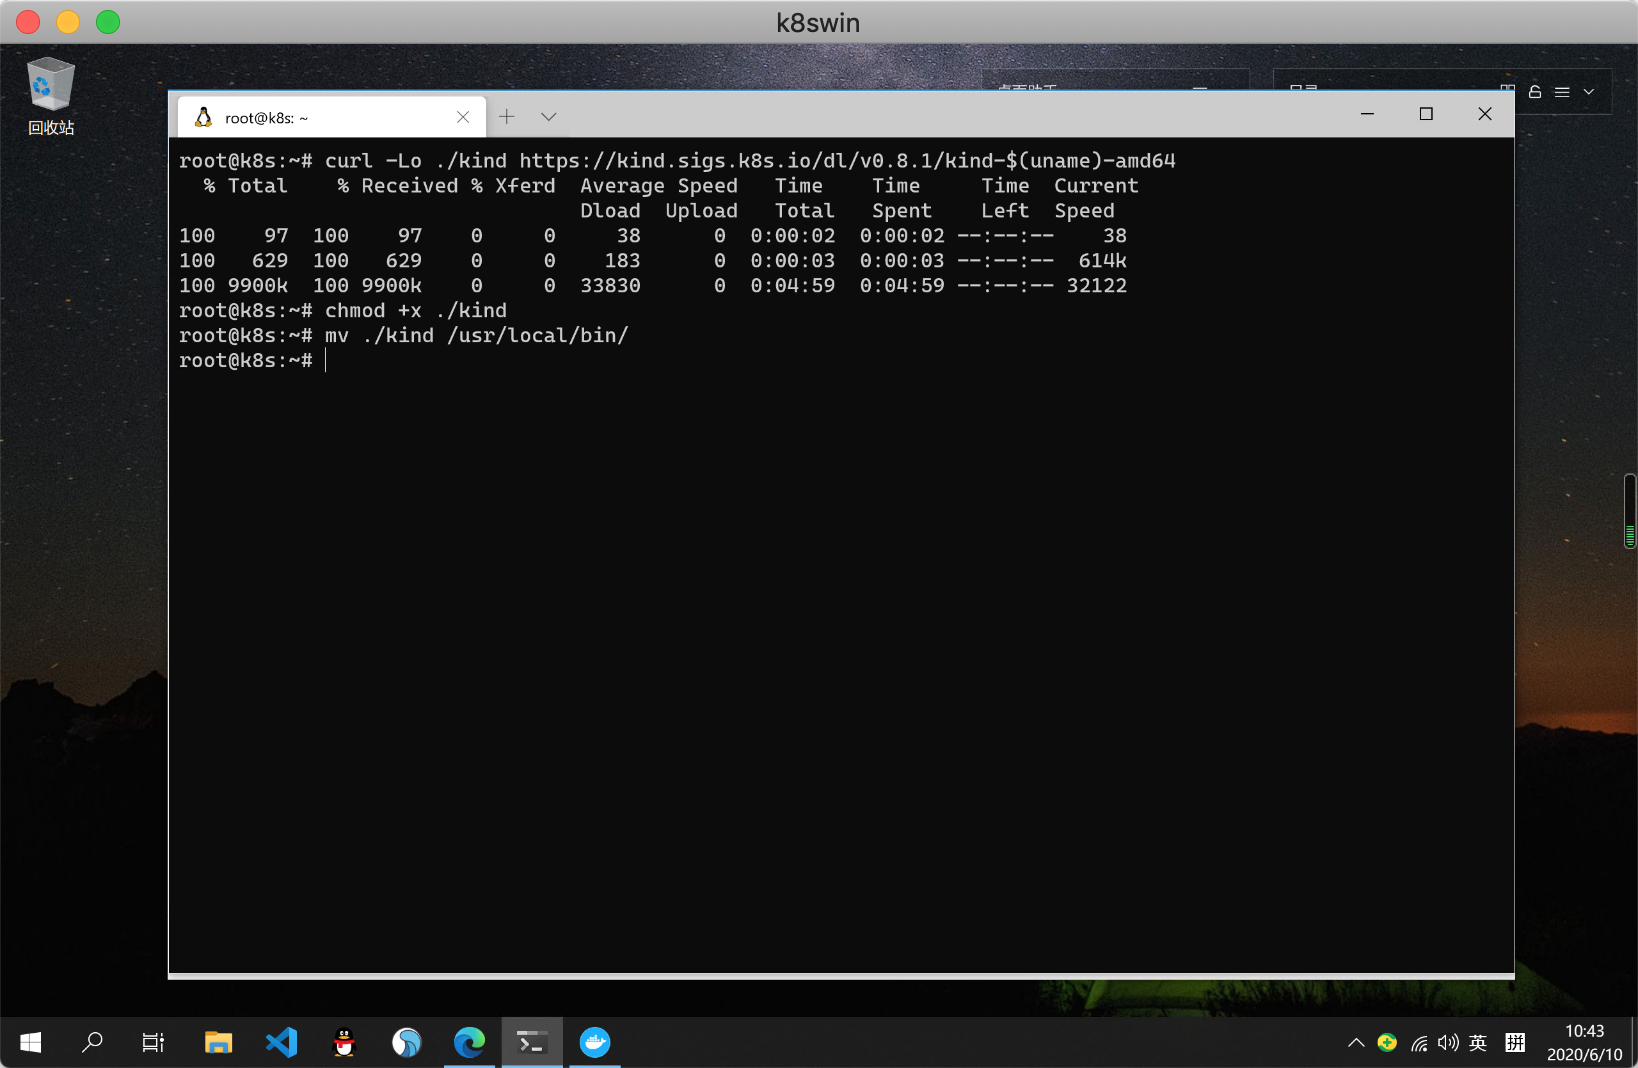
Once KinD is acquired, we can create the Kubernetes cluster
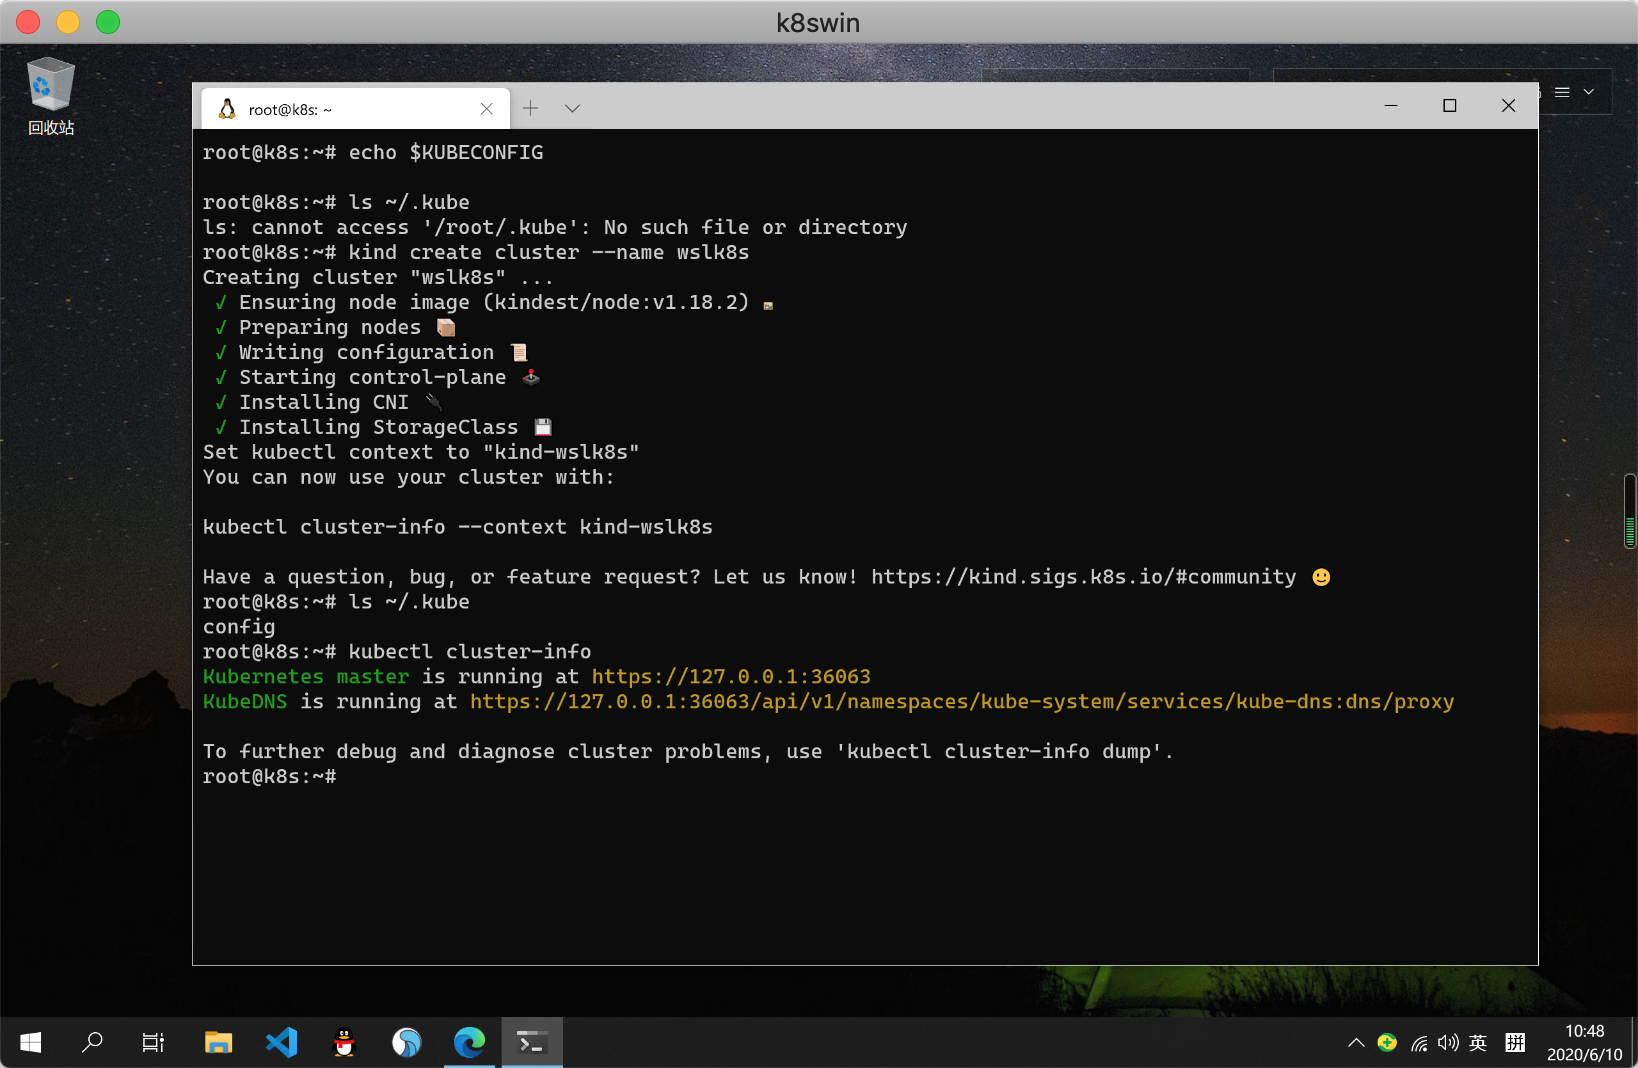
The cluster is now successfully created, and we can also open the above Kubernetes master address in a Windows browser at
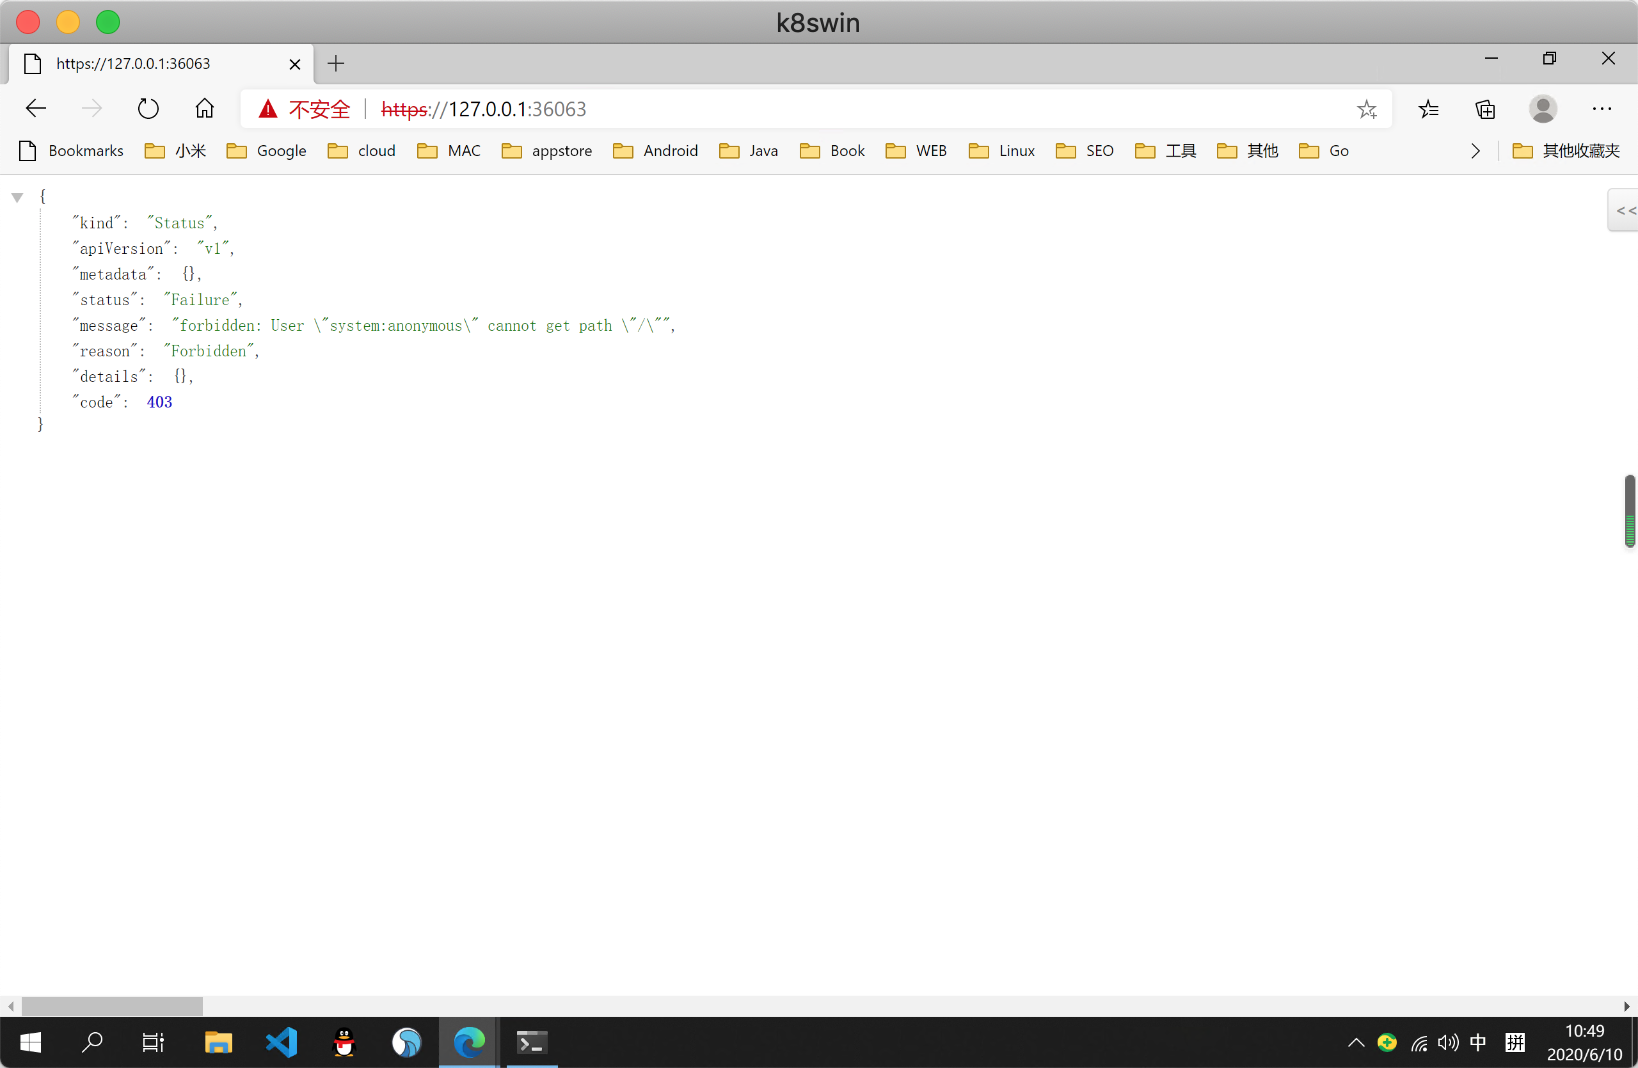
This is where Docker Desktop for Windows combined with the WSL2 backend really shines, with much better performance than the previous Docker default approach.
At this point we have successfully created a single-node Kubernetes cluster.
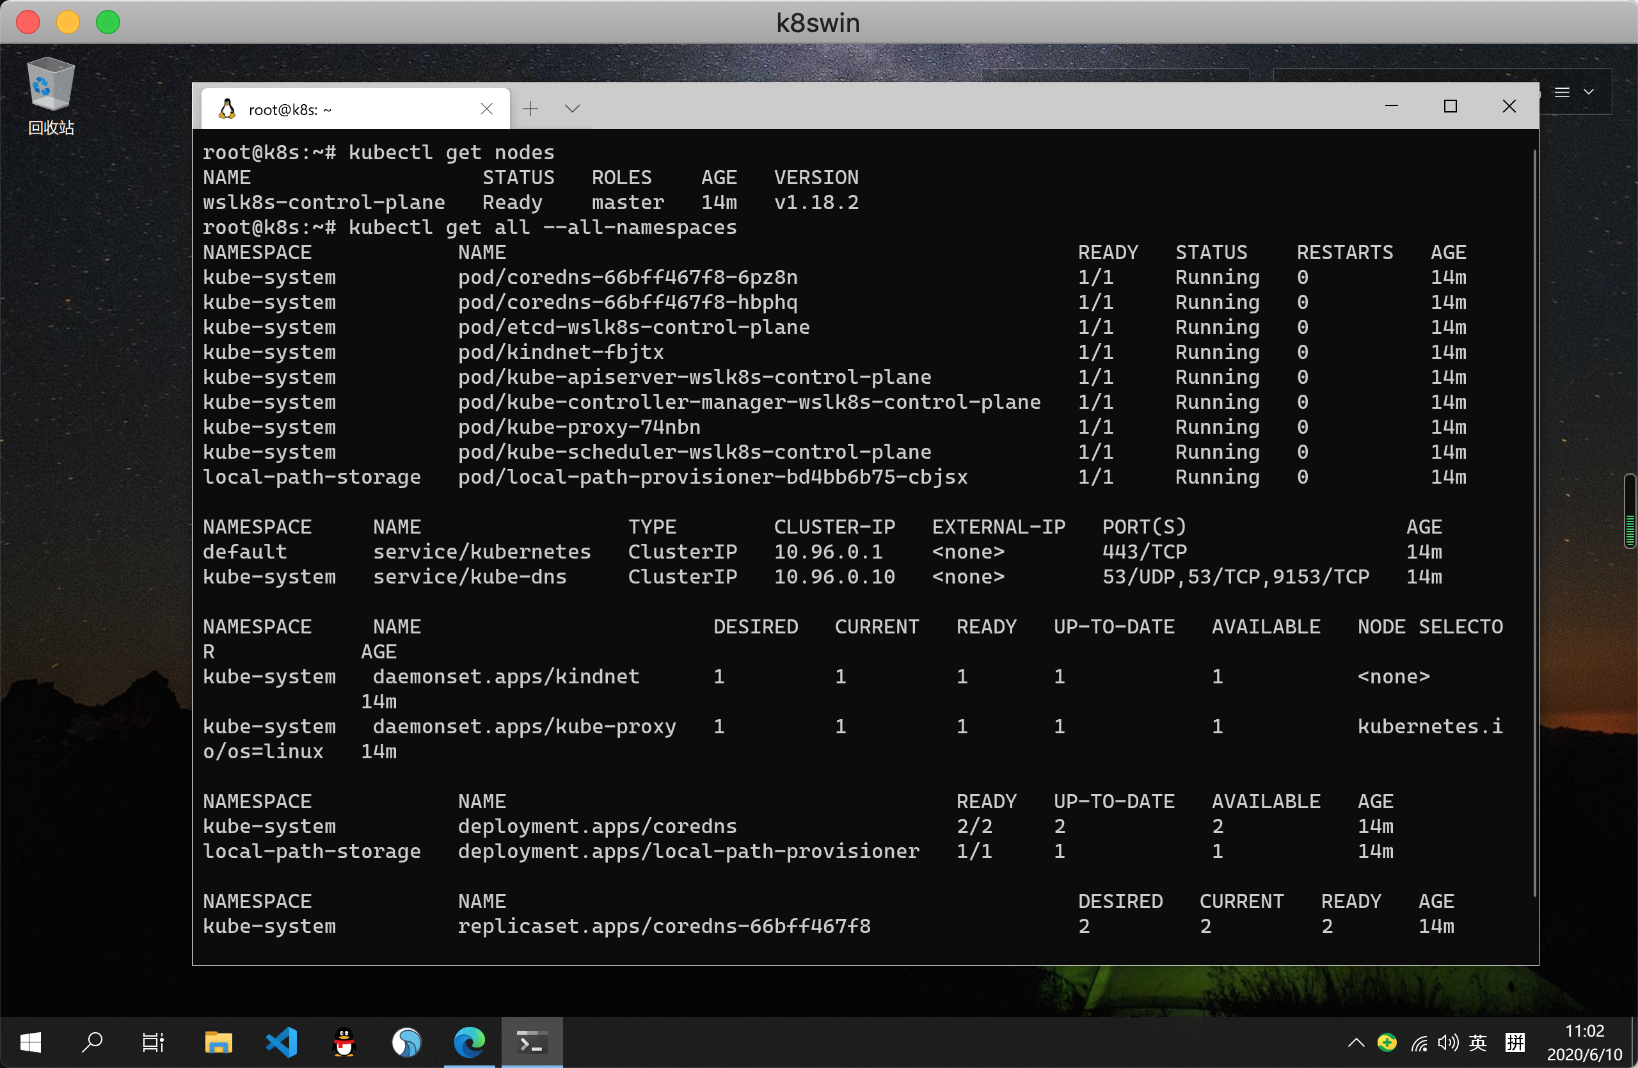
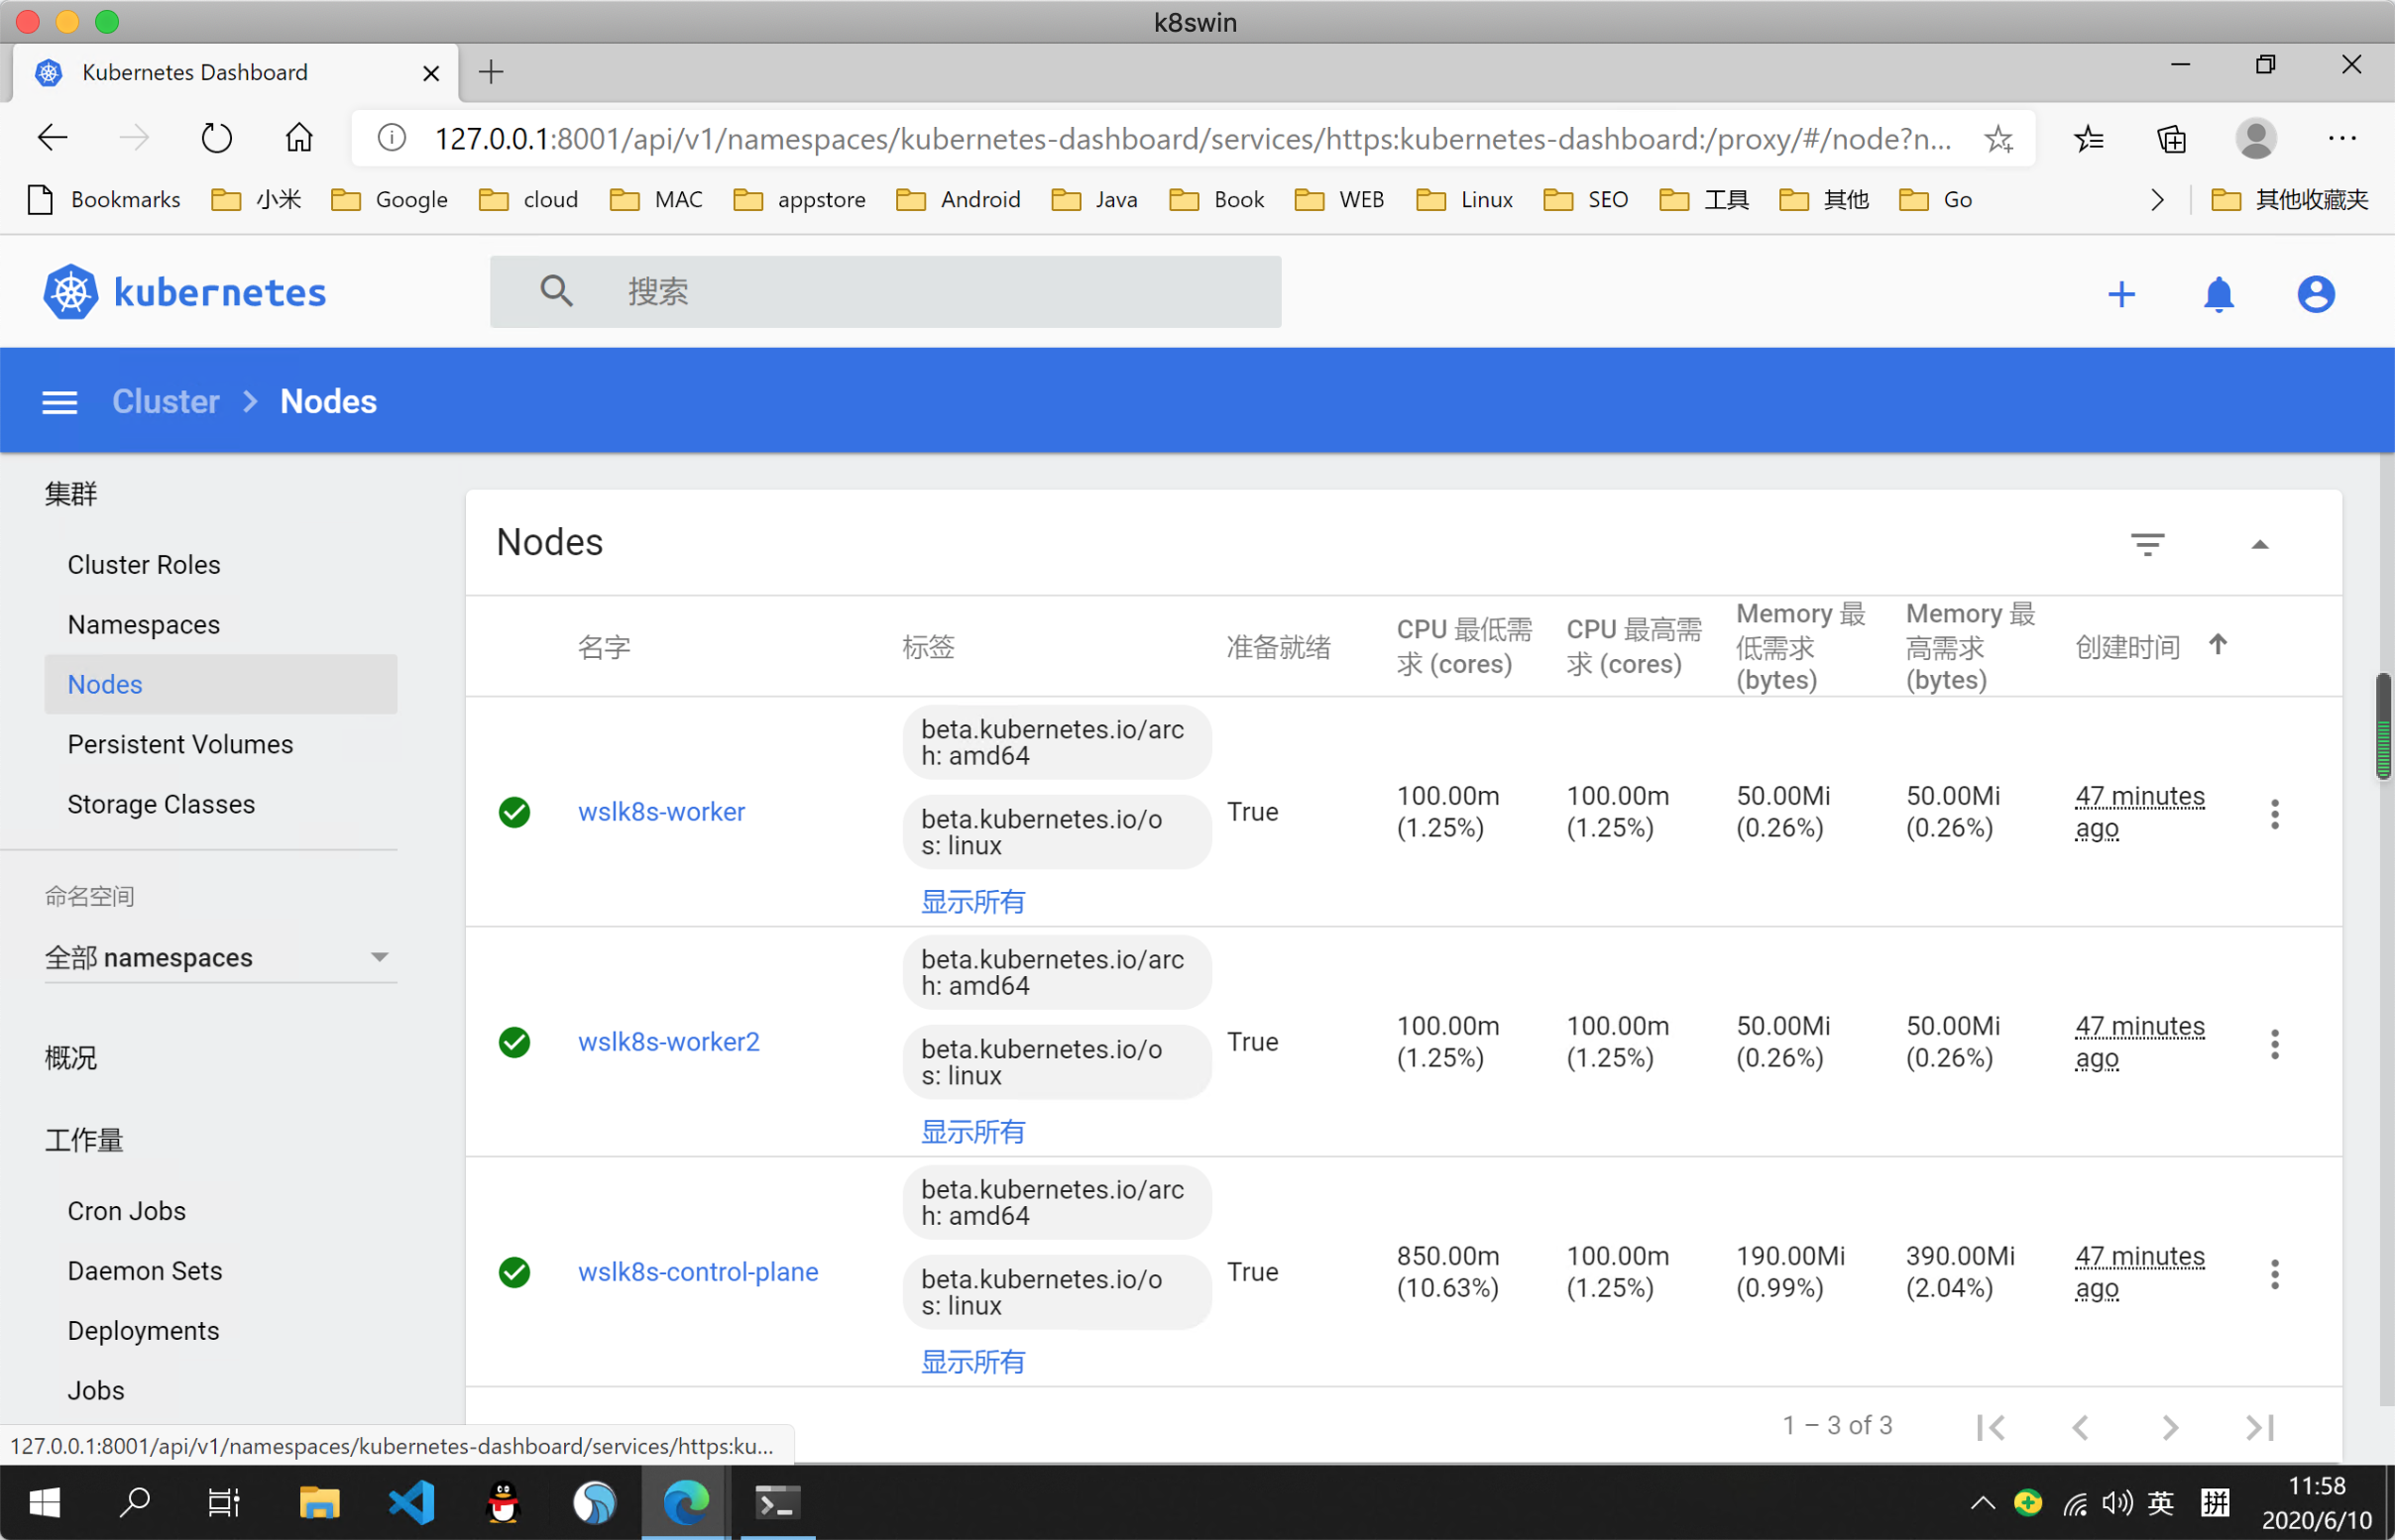
For most users, running a one-node cluster locally is sufficient, but if only one node is needed, we can use minikube. we can also use KinD to create a multi-node cluster.
|
|
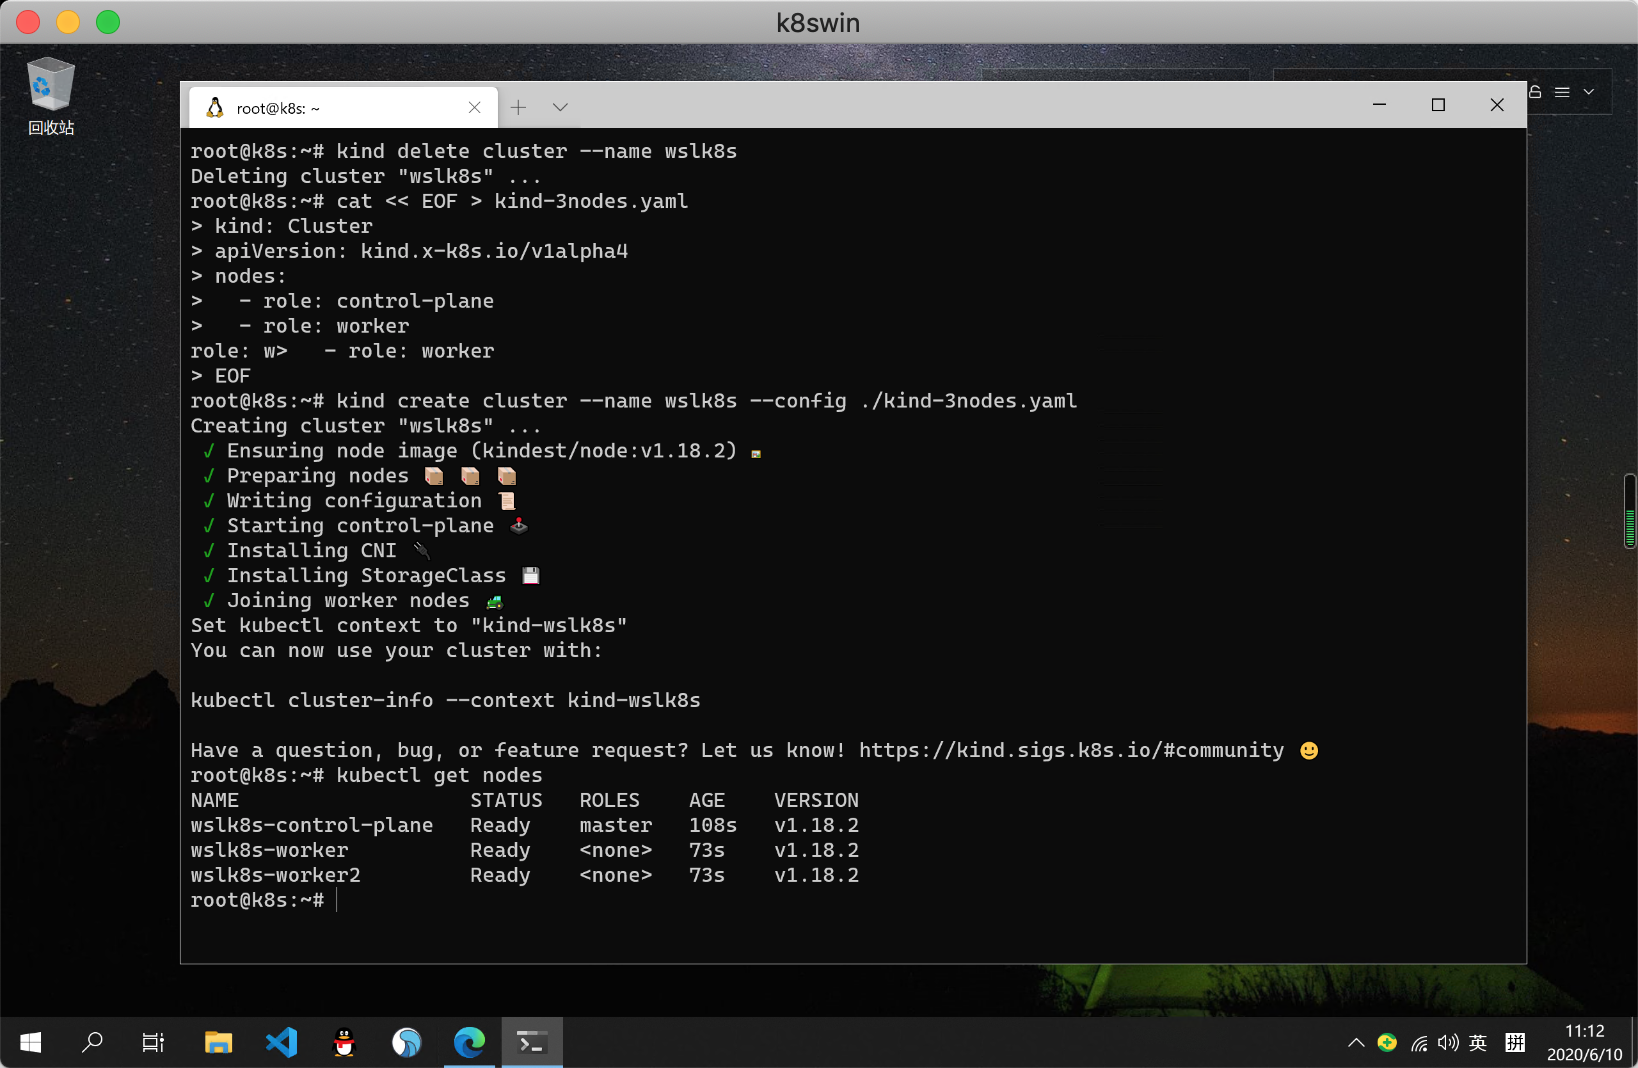
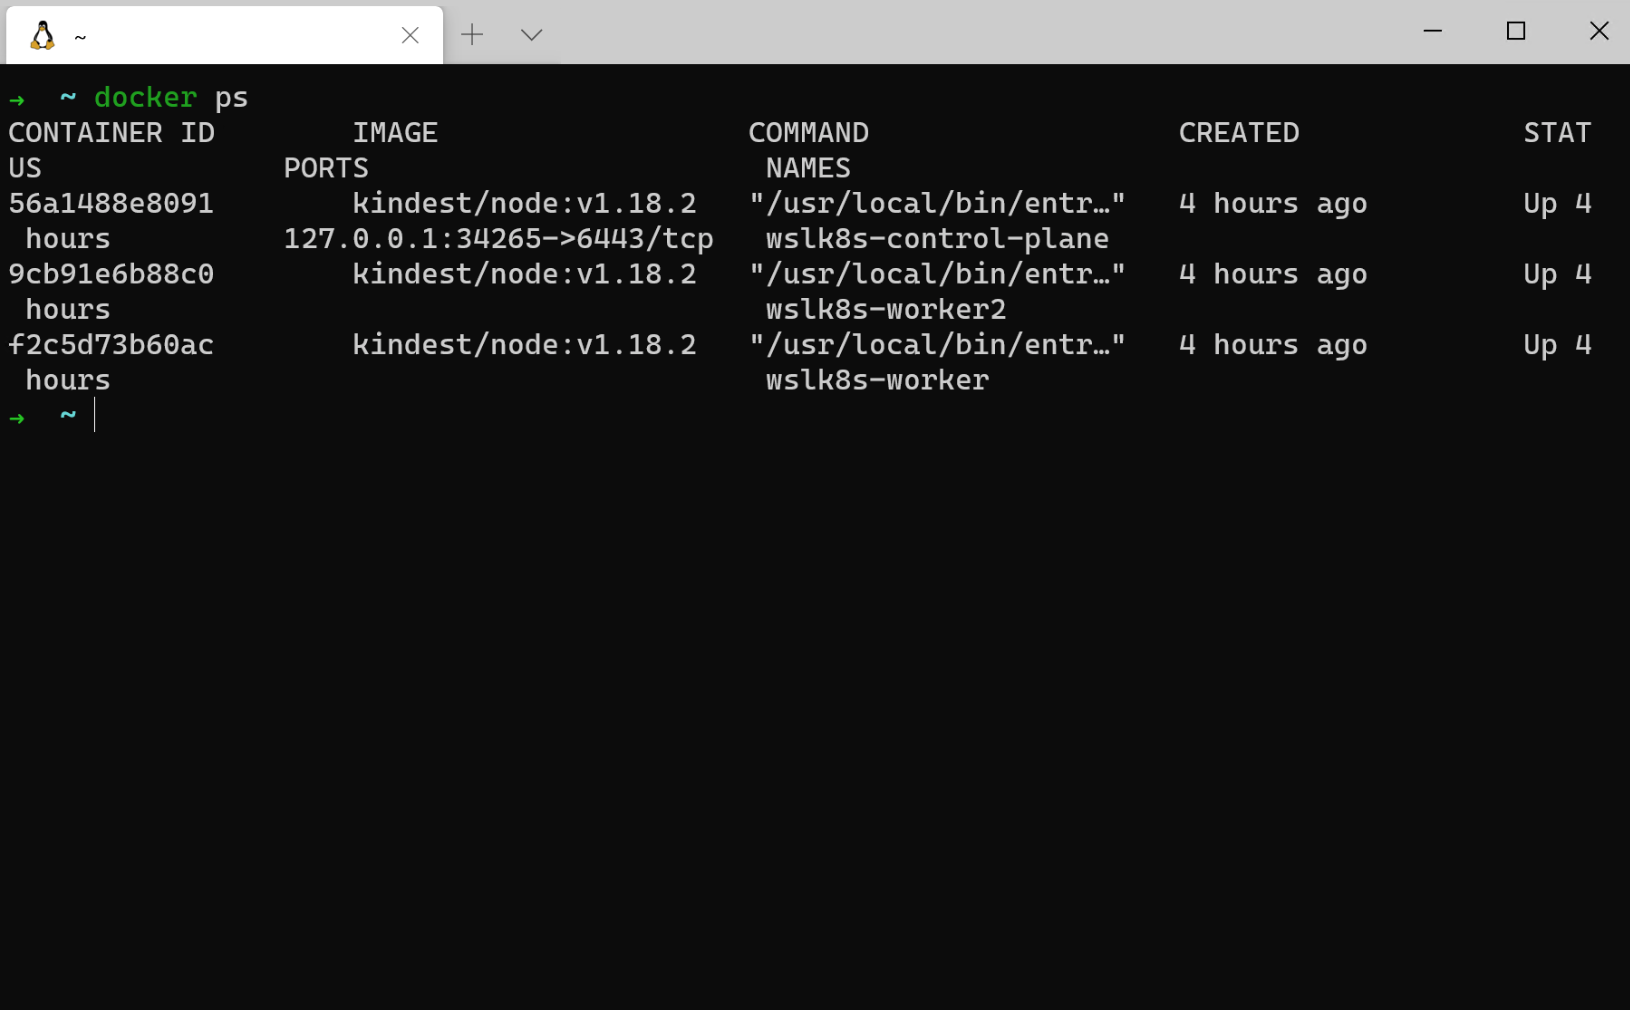
You can see that we have 3 Kubernetes nodes running successfully here with v1.18.2, and they are all running in Docker containers, which we can view with the docker ps command, similar to Kubernetes running in Docker containers, hence the name KinD.
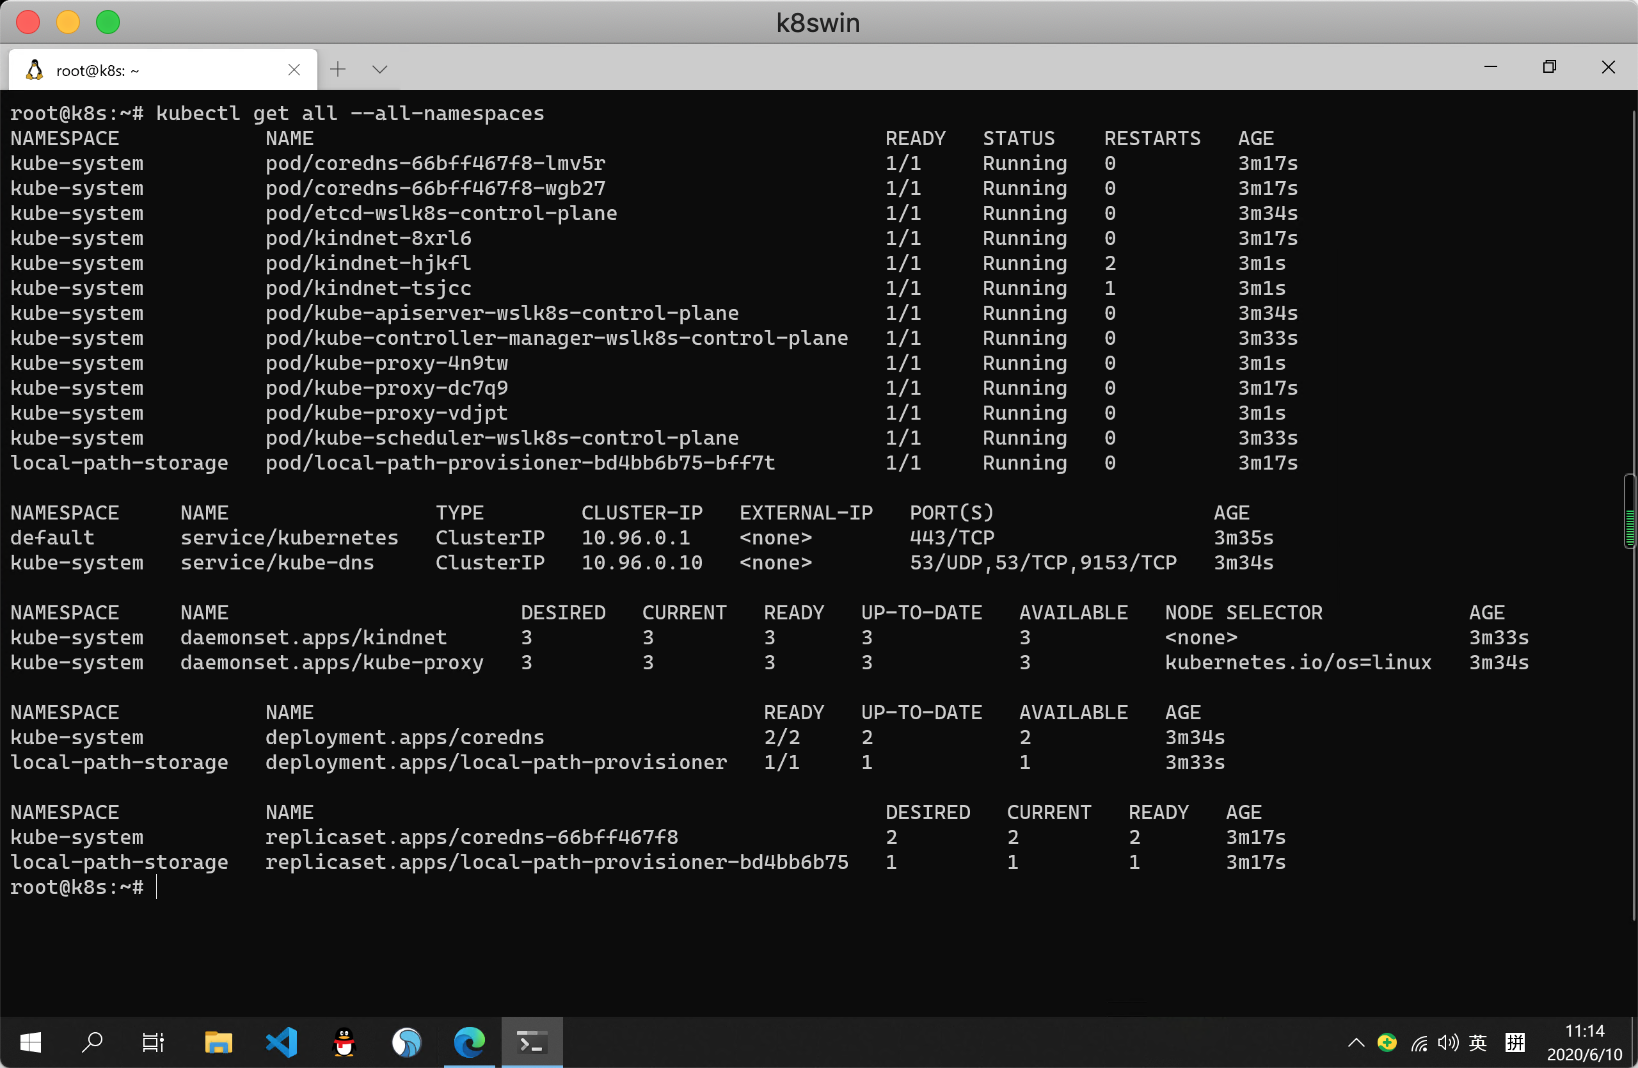
Now we can also go through the resource objects of the entire cluster: the
Of course we can also deploy applications in a cluster, for example by installing a Kubernetes Dashboard at
After successful installation, we can create a temporary proxy using the following command.
|
|
Then in a Windows browser we can access the Dashboard service at the following address.
|
|
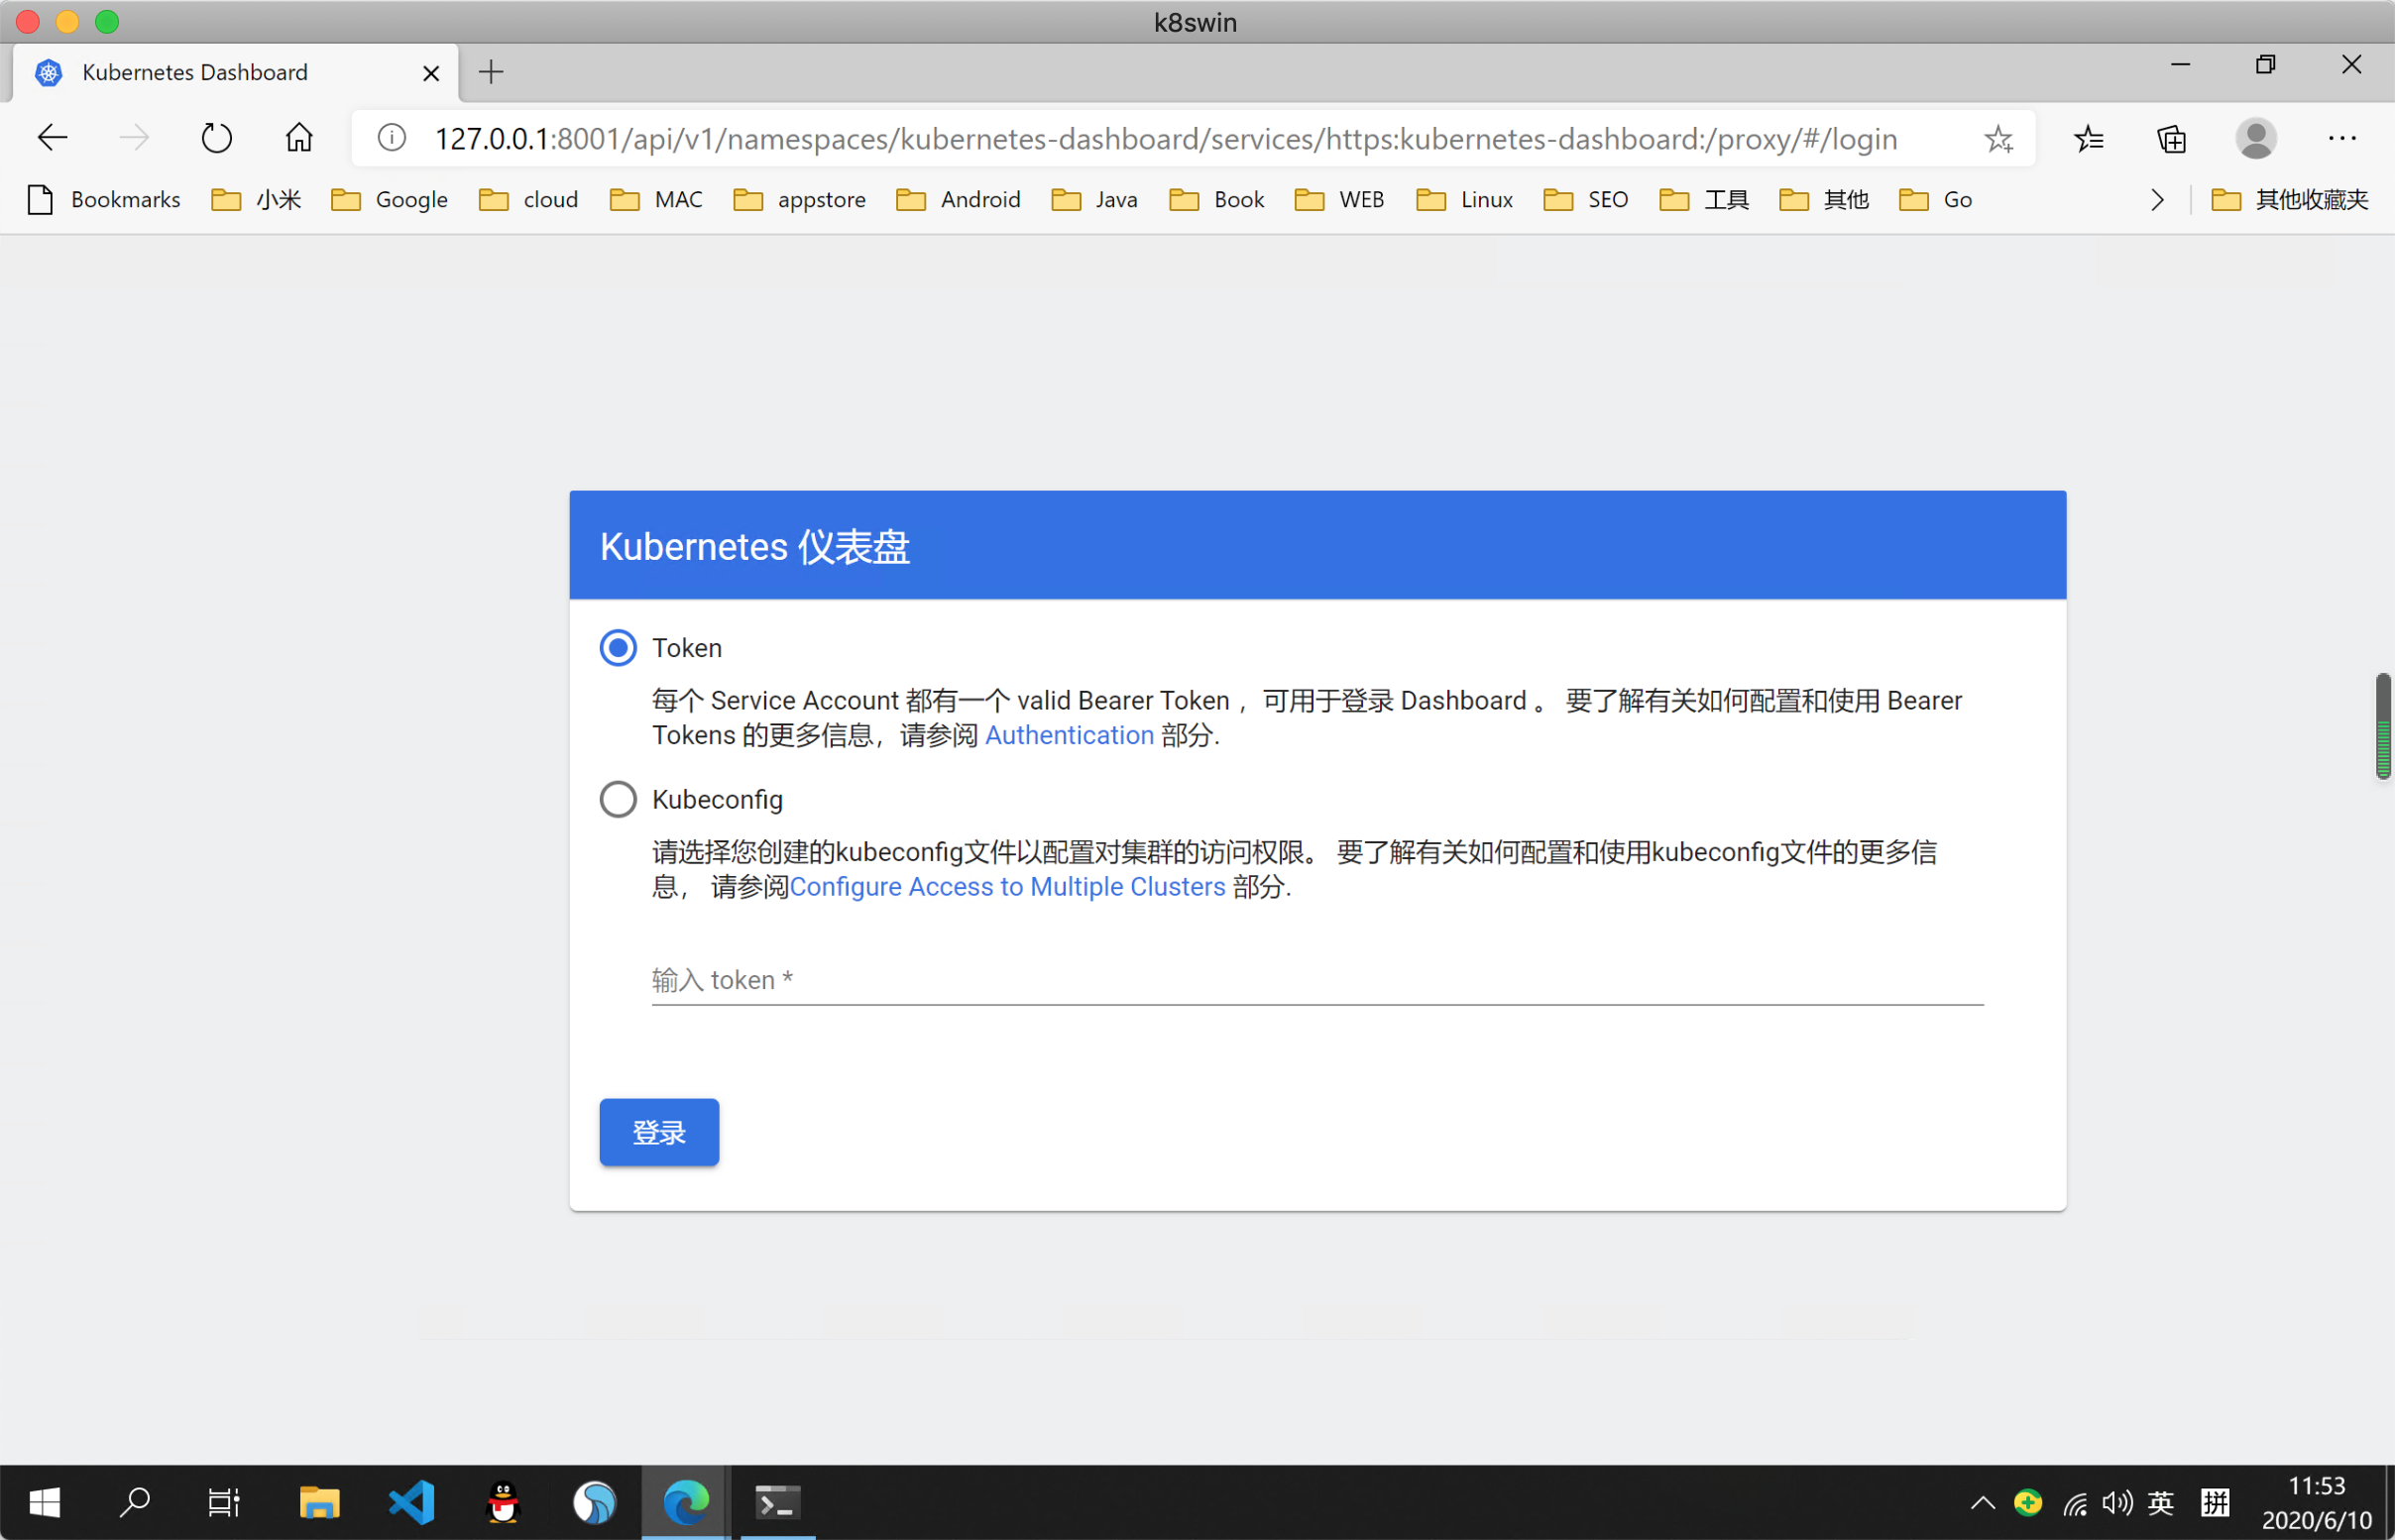
We then use the officially recommended RBAC method to create a Token for login, reopen a WSL2 terminal, and execute the command shown below.
|
|
We can then use the ServiceAccount created above to obtain the Token information.

Copy the token data obtained above to the Dashboard login page to log in.
Here we have finished building a Kubernetes cluster using WSL2 + KinD on Windows, which is very convenient for local development and testing. Of course, there are still some minor problems with WSL2, such as not being able to access the services in WSL2 over the LAN, but there are some solutions, but they are not elegant, and the IP of WSL2 will change after each reboot, so it is sometimes very inconvenient, but overall WSL2 is still very good.