The previous article, How to Extend a Kubernetes Cluster with CRD, explained what CRD is and what capabilities it can provide through a demo. This article continues to build on that demo (https://github.com/Coderhypo/KubeService) and explains how to build a CRD Controller.
CRD Controller
For the CRD (CustomResourceDefinition) itself, it is not too much to understand it as just a Schema of OpenApi, because that is its only ability and role, but for the broader statement: “CRD is used to implement xx functions”, it is actually the CRD Controller that is responsible for implementing the functions.
Kubernetes itself comes with a bunch of Controllers, and one of the three core components on the Master node: Controller Manager, is actually a collection of Controllers.
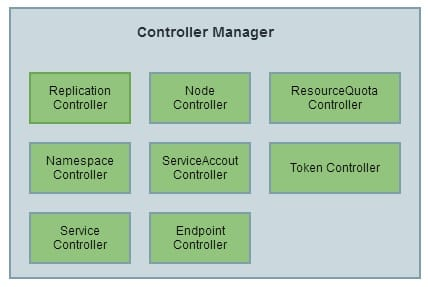
There are many Controllers in the Controller Manger that do essentially the same thing as the CRD Controller we are implementing, which is to manage specific resources.
It is also interesting to see how different Controllers communicate with each other in Kubernetes, for example, by creating Pods through Deployment.
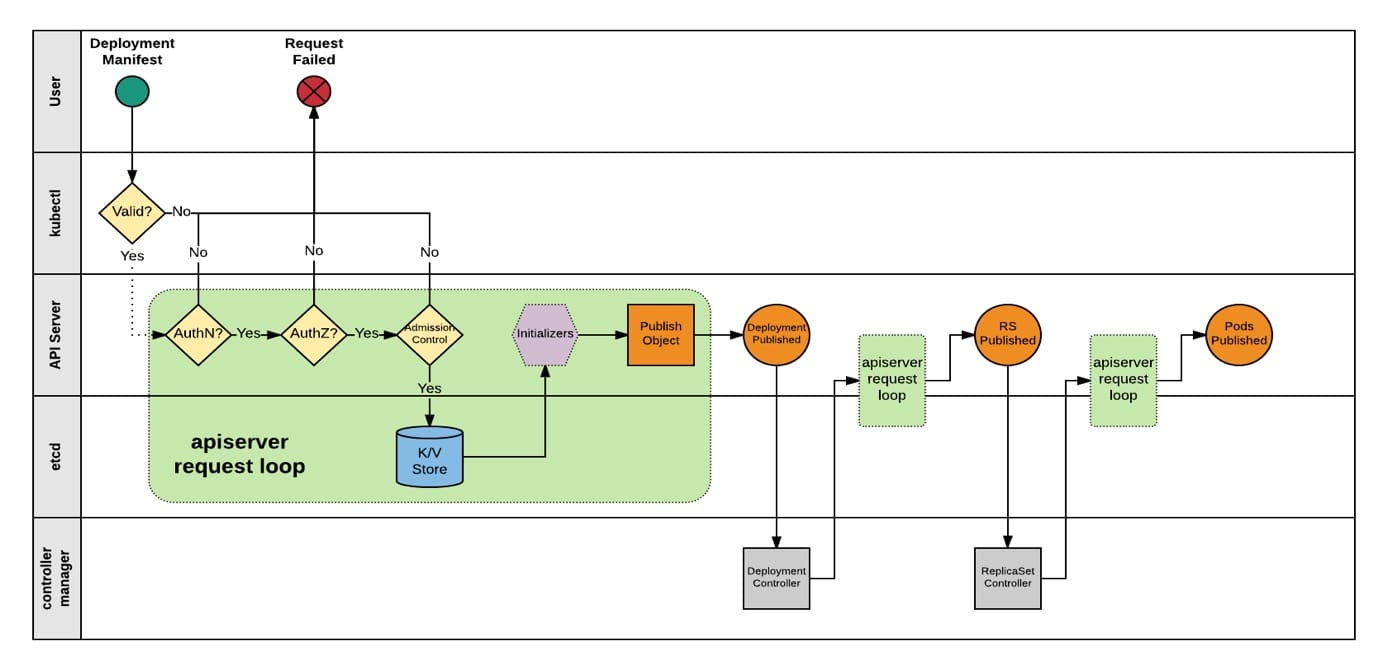
The user creates a Deployment through Kubectl, APIServer authenticates the permission and access to the request, and then stores the resources of the Deployment in ETCD, because Kubernetes implements the List-Watch mechanism through ETCD, so the Deployment-related events of interest to The Deployment Controller receives the ADD event for the resource and processes it, i.e., creates an RS for the Deployment.
After the RS creation request is received by the APIServer, the ADD event of the RS will be published, so the ReplicaSet Controller will receive the event and process it subsequently: i.e., create the Pod.
So you can see that thanks to the event-based way Kubernetes works, the action of creating a Deployment-managed Pod is performed by both the Deployment Controller and the ReplicaSet Controller, but there is no direct communication between the two Controllers.
Because of its event-based approach, we can customize the Controller to handle events of interest, including but not limited to CR creation, modification, etc.
Kubebuilder and Operator-SDK
For building CRD Controllers, there are several mainstream tools, one is the coreOS open source Operator-SDK and the other is the Kubebuilder maintained by the K8s interest group (https://github.com/kubernetes-sigs/kubebuilder).
The Operator-SDK is part of the Operator framework, and the Operator community is relatively mature and active, and even has its own Hub to let people explore and share interesting Operators.
Kubebuilder is not so much an SDK as a code generator, which generates a working Controller by conforming to the format of comments and data structures.
Kubebuilder quick start
Probably thanks to the Kubebuilder biased code generator, it is very easy to create a Controller from scratch using Kubebuilder, and there will be many articles or topics with the title “Create a CRD Controller in x minutes”.
The official Getting Started documentation can be found at: https://book.kubebuilder.io/quick-start.html
Creating a project
First initialize the project with the Kubebuilder init command, --domain flag arg to specify the api group.
|
|
When the project is created, you will be reminded whether to download the dependencies or not, and then you will find that most of the Kubernetes code is already in your GOPATH.
Creating Api
Once the project is created, you can create the api.
While creating the api, you will find that Kubebuilder will create some directories and source files for you.
pkg.apiscontains the default data structures for the resourcesAppandMicroService.pkg.controllercontains the two default controllers forAppandMicroService.
resource type
Kubebuilder has already created and default structure for you.
|
|
All you have to do is expand, using MicroService as an example.
|
|
The complete code is available at: https://github.com/Coderhypo/KubeService/blob/master/pkg/apis/app/v1/microservice_types.go
If you haven’t understood the Kubernetes controller code before, you may be wondering about the default generated Controller. The default MicroService Controller is named ReconcileMicroService, which has only one main method that is.
|
|
Before making this controller work, you need to register the events to follow in the add method in pkg.controller.microservice.micriservice_controller.go, and when any event of interest occurs, Reconcile will be called. When an event occurs, it compares the current state of the resource with the expected state, and corrects it if it is inconsistent.
For example, if MicroService manages versions through Deployment, Reconcile has to determine whether each version of Deployment exists and whether it meets expectations.
The specific ReconcileMicroService code can be found at: https://github.com/Coderhypo/KubeService/blob/master/pkg/controller/microservice/microservice_controller.go
Running
Once the structure of CR has been defined and the Controller code has been completed, you can try to run it. kubebuilder can be run with a cluster configured locally in kubeconfig (minikube is recommended for creating a development cluster quickly).
First remember to add the schema to the init method in main.go.
Then make Kubebuilder regenerate the code:
|
|
Then apply the CRD yaml under config/crd to the current cluster:
|
|
Run CRD Controller locally (you can execute the main function directly):
|
|